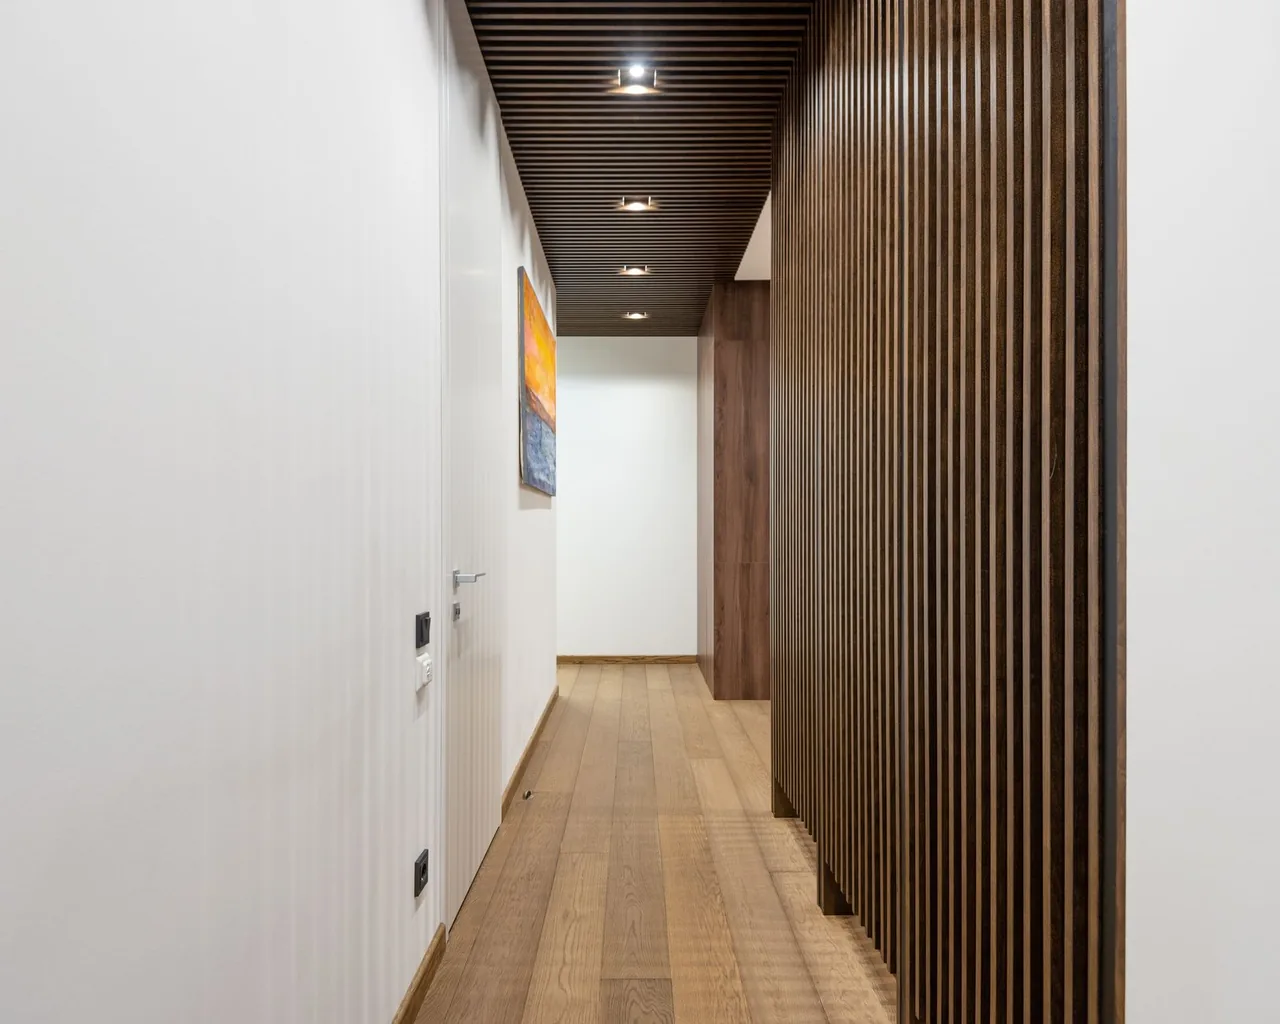
A wood ceiling covers the overhead plane with real wood — tongue-and-groove planks, exposed beams, or a plank-and-beam combination — for warmth and texture no painted surface can match. Two things decide whether yours stays tight and flat for its full life and almost nothing else does: the wood's moisture content when it goes up, and whether it was finished on every face first. Hit equilibrium with the home's humidity and finish all faces before fastening and nearly any species performs; miss either and planks gap in winter and cup in summer, with seasonal movement around 1/4" across a wide run and a pale unfinished tongue showing at every seam. Get a free consultation and a written, itemized scope from a vetted installer who reads the wood with a meter and furs the plane flat before a single board goes up — that document is where a lasting wood ceiling is decided.
A Wood Ceiling Is a Moisture Job First, a Carpentry Job Second
The species and the grain everyone admires matter least to whether a wood ceiling stays tight. What separates a ceiling still flat and gap-free in ten years from one that stripes and waves within a season is the measured moisture work and the furring done before the first board.
Wood Moves With Humidity, Overhead Just Like Underfoot
Wood is hygroscopic — it gains and loses moisture with the air around it and changes dimension when it does — so the moisture state dictates what is possible and the finish only decides what it looks like inside that constraint:
- Boards installed too wet shrink as they dry, opening visible gaps along every seam over the first heating season.
- Boards installed too dry then absorb humidity, swell at the edges, and cup into a washboard the raking light exposes.
- Boards finished after install reveal a pale, raw tongue every time they shrink, striping the ceiling within a year.
None of those are product defects — they are moisture and finishing failures, the most common reasons a wood ceiling disappoints, and every one is decided before the boards are even fastened.
The Order of Operations Never Changes Across Wood Types
Acclimate and fur, then finish, then fasten. That sequence holds across solid tongue-and-groove, engineered planks, exposed beams, and reclaimed stock. The work before the field is always the same: deliver the wood and acclimate it on site until a meter confirms equilibrium, fur the ceiling flat to correct any dip, finish the boards on every face, then fasten on a schedule into solid backing. The look — wide rustic boards or tight clear planks, stained or whitewashed — happens inside those facts, not before them. Because furring, fastening, and sometimes structure are involved, wood ceiling work is closely tied to broader ceiling installation, and the order is what keeps the field tight and flat.
The Wood Ceiling Readiness Gate: Six Checks Before Any Board Goes Up
Before the first board is fastened, a competent installer runs the job through the same six-check gate. Each check has a measurable answer, each is a documented cause of a gapped, cupped, or striped ceiling when skipped, and a job that fails any one is not ready. Call it the Wood Ceiling Readiness Gate: pass all six and the field has a foundation to stay tight; fail one and you are buying a future seam.
- 1. Moisture content at equilibrium
- The wood is read with a pin or pinless moisture meter and must reach equilibrium with the home before install — the meter, not the calendar, governs when it is ready. Boards fastened above their target MC shrink and gap; boards too dry swell and cup. The acceptable range depends on the species and the region's indoor humidity, which is why the reading is compared to the wood's target before anything is fastened.
- 2. On-site acclimation
- The wood sits inside the conditioned space, often unboxed, until its moisture content stabilizes with the home's real humidity — with the HVAC running at normal living conditions, not a jobsite temperature it will never see again. Rushing this is the single most common cause of a gapped ceiling, because the wood finishes its adjustment after it is up instead of before.
- 3. A flat, furred plane to fasten into
- Furring strips are fastened across the ceiling, located into the joists and shimmed so they create a dead-flat, solid plane to nail into, correcting any dip or wave in the existing ceiling. A flat plane matters overhead as much as it does under a floor — boards run over a wavy ceiling telegraph every dip, and boards shot into drywall alone sag and pull loose.
- 4. All-face finishing before install
- The boards are finished on every face — including the tongue hidden in each groove — before they go up, so seasonal movement never reveals a raw edge. When boards shrink, the hidden tongue is exposed; if the wood was stained or painted after it was up, that strip shows as a pale line. Finishing first is the detail that separates a ceiling that ages cleanly from one that looks striped within a year.
- 5. Species and stability for the room
- The species and construction are matched to the room's humidity and the board width, because different species move at different rates and a more dimensionally stable species or an engineered plank moves less. Wide boards in a swingy room need the most stability; a conditioned interior is forgiving while a porch or bath is not. The room's environment is part of the spec, not an afterthought.
- 6. Exposure rating matched to the environment
- The product is confirmed rated for where it is going before it is ordered. A conditioned interior takes solid planks; a covered porch, a bath, or an unconditioned space demands a species and finish rated for that moisture and temperature swing, or the wood moves excessively, cups, and discolors. Matching the product to the exposure is what makes the other five checks count in a damp or exterior room.
Three of these six — moisture content, acclimation, and all-face finishing — are the corners cut on a rushed wood ceiling, because they cost time and a controlled space a fast quote skips, yet every one is verifiable. That is why the gate is non-negotiable.
Want the wood read and the plane furred before it goes up?
We match you with a vetted installer who meters the wood to equilibrium, furs the ceiling flat, and finishes every face first — and puts it in a written scope before a board is fastened.
Wood Ceiling Specifications & What Actually Gets Rated
A wood ceiling is not rated on a wear scale, because it takes no foot traffic — the numbers that matter govern how it moves, how it looks, and where it can safely go. They run from the controlling spec, moisture content, through species stability to the board profile and the exposure the room demands.
Moisture Content and Equilibrium
Moisture content is the spec that decides whether a wood ceiling survives its first heating season, because wood that goes up out of balance with the home keeps moving after it is fastened. How it is read depends on the tool, but the principle never changes: measure, don't guess.
Reading Moisture With a Meter
The wood is read with a pin or pinless moisture meter rather than judged by feel or by how long it has sat. A pin meter reads between two probes driven into the board; a pinless meter scans below the surface without marking it. Either way, the goal is a number that matches the wood's target for the home, not a date on a calendar.
Equilibrium Moisture Content by Region
The target the wood is read against is its equilibrium moisture content — the moisture level at which it stops gaining or losing to the surrounding air in that home's indoor humidity. That target is not universal: a dry climate equilibrates the wood lower, a humid one higher, which is why the same species has a different ready-number in different regions and why the meter is read against the local environment.
Why the Meter Beats the Calendar
Acclimation is done when the meter says so, not when a set number of days has passed. Wood delivered very wet or very dry takes longer to reach equilibrium than a box that was already close, so a fixed waiting period can leave it short either way. Reading the meter to a stable number — and confirming it has stopped changing — is the only honest signal that the wood is ready to fasten.
Species Stability and Board Profile
Species stability and board profile set both the look and how movement reads. Different species expand and contract at different rates and carry different grain, color, and hardness; a more dimensionally stable species, or an engineered plank layered for stability, moves less seasonally — which matters most on wide boards and in rooms with big humidity swings. The profile matters too: wider boards move more in absolute terms so their gaps are more visible, while the tongue-and-groove, shiplap, or nickel-gap joint sets the shadow line and how forgiving the seam is of movement.
Exposure Rating for the Room
Exposure rating governs where a given product can go. A conditioned interior is forgiving; a covered porch, a bath, or an unconditioned space demands a species and finish rated for that moisture and temperature swing, or the wood will move excessively and discolor. A porch reads as an exterior environment even though it has a roof, which is why a board fine in a living room can fail over an open three-season space.
Wood Ceiling Specifications, by Type
The table below collects the factors a competent installer verifies across the honest ways to put wood overhead. These are representative relationships, not fixed numbers — the species, the region's humidity, and the room's exposure always govern.
| Type | Relative seasonal movement | Refinishable | Best-fit environment | Relative weight | What it asks of the install |
|---|---|---|---|---|---|
| Solid tongue-and-groove | Highest | Yes — sandable | Conditioned interior | Moderate | Acclimation + all-face finish + furred plane |
| Engineered planks | Low | Limited by veneer | Swingy or wide-board rooms | Moderate | Stable core forgives humidity; still furred flat |
| Exposed / decorative beams | Real beams: with the timber | Real: yes | Any, paired with a field or alone | Real: high; faux: low | Real beams anchor into structure |
| Reclaimed / rustic stock | Varies with the salvage | Yes | Conditioned interior, character look | Moderate | Sorting, cleaning, sometimes remilling first |
The lesson is that the type is chosen for the room's environment, not the showroom sample: solid planks reward a controlled interior, engineered forgives a harder climate or a wide board, real beams demand structure, and reclaimed demands prep. Match the wood to where it lives, and compare what each route costs in our cost guides.
Wood Ceiling vs. Coffered, Panels, and Faux Beams Compared
Several treatments deliver wood or the look of it overhead, and choosing among them is as consequential as the species, because each is a different amount of real wood and a different amount of work — a continuous plank field, a recessed grid, a fast decorative cover, or just the beams.
The Wood-Overhead Comparison Matrix
The matrix below is the trade-off an installer walks you through — authenticity, movement, weight, and refinishability, side by side.
| Treatment | How much real wood | Seasonal movement | Refinishable | Moisture tolerance | Best when |
|---|---|---|---|---|---|
| Wood (plank-and-beam) | All of it | Real — needs acclimation | Yes | Species-dependent | Want authentic warmth, willing to acclimate |
| Coffered (in wood) | The grid beams | Real, in the beams | Yes | Species-dependent | Want geometry and depth, not plank texture |
| Wood-look panels | None (PVC/laminate) | Minimal | No | High (PVC) | Want the look without acclimation, or a damp room |
| Faux structural beams | None (polyurethane) | Minimal | No | High | Want exposed-beam look with no real-lumber load |
A wood (plank-and-beam) ceiling is real wood across the plane — the most authentic, the warmest, and the most demanding because real wood moves. A coffered ceiling can be built in wood too, but its defining feature is the recessed grid of boxes, not the plank texture; choose coffered for geometry and depth, wood planks for continuous warmth. Wood-look panels, including PVC and laminate plank systems, mimic the look on a flat plane with a fraction of the movement and weight; see ceiling panels when you want the appearance without acclimation, finishing, or the cost of real lumber, and they are the safer pick in a humid room. And faux structural beams give the exposed-beam look alone, with no real-lumber weight, when the beams are what you are after rather than a boarded field.
When None of These Warms the Room
If the goal is to control sound in the room rather than warm it, none of these solves that on its own, and an acoustic ceiling treatment is the right tool. And if access to ducts and wiring overhead matters more than warmth, a drop ceiling keeps the cavity reachable in a way a fastened wood field cannot. All of these sit within the wider field of home surfaces, and the ceilings hub maps where each belongs, including coordination with a wood-clad wall below.
Types of Wood Ceiling — Planks, Beams, Engineered, and Reclaimed
There are a few honest ways to put wood overhead, and they differ in authenticity, weight, stability, and cost. The grades section links the related ceiling routes where each overlaps, so you can follow the type that fits your room.
Solid Tongue-and-Groove Planks
Real solid-wood boards that interlock edge to edge across the ceiling — the most authentic plank field, fully refinishable, and available in the widest range of species and widths. They also move the most with humidity, so they demand acclimation, all-face finishing, and a controlled indoor environment to stay tight. This is the route when authenticity and the ability to sand and re-coat down the line matter most.
Engineered Wood Planks
A real-wood veneer over a stable layered core. They carry a genuine wood face but move far less than solid boards, install over more substrates, and tolerate humidity swings better — often the smarter choice for wide boards or rooms where the climate is harder to control. The trade-off is a thinner wear layer that limits refinishing, but for overhead use, where there is no foot traffic, that rarely matters.
Exposed and Decorative Beams
Real timbers, hollow box beams, or polyurethane faux beams that cross the ceiling for structure and rhythm, with or without a boarded field between them. Real beams add real dead load and must anchor into structure; hollow and faux beams give the look with a fraction of the weight. This overlaps directly with the beam side of a coffered build, and a beam-only treatment is the move when the rhythm of beams is what you want rather than a continuous field.
Reclaimed and Rustic Stock
Salvaged barn wood and weathered boards for a heavily textured, character look. They bring patina no new wood can fake, but they vary in dimension and condition and need careful sorting, cleaning, and sometimes remilling before they go up. The character is the payoff; the prep is the cost. Across all four types the finish — stain, whitewash, paint, or a clear coat — is chosen and ideally applied before install, on every face, so movement never reveals raw wood at the seams.
Why Wood Ceilings Gap, Cup, and Stripe — and How the Install Stops It
The failures of a wood ceiling trace back to moisture and movement, and all are preventable at install — each paired below with its mechanism, cause, and named prevention.
Gapping: Shrinkage From Wood Installed Too Wet
Gapping is shrinkage: boards that went up above their target moisture content dry out, lose width, and pull apart at the seams over the first heating season — and because a ceiling is read in raking light, every gap shows. It points back to a skipped meter reading or missing acclimation, where the wood was never brought to equilibrium with the home. The prevention is upstream — acclimate on site and confirm the moisture content with a meter before a single board is fastened.
Cupping: A Moisture Imbalance Across the Board
Cupping is the opposite intake: boards that went up too dry, or that sit in a damp room, absorb moisture, swell at the edges, and curl into a concave board the light exposes as a washboard. It is a moisture-balance failure — the wood and the room were never matched, or the room is wetter than the product is rated for. The prevention is acclimating to the real environment and matching the species and exposure rating to the room, especially in a bath or porch.
Striping: A Raw Tongue Revealed by Movement
Striping is the subtle one: when boards shrink, they reveal the tongue tucked in the groove, and if the wood was stained or painted after it was up, that exposed strip shows as a pale line at every seam. That is an all-face finishing failure — the hidden faces were never finished. The prevention is finishing the boards on all faces before they go up, so the tongue is already the right color and seasonal movement never reveals a raw edge.
Sag and Telegraphing: A Fastening-and-Plane Problem
The fourth failure — boards that sag, pull loose, or telegraph every dip in the ceiling — is a fastening-and-plane problem, caught at the Readiness Gate. Planks have to fasten into furring, joists, or sound backing on a sensible schedule, blind-nailed through the tongue so the fasteners hide; boards shot into drywall alone sag, and boards run over a wavy ceiling without furring telegraph the waves. Furring to a flat plane and fastening to schedule removes it. If a wood ceiling has already failed, the path is diagnosis-first ceiling repair rather than refastening over the same problem.
Common Wood Ceiling Mistakes, Consequences, and Prevention
Most wood ceiling failures are the same handful of shortcuts, each with a predictable consequence and a known prevention. Naming them is how you spot a corner being cut before it is fastened overhead.
| Mistake | What it causes | The prevention |
|---|---|---|
| No acclimation | Gaps in winter, cupping in summer as the wood adjusts after install | Acclimate on site to equilibrium, confirmed by a moisture meter |
| Boards installed too wet | Shrinkage and open seams over the first heating season | Read the MC to its target before fastening, not by the calendar |
| Finishing after install | A pale raw tongue striping every seam when boards shrink | Finish all faces, including the tongue, before the boards go up |
| No furring over a wavy ceiling | Boards telegraph every dip; an uneven, waving field | Fur and shim a dead-flat, solid plane into the joists first |
| Boards nailed to drywall alone | Sagging and loose boards that pull free over time | Blind-nail through the tongue into furring or joists on schedule |
| Wrong species for a damp room | Excessive movement, cupping, and discoloration on a porch or bath | Match the species and finish to the room's exposure rating |
| Wide boards in a swingy climate | Large, visible seasonal gaps in raking light | Choose engineered or narrower boards where the climate is hard to control |
Every row is a moisture, finishing, or fastening decision made before the wood is up — which is why "we acclimate to a meter, finish all faces, and fur to a flat plane" is the most valuable sentence in a wood ceiling quote.
Matching the Wood Ceiling to the Room — and the Look That Sets the Mood
The best wood ceiling is matched to the room's environment, the substrate above, and the look you want, and the species and width — not the sample alone — set whether it reads rustic or refined. Which is why buying on the showroom board alone lands the wrong wood in the wrong room.
Rooms a Wood Ceiling Warms
It wins wherever a room wants warmth and dimension overhead instead of a flat white plane — living rooms and great rooms, covered porches and three-season rooms, kitchens that want a cabin or farmhouse note, primary bedrooms, and especially rooms with height to show the wood off. It is the natural overhead partner to a wood-clad or shiplap wall, and it carries rustic, farmhouse, craftsman, and warm-modern interiors equally well. The constant is that wood overhead changes the entire mood of a room in a way paint cannot — it brings color temperature, grain, and shadow to the one surface that is usually blank.
The Species and Width That Set the Character
Room context and intended feel override preference. Wide rustic boards read like a barn or lodge; tight clear boards read refined and contemporary; a whitewash brightens and a dark stain warms. But the look choice rides on top of the environment: a wide solid plank that reads beautifully in a conditioned living room can gap badly on a porch, so the room decides the construction before the species decides the look. To weigh species and constructions spec-for-spec, the material comparison tool lines them up, and the surface selector helps confirm wood overhead fits the room and its exposure.

What Actually Drives the Cost of a Wood Ceiling
A wood ceiling quote is not a flat per-square-foot rate; the headline number hides the items below, ranked by how much they move the total. None is a dollar figure here — the point is to read a quote critically, not to guess a price.
The Cost Drivers That Move the Total Most
- Species, grade, and construction. The wood and how it is built set the baseline — a wide clear solid plank in a premium species is far more material than a narrow engineered board or a paint-grade stock, and reclaimed wood carries a sorting-and-remilling premium on top.
- Furring and plane correction. The biggest hidden swing. Furring strips fastened and shimmed flat across a wavy ceiling is real material and labor a flat, sound ceiling avoids — and the dip has to be corrected before any board goes up.
- Acclimation and finishing. Acclimating the wood on site and finishing every face before install is time and labor a rushed job skips — and skipping it is exactly what produces the gapping and striping that ruin the result.
- Beams and exposed structure. Real beams add weight that must anchor into structure, slowing the install; even faux beams add a layout and fitting step beyond a plain plank field.
- Ceiling height and access. A tall or vaulted run means staging or scaffolding to work overhead safely and reach a high plane, raising the labor well beyond a standard-height room.
- Layout complexity and pattern. A simple straight-lay field is quicker than diagonal runs, mixed widths, or a coffered-style beam grid integrated into the plank field, each adding cutting, waste, and skilled hours.
- Lighting and penetrations. Recessed cans or fixture boxes have to be located and roughed in before the wood closes the plane, and cutting the field cleanly around them adds careful work.
- Removal and prep. Pulling an old ceiling, or prepping and degreasing an existing surface before furring, is labor that an open, ready ceiling does not need — and it belongs in the written quote up front.
Because these drivers swing so widely, the only honest number comes from an on-site assessment that reads the wood, checks the plane, and prices the field you actually want. Compare what moves the price across ceiling work in our cost guides, and read how each treatment is built in our guides so you can read a quote critically.
Get an itemized wood ceiling scope, not a headline rate.
A vetted installer prices the wood, the furring, the acclimation and finishing, and any beams as separate lines — so you see the whole field, free and with no obligation.
Is a Wood Ceiling Right for Your Space?
A wood ceiling is not a preference you can simply pick — it is the output of a short chain of facts about your room's environment, the substrate above, and the look you want. Walk the decision in order; each branch eliminates the products the room cannot support, and what survives is the right call.
- Read the room's environment first. Is it a conditioned interior, or a damp or unconditioned space — a bath, a covered porch, a three-season room? A conditioned interior opens the full range of solid wood. A damp or exterior environment eliminates most solid stock immediately and points to an exposure-rated species, engineered, or a wood-look panel.
- Choose solid or engineered for the climate. In a controlled interior with stable humidity, solid planks deliver the most authenticity and can be refinished. In a hard-to-control climate, or for wide boards, engineered planks carry a real-wood face with far less seasonal movement — often the smarter call.
- Check the board width against the swing. Wide boards read dramatic but move more, so their seasonal gaps are more visible. Decide how much movement you can live with in raking light; a swingy room points to narrower boards or an engineered product that hides movement better.
- Confirm what is above and how it fastens. The boards need a flat, solid plane — furring located into the joists, shimmed flat — to nail into, and any recessed lights or fixture boxes have to be located before the wood closes the plane. A wavy ceiling means furring is part of the scope, not optional.
- Lock acclimation and all-face finishing for the surviving product. Whatever product remains still has to reach equilibrium with the room, confirmed by a meter, and be finished on every face before fastening. These two steps prevent the gapping and striping that define a bad wood ceiling regardless of the wood you chose.
Run honestly, this tree almost always returns a single defensible product and construction — and an installer who fastens the same wide solid plank in a porch and a living room alike is the red flag.
Talk through your project — free.
A free consultation and a written, itemized quote from a vetted installer. No pressure, no obligation.
How a Wood Ceiling Is Installed, Step by Step
A professional wood ceiling install runs the same disciplined sequence every time, and each step exists to prevent a specific failure. The six steps below are the full arc from on-site assessment to final trim.
On-Site Assessment and Wood Delivery
The installer reads the room's environment, checks the existing ceiling for dip and wave, plans the run direction and layout, and delivers the wood to the conditioned space. The product and construction are confirmed here against the Readiness Gate — interior, damp, or exterior — before anything is fastened.
Acclimation to Equilibrium
The wood sits unboxed in the conditioned space, with the HVAC running at normal living conditions, until a moisture meter confirms it has reached equilibrium with the home's real humidity. Rushing this is the single most common cause of a gapped ceiling, so the meter — not the calendar — decides when it is ready.
Furring to a Flat, Solid Plane
Furring strips are fastened across the ceiling, located into the joists and shimmed flat, to create a dead-flat, solid plane to nail into and correct any dip or wave in the existing ceiling. This is where a wavy ceiling is trued so the boards do not telegraph it and have solid backing to hold.
All-Face Finishing
The boards are finished on every face — stain, whitewash, paint, or clear coat — including the tongue hidden in each groove, before they go up. So when the boards shrink seasonally, the exposed tongue is already the right color and the ceiling never reveals a pale, raw line at the seams.
Fastening the Field
The field goes up — boards blind-nailed through the tongue into the furring on a consistent schedule so the fasteners hide, end joints staggered, the layout planned so the run reads square and balanced wall to wall, with a perimeter detail or molding left to absorb expansion. Beams, where used, are anchored into structure first and the field worked around them.
Trim, Scribe, and Walkthrough
A final pass of trim, scribe at the walls, and touch-up finish closes the edges and conceals the expansion detail, and any lighting that penetrates the wood is finished out. The site is cleaned and the installer walks the ceiling with you to confirm the result and review care.
Skip or rush any one of these six steps and the failure it was meant to prevent — a gap, a cup, a stripe, a sag — shows up later, which is why a vetted installer treats the sequence as fixed, not optional.
Wood Ceiling Glossary
The terms below recur in every wood ceiling quote, spec sheet, and scope — each defined as its working meaning on an actual job site, so you can read a proposal and judge whether it is complete.
- Tongue-and-groove
- A milled board profile where a protruding tongue on one edge fits into a groove on the next, interlocking the boards edge to edge so the field reads continuous and the fasteners hide in the tongue.
- Moisture content
- The amount of water in the wood, read with a meter and expressed as a percentage — the spec that decides whether a board shrinks, cups, or stays tight after it is fastened.
- Equilibrium moisture content
- The moisture level at which wood stops gaining or losing to the surrounding air in a given indoor humidity — the target the meter is read against, and why the ready-number differs by region.
- Acclimation
- Letting the wood sit in the conditioned space until its moisture content reaches equilibrium with the home, so it stops moving after it is up — done to a meter reading, not a fixed number of days.
- Hygroscopic
- The property of wood that makes it absorb and release moisture with the surrounding air and change dimension as it does — the underlying reason a wood ceiling must be acclimated and the room's humidity kept stable.
- Furring strips
- Thin strips fastened across the ceiling into the joists and shimmed flat to create a dead-flat, solid plane for the boards to nail into — the fix for a wavy ceiling and the backing that stops boards from sagging.
- Blind-nailing
- Fastening through the tongue at an angle so the next board's groove hides the fastener — the technique that keeps a tongue-and-groove field free of visible nail holes.
- All-face finishing
- Finishing every face of each board, including the hidden tongue, before install — so seasonal shrinkage never reveals a pale, raw strip at the seams.
- Engineered plank
- A real-wood veneer bonded over a stable layered core, carrying a genuine wood face while moving far less than a solid board — the safer choice for wide boards or a swingy climate.
- Nickel-gap
- A board profile that leaves a small, even gap (about the thickness of a nickel) between boards for a deliberate shadow line — a joint that also forgives some seasonal movement.
- Dead load
- The static weight a wood ceiling — especially real beams — adds overhead, which must transfer into structure rather than drywall when the beams are real timber.
- Reclaimed stock
- Salvaged wood, often barn boards, used for a weathered character look — bringing patina no new wood can fake but requiring sorting, cleaning, and sometimes remilling before install.
Standards, Warranty Conditions, and When a Permit Applies
A wood product's warranty is a contract with conditions, and most denials are not about the wood — they are about how it was installed and the environment it went into.
Warranty Conditions That Hinge on the Install
The conditions are specific and testable: the wood acclimated to its target moisture content; installed within its rated environment; finished and maintained per the maker's instructions; fastened to solid backing on the specified schedule. An installer who skips acclimation, fastens a damp-rated product in a wet room without the right finish, or shoots boards into drywall has voided the coverage before you notice a gap. Ask in writing that the install follow the manufacturer's published instructions and the wood be acclimated to a meter — that document is what a claim is judged against, and one more reason the cheapest quote is rarely the cheapest ceiling.
The Trades and Practices That Set the Bar
Wood ceiling work draws on finish carpentry for the field and the trim, framing for the furring and any real-beam structure, and the wood industry's acclimation and moisture practice for the readiness. A ceiling built with all three respected holds its shape and its finish; one treated as a quick cover-up, ignoring the meter and the furred plane, is where the failures live. Structural questions about real beams belong with the framing side of ceiling installation first.
When a Wood Ceiling Needs a Permit
Permits enter when the work goes beyond the finished surface. A plank or beam field applied to a sound ceiling usually does not require one, but adding structural support for heavy real beams, integrating new electrical for recessed lighting, or wood ceiling work tied to a larger renovation often does. A reputable installer tells you when a permit applies rather than working around it. When an existing wood ceiling has gapped, cupped, or sagged, the better path may be diagnostic ceiling repair than refastening over the same moisture problem.
A Real Wood Ceiling Decision
One representative scenario shows why the room's environment decides everything: humidity, not the species sample, drove every call below.
How to Vet a Wood Ceiling Installer
A wood ceiling is installed, not just bought, so the installer matters more than the species on the sample. These questions separate a crew that builds a field to stay tight from one that simply nails boards up fast.
- They read the wood with a meter before they fasten
- An installer who commits to a start date without metering the wood is guessing at the gaps. Ask how they confirm the wood is ready — a real answer names a moisture meter and equilibrium with the home, not a fixed number of days.
- They fur and shim to a flat plane, not nail to drywall
- Ask how they handle a wavy ceiling and what the boards fasten into. A credible answer involves furring located into the joists and shimmed flat — not rolling boards over the existing surface or shooting them into drywall.
- They finish all faces before install
- Ask whether the boards are finished before they go up and on which faces. A professional finishes every face, including the tongue, so seasonal movement never reveals a pale raw line — a crew that finishes after is building in stripes.
- They match the product to the room's exposure
- The right installer explains why solid, engineered, or exterior-rated stock fits your room — conditioned interior, damp bath, or covered porch — and why the others don't. A one-wood-for-every-room shop is a red flag.
- They plan furring and lighting before the boards
- Ask whether the furring layout and any recessed lights or fixture boxes are located before the wood closes the plane. The penetrations and the backing are decided up front, not improvised.
- They put the scope and a workmanship guarantee in writing
- Ask for the full scope, the acclimation and finishing plan, and the labor warranty in writing before work starts. A crew willing to name a workmanship guarantee — and to return if a seam opens or a board sags — is accountable for the install, not just the wood.
Why Route Your Wood Ceiling Through Pro Work Home Surface
Pro Work Home Surface is not a contractor and does not install your ceiling — we are a national authority on home surfaces that matches homeowners with vetted local installers and holds them to a published bar.
- A free consultation and an itemized written scope
- Every connection starts with a no-obligation consult and a written quote that lines out the wood, the furring, the acclimation and finishing, and any beams separately — so you read the whole field, not a headline rate.
- A real vetting standard, applied before we connect you
- Installers are screened on what decides a wood ceiling's life: whether they meter the wood to equilibrium, fur to a flat plane, finish all faces first, and match the product to the room's exposure rather than nailing the same board everywhere.
- Acclimate and finish before fastening, every time
- The wood is acclimated on site until a moisture meter confirms equilibrium with the room, and finished on all faces first — so seasonal movement never opens raw gaps or reveals a pale unfinished tongue.
- National coverage, local crews
- We match you with installers in your area nationwide, so the standard is consistent even though the crew is local — whether your project is one room or a whole-home plank field.
Ceilings are one of eight categories we cover across home surfaces. If your project also touches a wood-clad wall below, a recessed-grid coffered ceiling in an adjoining room, a moisture-proof wood-look panel in a damp space, or full ceiling installation, the same standards apply — compare what moves the price in our cost guides, dig into how each ceiling is built in our guides, weigh species with our comparison tools, and start from the ceilings hub or the full range of home surfaces.
Brands & Material Authority
Quality and construction drive long-term performance more than the label. These are widely respected names in this category:
- Armstrong
- USG
- CertainTeed
- Genesis
- ACP