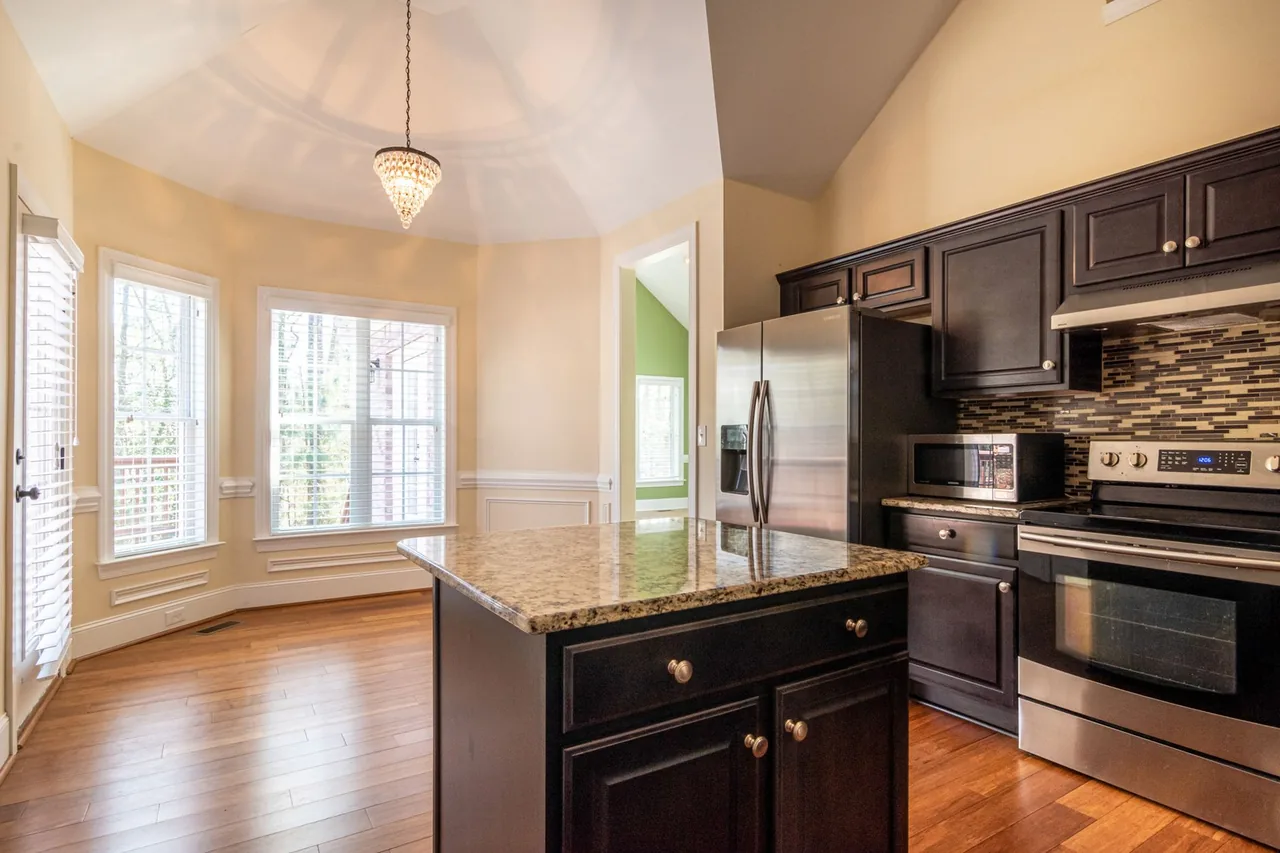
Cabinet refacing is the engineered process of keeping your existing cabinet boxes in place and replacing only what you see — skinning the face frames and exposed end panels in new veneer, then hanging brand-new doors, drawer fronts, and hardware. Two facts decide whether a reface delivers a custom-looking kitchen or wastes money on a doomed surface, and almost nothing else does: whether the boxes underneath are structurally sound and square, and whether the veneer is bonded to a properly degreased, sanded, dust-free face. Pass the box-condition test and prep the substrate right and a reface reads like new cabinetry at a fraction of replacement; fail either and the new skin telegraphs every flaw beneath it or peels at the edges inside a year. Get a free consultation and a written, itemized scope from a vetted installer before any veneer is ordered — that document is where a lasting reface is decided.
Cabinet Refacing Is a Box-Condition Job First, a Cosmetic Job Second
The new doors and veneer everyone sees matter least to whether refacing was the right call. What separates a reface still tight in fifteen years from one that fails in two is the condition of the carcasses it is applied over — assessed before a single door is ordered.
The Existing Boxes Decide Whether Refacing Is Even Possible
Refacing is a skin over a structure, so the structure dictates what is possible and the new surface only decides what it looks like inside that constraint — which is why a credible installer inspects the boxes before quoting:
- A water-swollen, delaminating particleboard sink base will not hold veneer and will keep failing under a new door.
- A racked box that is out of square leaves new doors that never sit flush no matter how perfect the doors are.
- A face frame that was never anchored to the wall properly puts a beautiful new front on a cabinet that still sags.
None of those are fixed by refacing — they are structural problems that refacing hides instead of solving, which is the most common way a reface disappoints. When the boxes are gone, the honest path is new installation, not new skin.
The Order of Operations Never Changes Across Door Styles
Assess the boxes, prep the faces, apply the veneer, then hang the doors. That sequence holds whether you reface to a Shaker, flat-panel, or solid-wood door. The work is always the same: confirm the carcasses are sound and square, remove old doors and hardware, degrease and sand the face frames and end panels to bond readiness, apply rigid end panels and self-adhesive or contact-bonded veneer, then mount new doors and drawer fronts and adjust the reveals. The door style happens inside those facts, not before them.
The Refacing Readiness Gate: Six Checks Before Any Veneer Goes On
Before a single door is ordered, a competent installer runs every box through the same six-check gate. Each check has an observable condition, each is a documented reason a reface fails when skipped, and a kitchen that fails any one is not a refacing candidate. Call it the Refacing Readiness Gate: pass all six and a reface lasts; fail one and you are skinning a future tear-out.
- 1. Box structural soundness
- Every carcass is checked for racking, loose joints, broken backs, and failed anchoring, because veneer and new doors add no structure — they ride on what is there. A box that is loose, twisted, or pulling off the wall stays that way under a new front; refacing a structurally compromised box is money spent on a cabinet that still fails.
- 2. Moisture and material integrity
- The box material is checked for water damage, swelling, and delamination, especially under the sink and in a bathroom vanity. Swollen particleboard will not hold an adhesive bond and keeps deteriorating beneath the skin; a face that has lost its integrity cannot be the substrate for a finish meant to last fifteen years.
- 3. Face-frame squareness and door fit
- The face frames and openings are measured for square, because new doors are ordered to those openings and a racked frame yields doors that never sit flush. An out-of-square box can sometimes be re-squared and re-anchored first, but a frame too far gone is a replacement, not a reface.
- 4. Surface degrease and bond readiness
- The faces are degreased and sanded to remove years of cooking film and dull the old finish, because veneer adhesive grips a clean, scuffed surface and slides off a greasy, glossy one. This is the same bond principle behind cabinet painting — a contaminated or slick face is the difference between veneer that holds and veneer that lifts at the edges.
- 5. Door and front specification
- The door style, material, overlay, and hinge type are specified to match the existing box construction — framed boxes take a different hinge and overlay than frameless. New drawer fronts, end panels, and matching veneer are ordered as a coordinated set so grain, color, and sheen read as one kitchen rather than a patchwork.
- 6. Hardware and accessory plan
- Hinges, slides, knobs, pulls, and any soft-close upgrade are planned before the doors arrive, because refacing is the moment to replace tired hardware while the doors are off. New concealed hinges let the installer dial every door to an even reveal; reusing worn hinges on new doors squanders the reface.
Two of these six — box soundness and bond readiness — are the corners cut on a cheap reface, because honestly failing a box on the first costs the installer a job and proper prep on the second costs labor a low bid skips, yet both are observable on site. That is why the gate is non-negotiable.
Want to know if your boxes are worth refacing before you spend a dollar?
We match you with a vetted installer who inspects the carcasses, confirms they are sound and square, and puts the box-condition verdict in a written scope — before any veneer or door is ordered.
Cabinet Refacing Specifications & Standards
The specs that gate a reface are about the skin and the substrate it bonds to — from what refacing actually replaces, through the veneer types and thicknesses, to the new components that complete it.
What Refacing Replaces and What Stays
Refacing draws a clean line between the visible surfaces it renews and the structure it keeps, and knowing which is which is how you judge a quote. What stays is the carcass; what changes is everything you touch.
The Surfaces a Reface Renews
A reface replaces every visible component: all doors and drawer fronts come off and new ones go on, the face frames and exposed end panels are skinned in matching veneer, and the hardware is replaced. The result is a kitchen where every surface you see and touch is new, even though the boxes behind them are original.
Veneer Over Face Frames and End Panels
The face frames — the wood edges around each opening — and any exposed cabinet ends are covered with a thin layer of veneer: real-wood or rigid thermofoil/laminate sheet, typically bonded at around 1/32" to 1/40" thick over the prepped surface. Rigid 1/4" end panels often cap the exposed sides for a more durable, flush finish. This skin is what makes the original frames match the new doors.
Why Veneer Bond Depends on Surface Prep
Bond is the practical reason prep decides a reface: veneer is held by adhesive, and adhesive grips only a clean, dull, dust-free surface. A face still carrying cooking grease or a slick factory finish gives the adhesive nothing to key into, so the veneer releases at the edges within a season — exactly where eyes and fingers land. Degreasing and scuff-sanding the frames before veneer is the unglamorous step that separates a reface that stays tight from one that peels, which is why a careful installer treats it as load-bearing.
New Doors, Drawer Fronts, and Hardware
The new doors and drawer fronts are made to order in the chosen style, material, and overlay to fit the existing openings, and they arrive with new concealed hinges and the chosen knobs or pulls. Because the doors are new and the hardware is adjustable, the installer can set an even reveal across the run — the visible payoff that makes a reface read as a new kitchen rather than a touch-up.
Refacing vs. Repainting vs. Replacement
Refacing sits between repainting and full replacement, and the right choice depends on box condition and whether you want a new material or just a new color. Repainting recolors the existing doors; refacing puts new doors and veneer over sound boxes; replacement tears everything out. A reface buys a new look and new doors without the layout change and disruption of replacement, but only when the carcasses earn it.
Refacing Components & Specs, by Element
The table below collects the components a reface renews and the figures a competent installer works to. These are representative — the product and the existing box construction always govern the exact spec.
| Element | What's done | Stays or changes | Typical spec |
|---|---|---|---|
| Cabinet boxes (carcasses) | Inspected, re-anchored if needed, kept | Stays | Must pass the box-condition gate |
| Doors & drawer fronts | Removed and replaced new to order | Changes | New style, material, and overlay |
| Face frames | Degreased, sanded, skinned in veneer | Skin changes | Veneer 1/32"–1/40" thick |
| Exposed end panels | Capped with rigid matching panels | Skin changes | Often 1/4" rigid panel |
| Hinges | Replaced with adjustable concealed | Changes | 3-way adjustable concealed hinge |
| Drawer slides | Optional upgrade to soft-close | Optional | Full-extension undermount |
| Knobs & pulls | Replaced to the new look | Changes | New hardware, drilled to fit |
The lesson is that a reface renews everything visible and reuses only what is sound and hidden — which is why the carcass inspection, not the door catalog, is where the decision is actually made. Size the project against alternatives with the cabinet cost calculator first.
Refacing Veneer Types and How Each Applies
How the face frames are skinned is as consequential as the door, because each veneer type bonds differently and ages differently. The three mainstream veneer materials, plus the door-and-front upgrade that completes them, decide how a reface looks and lasts.
Veneer Materials Compared
The matrix below is the decision behind the skin: real wood, rigid thermofoil, and laminate differ in look, durability, and how they handle a less-than-perfect substrate.
| Veneer type | Look | Durability | Best paired door | Notes |
|---|---|---|---|---|
| Real-wood veneer | Authentic grain, stainable | Good; can be refinished later | Solid-wood doors | Matches stained doors; needs careful bond |
| Rigid thermofoil (RTF) | Smooth, seamless, painted look | Easy-clean; can peel near heat | Thermofoil doors | Wraps edges cleanly; keep clear of un-vented heat |
| Laminate veneer | Wide color and pattern range | Hard, scratch- and stain-resistant | Flat-panel doors | Very durable; modern, uniform finish |
Real-Wood Veneer Application
Real-wood veneer is a paper-thin slice of genuine hardwood, applied as a peel-and-stick or contact-cemented sheet over the prepped face frames and end panels, then trimmed flush. It is the choice when the new doors are stained solid wood, because it matches their grain and can be stained and clear-coated to blend. It is the least forgiving veneer of a poor substrate — every bump and ridge telegraphs through a thin wood skin — which is exactly why the degrease-and-sand prep matters most here.
Rigid Thermofoil and Laminate Application
Rigid thermofoil (RTF) and laminate veneers are heat- or pressure-applied sheets that wrap the face frames in a smooth, seamless, color-matched skin. They pair with painted-look thermofoil and modern flat-panel doors, clean up easily, and hide a slightly imperfect substrate better than thin wood. The trade-off is that RTF can peel near a heat source over time, so it is kept clear of an un-vented oven, and laminate's hard surface is durable but cannot be refinished later — the look is the look.
The Upgrade That Completes the Reface: New Doors and Soft-Close Hardware
The veneer matches the frames, but the new doors and hardware are what make a reface read as new. Doors and drawer fronts are made to order in the chosen overlay, hung on adjustable concealed hinges, and drawers can be upgraded to soft-close undermount slides while they are off — the one moment in a cabinet's life when swapping tired slides is easy. Reusing worn hardware on new doors is the false economy that undercuts the whole reface; replacing it is what delivers the even reveals and smooth motion a homeowner feels every day.
Is Your Kitchen a Refacing Candidate, or Should You Repaint or Replace?
Refacing is the right call only in a specific band of conditions — sound boxes, a layout you are keeping, and a desire for new doors or a new material. Walk the decision in order; each branch eliminates the paths that do not fit, and what survives is the honest answer.
- Are the cabinet boxes structurally sound and square? Open the doors and check for racking, loose joints, water swelling, and failed anchoring. If the carcasses are compromised, refacing only hides the problem — new installation is the path. If they are sound, refacing stays on the table.
- Are you keeping the existing layout? Refacing keeps the same footprint and openings. If you want to move the sink, change the island, or reconfigure the run, you are replacing cabinets regardless of box condition, because the layout drives it. If the layout works, a reface fits.
- Do you want new doors or a new material, or just a new color? If the existing doors are sound and you only want a different color, painting or refinishing is far cheaper than a reface. Refacing earns its cost when you want a new door style, a new material, or doors too damaged to repaint.
- Are the existing doors solid wood you'd rather restore? If the doors are real wood in good shape and you like the style, refinishing them keeps the originals for less. Reface when the doors themselves need replacing or you want a material change a refinish cannot give.
- Confirm the reface scope for the surviving path. If refacing is the answer, the scope is the full Readiness Gate — box soundness, bond prep, door spec, and hardware plan. Compare door styles and materials against the room under the cabinets hub before ordering.
Run honestly, this tree sometimes returns painting or refinishing rather than a reface — and an installer who pushes a reface over clearly repaintable doors and sound finishes is the red flag.
Not sure whether to reface, repaint, or replace?
Tell us about your kitchen and we will match a vetted installer who inspects the boxes and doors, names the honest path, and explains why the others don't fit — in writing.
Why a Reface Peels, Telegraphs, and Disappoints — and How the Work Stops It
The most common refacing failures trace back to box condition and bond prep, and all are preventable before the veneer goes on — each paired below with its mechanism, cause, and named prevention.
Peeling Veneer: A Bond-Prep Failure
Veneer that lifts at the edges or bubbles in the field is a bond-prep failure: the adhesive was applied over grease or a glossy old finish and never keyed into the surface. The prevention is the Readiness Gate check — degrease the face frames to strip cooking film, scuff-sand to dull the old finish, and remove all dust before veneer, so the adhesive grips a clean, prepared face instead of sliding off a contaminated one.
Telegraphing Flaws: A Substrate-and-Veneer-Choice Failure
When every old screw hole, ridge, and seam shows through the new skin, the substrate was not smoothed or a too-thin veneer was used over an imperfect face. That is a substrate-and-veneer-choice failure. The prevention is filling and sanding the frames flat first and, where the face is less than perfect, choosing a rigid or laminate veneer that bridges minor variation rather than a paper-thin wood sheet that reveals it.
Doors That Never Sit Flush: A Box-Squareness Failure
New doors that won't align point back to boxes that are out of square — the openings the doors were ordered to are racked, so even perfect doors hang crooked. It is a box-squareness failure that refacing cannot fix on its own. Re-squaring and re-anchoring the box first, then hanging the door and dialing the concealed hinge, removes it; a box too far gone to re-square is a replacement, not a reface.
Mismatched Color and Sheen: A Specification Problem
The last common failure — new doors that don't match the veneered frames in grain, color, or sheen — is a specification problem, caught at the Readiness Gate. Ordering doors, drawer fronts, end panels, and veneer as one coordinated set in the same material and finish removes it. If a reface has already gone wrong, the path is often a fresh paint over the whole run to unify it, or replacement if the boxes were never candidates.
Common Cabinet Refacing Mistakes, Consequences, and Prevention
Most refacing failures are the same handful of shortcuts, each with a predictable consequence and a known prevention. Naming them is how you spot a corner being cut before it is bonded over your boxes.
| Mistake | What it causes | The prevention |
|---|---|---|
| Refacing unsound boxes | A new front on a cabinet that still sags or fails | Pass the box-condition gate first; replace boxes that fail it |
| Skipping degrease and sand | Veneer peels and bubbles at the edges within a season | Degrease and scuff-sand every face to bond readiness before veneer |
| Too-thin veneer over a rough face | Old holes, ridges, and seams telegraph through the skin | Fill and sand flat, or choose a rigid/laminate veneer that bridges |
| Ordering doors to racked openings | New doors that never sit flush no matter how good they are | Re-square and re-anchor boxes first; verify openings before ordering |
| Reusing worn hinges and slides | Sloppy reveals and rough drawers undercut new doors | Replace with adjustable concealed hinges and soft-close slides |
| Mismatched door and veneer finish | New doors that clash with the skinned frames | Order doors, fronts, panels, and veneer as one coordinated set |
| RTF veneer next to un-vented heat | Thermofoil skin that peels near the oven over time | Keep RTF clear of heat sources or choose laminate/real wood there |
Every row is a documented callback trigger — which is why "we inspect the boxes and prep the faces before any veneer, in writing" is the most valuable sentence in a refacing quote.
Choosing the Door Style and Veneer for the Reface — and the Spec That Rates It
The best reface for a kitchen is matched to the room's use, the look you want, and the substrate underneath, and every choice has a trait that predicts how it holds up — which is why choosing on the door photo alone lands a beautiful front on the wrong veneer.
Door Styles for a Reface and What They Demand
The new door sets the entire look of the reface, so match the style to the room and the veneer that will frame it:
- Shaker is the most popular reface door — a five-piece recessed panel that suits nearly any kitchen and pairs with painted or wood-grain veneer; its square inside edges collect a little more dust than a slab.
- Flat-panel (slab) doors give a clean, modern face and pair naturally with durable laminate veneer; they are the easiest to wipe and the default for full-overlay, contemporary refaces.
- Solid-wood doors paired with real-wood veneer deliver an authentic stained look and can be refinished later, but the thin wood skin demands the flattest substrate prep to avoid telegraphing.
- MDF painted doors over a smooth veneered frame give a uniform painted finish with no grain telegraphing — a strong choice when the look is a solid color rather than wood grain.
- Thermofoil doors with matching RTF veneer create a seamless, easy-clean face for a painted look, kept clear of un-vented heat sources where the film can peel.
Matching the Reface to the Room
Room context overrides the catalog. A kitchen reface wants a durable, cleanable door and a veneer that survives grease and steam; a bathroom vanity reface demands moisture-tolerant materials over a box confirmed dry and sound; a laundry or home office reface favors a wipeable, hard-wearing finish. Pick the door and veneer for the room first, and confirm the boxes can carry it. To compare options spec-for-spec, the material comparison tool lines them up.

What Actually Drives the Cost of a Cabinet Reface
A refacing quote is not a flat per-door rate; the headline number a low bid leads with hides the items below, ranked by how much they move the total.
The Cost Drivers That Move the Total Most
- Door material and style. The new doors and drawer fronts are the largest single line — solid wood costs more than thermofoil or laminate, and an intricate style more than a flat slab. The door choice, not the veneer, drives most of the price.
- Box count and kitchen size. The biggest labor swing. More cabinets means more doors to order, more frames to veneer, and more hardware to set; a large U-shaped kitchen with an island is far more work than a small galley.
- Veneer type and end panels. Real-wood veneer and rigid 1/4" end panels cost more in material and labor than a basic laminate skin, and exposed island ends and tall pantries add veneer area.
- Box repair and re-squaring. Boxes that need re-anchoring, a re-squared frame, or a replaced sink base before veneer add labor a sound, square run avoids — the work that keeps a reface from failing.
- Hardware upgrade. New adjustable concealed hinges, soft-close undermount slides, and knobs or pulls across the whole run add up, and they are installed and adjusted box by box.
- Drawer-box replacement. Refacing renews the fronts, but tired drawer boxes themselves can be replaced while the fronts are off — an optional line that improves the result.
- Accessory add-ons. Roll-out trays, lazy-susans, and organizers added during the reface — the moment they are easiest to fit — raise the total but capture the access upgrade.
- Removal and finishing. Hauling old doors and hardware and finishing exposed toe-kicks and fillers to match are real, if smaller, lines that belong in the written quote up front.
Because these drivers swing so widely, the only honest number comes from an on-site assessment. Compare what moves the price across the category in our cost guides — including the detailed cabinet refacing cost breakdown — and size your own kitchen first with the cabinet cost calculator so you can read a quote critically.
Get an itemized scope, not a headline rate.
A vetted installer prices the doors, veneer, box repair, hardware, and removal as separate lines — so you see the whole reface, free and with no obligation.
The Cabinet Refacing Process, Step by Step
A professional reface runs the same disciplined sequence every time, and each step exists to protect the result. The six steps below are the full arc from box inspection to final door adjustment.
Box Inspection and Measure
The installer inspects every carcass for soundness, squareness, and water damage, re-anchors or re-squares what can be saved, and measures the openings. The reface verdict and the door order are decided here against the Readiness Gate — not assumed from the catalog — before anything is ordered.
Remove Doors, Fronts, and Hardware
All old doors, drawer fronts, hinges, and pulls come off, and the boxes are emptied and protected. Stripping the cabinet down to its frames exposes every face that will be veneered and every opening that takes a new door.
Degrease, Sand, and Prep the Faces
The face frames and exposed end panels are degreased to strip cooking film, scuff-sanded to dull the old finish, filled where needed, and wiped dust-free to bond readiness. This is the step the whole reface depends on — clean, dull, and smooth is what veneer adhesive grips.
Apply Veneer and End Panels
Rigid matching end panels cap the exposed sides, and real-wood, RTF, or laminate veneer is bonded over the prepped face frames at around 1/32"–1/40" thick and trimmed flush. The original frames now match the new doors in grain, color, and sheen.
Hang New Doors and Drawer Fronts
Made-to-order doors and drawer fronts go on new adjustable concealed hinges and onto any upgraded soft-close slides, set to the chosen overlay. Each is positioned to its opening before the final reveal pass.
Set Hardware and Adjust Reveals
Knobs and pulls are drilled and set, and the installer dials every concealed hinge in three directions until the reveals are even and consistent across the run. The site is cleaned and the installer walks the kitchen with you to confirm the result and review care.
Skip or rush any one of these six steps and the failure it was meant to prevent shows up later — which is why a vetted installer treats the sequence as fixed, not optional.
Talk through your project — free.
A free consultation and a written, itemized quote from a vetted installer. No pressure, no obligation.
Cabinet Refacing Glossary
The terms below recur in every refacing quote, spec sheet, and warranty — each defined as its working meaning on an actual job site, so you can read a scope and judge whether it is complete.
- Refacing
- Keeping the existing cabinet boxes and replacing only the visible surfaces — new doors and drawer fronts plus veneer over the face frames and end panels. A new look without a layout change.
- Veneer
- The thin skin — real wood, rigid thermofoil, or laminate, roughly 1/32" to 1/40" — bonded over the face frames and end panels so the original boxes match the new doors.
- Face frame
- The wood frame around each cabinet opening that gets skinned in veneer during a reface, so the exposed front of the box matches the new fronts.
- End panel
- The exposed side of a cabinet at the end of a run or on an island, capped during a reface with a rigid matching panel — often 1/4" — for a flush, durable finish.
- Carcass (box)
- The structural cabinet box that a reface keeps. It carries the load and must be sound and square for refacing to be worthwhile.
- Rigid thermofoil (RTF)
- A vinyl film heat-sealed to a substrate, used as a seamless painted-look veneer and door surface; clean and durable but able to peel near un-vented heat.
- Concealed hinge
- A hidden, three-way-adjustable cup hinge supplied with new reface doors that lets the installer dial each door to an even reveal.
- Overlay
- How much of the face frame the new door covers — partial, full, or inset — chosen to match the existing box construction and set the reveal between fronts.
- Bond readiness
- The degreased, scuff-sanded, dust-free state a face frame must reach before veneer, so the adhesive grips instead of releasing at the edges.
- Soft-close undermount slide
- A full-extension drawer slide that pulls the drawer shut on a damper, commonly added during a reface while the fronts are off and the swap is easy.
- Telegraphing
- When old screw holes, ridges, or seams show through a thin veneer — the visible sign the substrate was not smoothed or the veneer was too thin for the face.
- Reveal
- The visible gap between adjacent doors and drawer fronts; a consistent reveal across the run is the payoff of new adjustable hinges and careful setting.
Standards, Warranty Conditions, and When Refacing Is the Wrong Call
A refacing warranty is a contract with conditions, and most disappointments are not about the doors — they are about the boxes the reface was applied over and how the faces were prepped.
Warranty Conditions That Hinge on the Work
The conditions are specific: the new doors and hardware carry the maker's warranty, but a workmanship guarantee on the veneer assumes the faces were properly prepped and the boxes were sound. Veneer that peels because grease was not removed, or doors that hang crooked because the boxes were racked, are workmanship questions, not product defects. Ask in writing for both the door manufacturer's warranty and the installer's labor warranty on the veneer and adjustment — that combination is what protects a reface, and one more reason the cheapest quote is rarely the best value.
The Standards That Set the Bar
The new doors from quality makers are built and often tested to recognized cabinetry standards — the KCMA / ANSI A161.1 program tests doors and hardware for cycling and finish resistance, a useful mark when comparing door lines. The veneer and adhesive systems have their own manufacturer specs for surface prep and application, and an installer who follows both is why a reface stays bonded and the doors keep working.
When Refacing Is the Wrong Call
Refacing is the wrong call when the boxes cannot carry it or the layout has to change. Water-swollen, racked, or unanchored carcasses, a footprint you want to reconfigure, or a sink you want to move all point to new installation rather than a skin. When the boxes are sound and only the color is dated, the cheaper path is painting or refinishing the existing doors. Refacing earns its place in the narrow band between them — sound boxes, a kept layout, and a want for new doors or a new material.
A Real Cabinet Refacing Decision
One representative scenario shows why box condition decides everything: the carcasses, not the door catalog, drove every call below.
How to Vet a Cabinet Refacing Contractor
Most refacing failures are box-condition and prep failures, so the contractor matters more than the door brand. These questions separate a crew that refaces honestly from one that skins anything to sell a door order.
- They inspect the boxes before they quote a reface
- A contractor who quotes a reface without opening the doors and checking the carcasses is guessing. Ask what they look for — a real answer names racking, water swelling, loose joints, and anchoring, and a willingness to recommend replacement if the boxes fail.
- They degrease and sand before any veneer
- Ask how they prep the face frames. A credible answer involves degreasing to strip cooking film and scuff-sanding to dull the old finish — not bonding veneer straight onto a greasy, glossy surface, which is why veneer peels.
- They re-square and re-anchor boxes that need it
- The right contractor fixes a racked or loose box before hanging a new door, because doors ordered to a crooked opening never sit flush. A crew that skins over problems instead of correcting them is the red flag.
- They order doors, fronts, panels, and veneer as one set
- Ask how they match the new doors to the veneered frames. Ordering everything in the same material and finish as a coordinated set is what keeps grain, color, and sheen reading as one kitchen rather than a patchwork.
- They replace hardware and handle removal cleanly
- Ask whether new concealed hinges, soft-close slides, and pulls are included, and whether old doors and hardware are hauled away. Reusing worn hinges on new doors squanders the reface, and the removal is where rushed work shows.
- They put the scope and both warranties in writing
- Ask for the full scope, the door manufacturer's warranty, and the installer's labor warranty on the veneer and adjustment in writing before work starts. A crew willing to name a workmanship guarantee — and to return if veneer lifts or a door drifts — is accountable for the reface, not just the doors the maker covers.
Why Route Your Cabinet Refacing Through Pro Work Home Surface
Pro Work Home Surface is not a contractor and does not reface your cabinets — we are a national authority on home surfaces that matches homeowners with vetted local installers and holds them to a published bar.
- A free consultation and an itemized written scope
- Every connection starts with a no-obligation consult and a written quote that lines out doors, veneer, box repair, hardware, and removal separately — so you read the whole reface, not a headline rate.
- A real vetting standard, applied before we connect you
- Installers are screened on what decides a reface's life: whether they inspect the boxes honestly, prep the faces to bond readiness, and recommend replacement when the carcasses can't carry a skin rather than selling a doomed door order.
- Inspect before you skin, every time
- The carcasses are checked for soundness and squareness, and the faces degreased and sanded to bond readiness, before any veneer goes on — so the new doors land on boxes that earn them.
- National coverage, local crews
- We match you with installers in your area nationwide, so the standard is consistent even though the crew is local — whether your project is a single vanity or a whole kitchen.
Refacing is one path among the cabinet services we cover across home surfaces. If your project is really a repaint of sound doors, a refinish of solid wood, a repair of failed hardware, or a full new installation when the boxes are gone, the same standards apply — compare what moves the price in our cost guides, dig into the how-and-why in our learning center, size the job with our cabinet tools, and start from the cabinets category hub or the full range of home surfaces.
Brands & Material Authority
Quality and construction drive long-term performance more than the label. These are widely respected names in this category:
- KraftMaid
- Merillat
- Diamond
- Wellborn
- American Woodmark
- Thomasville