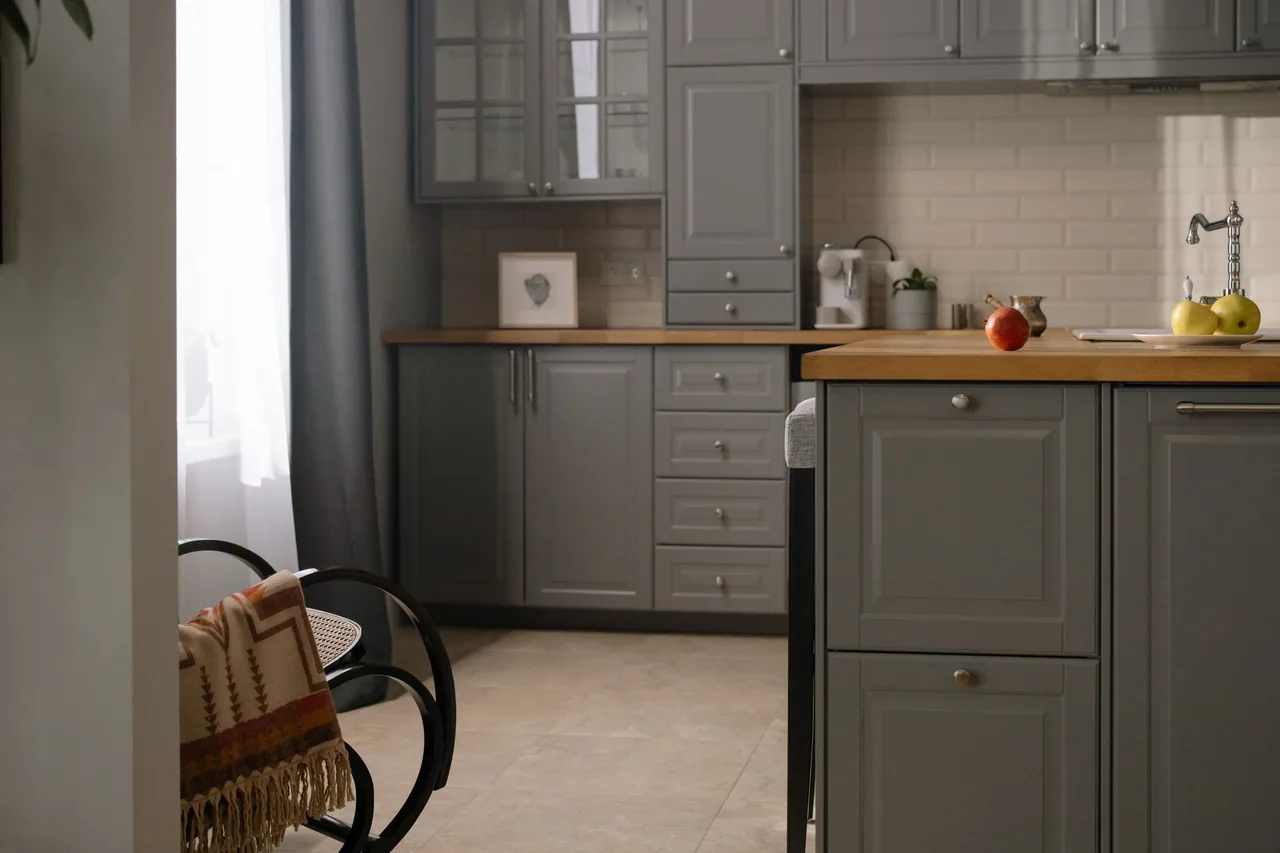
Cabinet painting is the engineered process of recoloring your existing doors, drawer fronts, and boxes with a hard, sprayed finish — keeping every box, hinge, and layout in place and changing only the color. Two facts decide whether painted cabinets stay flawless or chip and peel within a year, and almost nothing else does: whether the slick, grease-coated factory surface is degreased and dulled so paint can bite, and whether the right bonding primer goes down before color. Strip the contamination, scuff to a key, and prime to bond, and a sprayed cabinet-grade enamel reads like a factory finish; skip either and premium paint peels off in sheets at the first fingernail. Degrease, sand, bonding-primer is the entire job — the color is the easy part. Get a free consultation and a written, itemized scope from a vetted painter before a drop of paint is sprayed — that document is where a lasting finish is decided.
Cabinet Painting Is a Prep Job First, a Color Job Second
The color everyone picks first matters least to whether the finish lasts. What separates painted cabinets still flawless in ten years from ones peeling in twelve months is the surface preparation done before a drop of color is sprayed.
The Existing Finish Decides Whether Paint Can Bond
Cabinet faces are coated in grease and sealed by a factory finish, so the surface dictates what is possible and the paint only decides the color inside that constraint — which is why a credible painter assesses the existing finish before quoting:
- A door coated in years of cooking grease repels paint at the molecular level — the film never bonds and peels in sheets.
- A glossy factory finish left un-sanded gives the primer nothing to grip, so the whole coating delaminates at the first knock.
- A raw or sanded-through spot left unprimed drinks paint unevenly and flashes a dull patch through the color.
None of those are paint defects — they are preparation failures, the most common reason a paint job disappoints. When the doors themselves are damaged beyond a finish, the path is refacing with new doors, not paint over a ruined surface.
The Order of Operations Never Changes Across Door Types
Degrease, sand, prime, then color. That sequence holds across solid-wood, MDF, and even slick thermofoil doors that demand a specialty bonding primer. The work is always the same: clean off every trace of grease, scuff-sand the old finish to a uniform dull key, spot-prime or fully prime with a bonding primer matched to the surface, then spray color in thin, even coats and let it cure hard. The color choice happens inside those facts, not before them.
The Paint Readiness Gate: Six Checks Before Any Color Is Sprayed
Before a drop of color goes on, a competent painter runs every surface through the same six-check gate. Each check has an observable target, each is a documented cause of finish failure when skipped, and a surface that fails any one is not ready. Call it the Paint Readiness Gate: pass all six and the finish holds for years; fail one and you are spraying color onto a future peel.
- 1. Degrease to a clean surface
- Every door, drawer front, and face frame is washed with a degreaser to strip the cooking film that coats kitchen cabinetry, because paint and primer bond to clean substrate and slide off grease. The film is invisible but everywhere, heaviest around the range and pulls; a surface that feels clean can still carry it, and degreasing is the single step that decides whether the finish keys in or peels.
- 2. Sand to a uniform key
- The old finish is scuff-sanded to dull every glossy surface and give the primer a mechanical key to grip — typically working to a uniform 180 to 220 grit scratch. A glossy factory finish left un-sanded is the classic reason a whole coating delaminates; the goal is not bare wood but a consistently dulled, abraded surface across every face.
- 3. Repair and fill before primer
- Dents, gouges, open grain, and worn edges are filled and sanded flush before any coating, because paint magnifies surface flaws rather than hiding them. A ding left unfilled reads as a shadow under a solid color, and open oak grain telegraphs through unless grain-filled — the smoothness of the final finish is set here, not in the topcoat.
- 4. The right bonding primer for the surface
- A bonding primer matched to the substrate goes down before color — a stain-blocking primer over tannin-rich woods like oak and cherry to stop bleed-through, and a specialty adhesion primer over slick thermofoil and laminate that ordinary primer can't grip. The wrong primer, or none, is why color peels off a non-porous door or why brown tannin stains ghost through a white finish.
- 5. A spray-grade environment and setup
- Doors come off and are sprayed flat in a controlled, dust-managed space; boxes are masked, and the room is protected, because a factory-smooth cabinet finish comes from spraying, not brushing, and from a clean air path. Brush marks, dust nibs, and overspray on adjacent surfaces are the signature of a job done in the open without proper setup.
- 6. Coating system and cure plan
- A cabinet-grade enamel or lacquer is chosen and applied in thin, even coats with the maker's recoat windows honored, and a cure plan is set, because the finish keeps hardening for 2 to 3 weeks after the last coat before it reaches full durability. Reassembling and slamming doors during cure is what prints fingerprints and chips into a finish that isn't hard yet.
Two of these six — degreasing and sanding — are the corners cut on a cheap paint job, because they are slow, dirty, invisible labor a low bid skips, yet both decide everything. That is why the gate is non-negotiable.
Want the prep done right so the paint actually lasts?
We match you with a vetted painter who degreases, sands, and bonding-primes before any color, and puts the prep steps in a written scope — so your finish holds instead of peeling.
Cabinet Painting Specifications & Standards
The specs that gate a paint job are about adhesion and the coating film — from the prep sequence that lets paint bond, through the primer and paint chemistry, to the application that builds a durable finish.
The Adhesion Sequence
Adhesion is the whole game in cabinet painting, because a kitchen finish has to survive grease, water, fingernails, and daily slams. How the surface is made to hold paint comes down to two steps before primer: cleaning and abrading.
Degreasing and Sanding
The first two steps create the bondable surface, and they are the ones a rushed job skips. Cleaning removes the contamination paint can't bond to; sanding creates the texture it grips.
Why Degreasing Comes First
Degreasing comes first because every other step is wasted over a greasy surface. Kitchen cabinetry accumulates an invisible film of airborne cooking oil that coats the doors and is heaviest around the range and the handles — exactly the high-touch zones. Primer and paint cannot key into that film; they sit on top and release at the first stress. Washing with a degreaser until the surface is truly clean is the unglamorous foundation, and the reason a painter who starts by sanding a greasy door is building a finish destined to peel.
The Scuff-Sand Key
The scuff-sand creates the mechanical key. A factory finish is smooth and often glossy, which gives primer nothing to bite, so every face is abraded to a uniform dull scratch — commonly around 180–220 grit — not to remove the finish but to roughen it microscopically. That texture is what the bonding primer locks into. The goal is uniform dullness across every door, frame, and drawer front; a single glossy patch left un-scuffed is a future chip waiting for a fingernail.
Filling and Grain
Between sanding and priming, dents and open grain are addressed, because paint magnifies what it covers. Gouges and worn edges are filled and sanded flush, and open-grained woods like oak are grain-filled where a smooth, modern finish is wanted — otherwise the grain reads through the color. This is the step that decides whether the painted door looks like furniture or like a coat of paint over an old door.
Primer and Paint Chemistry
The coating system is matched to the substrate. A bonding primer — a stain-blocker over tannin-rich oak and cherry, a specialty adhesion primer over thermofoil and laminate — is the layer that turns a slick or bleed-prone surface into one color can hold. The topcoat is a cabinet-grade enamel or lacquer engineered to cure to a hard, washable film, not a wall paint that stays soft and prints every touch. The stricter of the primer maker's and the paint maker's prep and recoat specs governs.
Cabinet Painting Prep & Coating, by Step
The table below collects the recognized targets a competent painter works to. These are representative — the product instructions for the specific primer and enamel always govern, and where they are stricter, the stricter spec wins.
| Step | What's done | Why it matters | Typical target |
|---|---|---|---|
| Degrease | Wash off cooking-oil film | Paint won't bond to grease | Clean to bare, residue-free surface |
| Scuff-sand | Dull and abrade the old finish | Creates a key for primer | Uniform 180–220 grit scratch |
| Fill & grain-fill | Repair dents, fill open grain | Paint magnifies flaws | Flush, smooth, defect-free |
| Bonding primer | Adhesion / stain-blocking coat | Stops peel and tannin bleed | Primer matched to the substrate |
| Spray enamel | Thin, even color coats | Factory-smooth, no brush marks | Multiple thin sprayed coats |
| Recoat window | Honor maker's recoat timing | Wrong timing wrinkles the film | Per the enamel's published window |
| Cure | Let the film harden fully | Soft paint chips and prints | Full hardness in 2–3 weeks |
The lesson is that five of seven steps happen before any color — which is why a quote that's mostly prep is the honest one, and a quote that's mostly paint is the one that peels. Size the project against alternatives with the cabinet cost calculator first.
Cabinet Paint Finishes and How Each Applies
How the color is sprayed and what coating is used is as consequential as the prep, because each finish type cures differently and wears differently. The mainstream cabinet coatings, plus the application method that defines them, decide how a painted kitchen looks and holds up.
Cabinet Coating Types Compared
The matrix below is the decision behind the color: waterborne enamels, alkyd/oil enamels, and lacquers differ in hardness, cure, and how forgiving they are to apply.
| Coating | Hardness | Cure & odor | Best applied by | Notes |
|---|---|---|---|---|
| Waterborne enamel | Hard, durable, non-yellowing | Low odor; cures over weeks | HVLP / airless spray | The popular modern choice; stays white |
| Alkyd / oil enamel | Very hard, self-leveling | Strong odor; slower dry | Spray or fine brush | Glassy flow; can amber over time |
| Lacquer / conversion varnish | Hardest, factory-grade | Fast cure; pro ventilation | Spray only, controlled shop | Durable; needs spray booth conditions |
Why Spraying Beats Brushing on Cabinets
A factory-smooth cabinet finish comes from spraying, not brushing, because an atomized coat lays down without the ridges a brush leaves. Doors come off and are sprayed flat with an HVLP or fine-finish airless setup, building thin, even coats that flow level and dry without texture. A brushed door — even a careful one — carries visible stroke marks that read as a repaint up close, which is why the gold-standard job removes every door and sprays it horizontal rather than painting in place.
The Detail That Defines the Finish: Cure Before Reassembly
The single most-skipped detail is letting the coating cure before normal use. A cabinet enamel feels dry to the touch in hours but keeps hardening for 2 to 3 weeks after the last coat before it reaches full durability. Doors reassembled and slammed, drawers loaded, and surfaces wiped hard during that window print fingerprints, stack marks, and chips into a film that isn't hard yet. A painter who explains the cure window — and bumpers that keep freshly painted doors from sticking — is protecting the finish you paid for; one who reassembles a still-soft job the next day is not.
Should You Paint Your Cabinets, or Refinish, Reface, or Replace?
Painting is the right call only when the boxes and doors are sound and you want a new color rather than a new material or layout. Walk the decision in order; each branch eliminates the paths that do not fit, and what survives is the honest answer.
- Are the doors and boxes structurally sound? Paint changes color, not condition. If the doors are solid and the boxes are square and anchored, painting is on the table. If doors are delaminating or boxes are failing, painting wastes effort — refacing or new installation is the path.
- Do you want a painted (solid-color) finish, or natural wood? Painting gives a solid, opaque color. If you want the natural grain to show through a stain and clear coat, that's refinishing on real wood, not paint. Choose painting when an opaque color — white, navy, green, black — is the goal.
- Are you keeping the existing door style? Painting keeps your current doors and just recolors them. If you want a different door style or a new material, that's refacing with new doors, because paint can't change the door's shape. Paint when you like the doors and only want a new color.
- Are the doors thermofoil or laminate? They can be painted, but only with a specialty bonding primer made for non-porous surfaces, and the finish is less forgiving on a peeling thermofoil door. If a thermofoil door is already delaminating, refacing with new doors often makes more sense than painting a failing wrap.
- Confirm the paint scope for the surviving path. If painting is the answer, the scope is the full Readiness Gate — degrease, sand, fill, the right bonding primer, sprayed coats, and a cure plan. Compare colors and finishes against the room under the cabinets hub before committing.
Run honestly, this tree returns refinishing for those who want wood grain and refacing for those who want a new door — and a painter who promises a flawless result over a peeling thermofoil door without a specialty primer is the red flag.
Not sure whether to paint, refinish, or reface?
Tell us about your cabinets and we will match a vetted pro who inspects the doors and finish, names the honest path, and explains why the others don't fit — in writing.

Why Painted Cabinets Chip, Peel, and Yellow — and How the Prep Stops It
The most common cabinet-paint failures trace back to prep and cure, and all are preventable before and after the color goes on — each paired below with its mechanism, cause, and named prevention.
Peeling and Chipping: A Bond Failure
Paint that peels in sheets or chips at the edges is a bond failure: it was sprayed over grease, an un-sanded gloss, or the wrong primer, so it never keyed into the surface. The prevention is the Readiness Gate sequence — degrease to strip the film, scuff-sand to a uniform key, and prime with a bonding primer matched to the substrate — so the color locks onto a prepared surface instead of sitting on a slick one waiting to release.
Tannin Bleed: A Primer-Choice Failure
Brown or yellow stains that ghost through a white finish are tannin bleed — the natural tannins in oak, cherry, and some other woods migrating up through the paint. That is a primer-choice failure: an ordinary primer doesn't block them. The prevention is a stain-blocking bonding primer over tannin-rich woods, which seals the tannins below and keeps the white finish clean instead of letting brown shadows surface weeks later.
Brush Marks and Texture: An Application Failure
A painted door that reads as a repaint up close usually shows brush marks or roller texture — an application failure from painting in place instead of spraying flat. The prevention is removing the doors and spraying them horizontal with an HVLP or fine-finish setup, building thin, even coats that flow level and dry without ridges, for the atomized, factory-smooth surface a brush can't match.
Fingerprints and Early Chips: A Cure Problem
The last common failure — fingerprints pressed into the finish, stack marks, and chips that appear in the first weeks — is a cure problem, not a paint defect. The enamel was still soft when the doors were reassembled and used. Honoring the 2 to 3 week cure window, with door bumpers to prevent sticking, removes it. If a finish has already failed, the path is sanding back and re-priming the affected areas — or, if the doors are damaged, refacing rather than repainting.
Common Cabinet Painting Mistakes, Consequences, and Prevention
Most paint failures are the same handful of shortcuts, each with a predictable consequence and a known prevention. Naming them is how you spot a corner being cut before it is sprayed over your cabinets.
| Mistake | What it causes | The prevention |
|---|---|---|
| Skipping the degrease | Paint peels in sheets off the high-touch zones | Wash every face with a degreaser to a clean, residue-free surface first |
| Not sanding the gloss | The whole coating delaminates at the first knock | Scuff-sand every face to a uniform 180–220 grit dull key |
| Wrong or no primer | Color peels off slick doors; tannins bleed through white | Use a bonding/stain-blocking primer matched to the substrate |
| Brushing instead of spraying | Visible brush marks that read as a cheap repaint | Remove doors and spray flat with an HVLP or fine-finish setup |
| Wall paint instead of enamel | A soft finish that prints fingerprints and never hardens | Use a cabinet-grade enamel or lacquer built to cure hard |
| Reassembling before cure | Fingerprints, stack marks, and early chips in the film | Honor the 2–3 week cure window and use door bumpers |
| Painting over damaged doors | Color magnifies the dents and delamination beneath | Fill and repair first, or reface doors too far gone to paint |
Every row is a documented callback trigger — which is why "we degrease, sand, and bonding-prime before any color, in writing" is the most valuable sentence in a cabinet-paint quote.
Choosing the Color, Sheen, and Coating — and the Spec That Rates It
The best paint job for a kitchen is matched to the room's wear, the look you want, and the door material underneath, and every choice has a trait that predicts how it holds up — which is why choosing on a paint chip alone lands a beautiful color in the wrong sheen.
Sheen and Coating by How the Room Lives
The sheen and coating set the durability and the look, so match them to traffic and door material:
- Satin and semi-gloss are the cabinet standards — durable, washable, and able to take a scrub around the range and pulls; flatter sheens look soft but show every smudge in a working kitchen.
- Waterborne enamel is the popular modern coating: hard, low-odor, and non-yellowing, so a white stays white — the safe default for most painted cabinets on solid wood or MDF.
- Alkyd/oil enamel self-levels to a glassy, very hard film prized for trim-like smoothness, but it can amber over time, so it suits darker colors more than bright whites.
- Lacquer and conversion varnish are the hardest, factory-grade coatings, but they need controlled spray-booth conditions — a pro-shop finish rather than an in-home one.
- Specialty bonding primer is non-negotiable under any color on thermofoil and laminate, the non-porous surfaces ordinary primer can't grip.
Matching the Finish to the Room
Room context overrides the swatch. A kitchen wants a hard, washable enamel in satin or semi-gloss for grease and scrubbing; a bathroom vanity demands a moisture-tolerant finish in a humid room; a laundry or home office can run a softer sheen where wear is lighter. Pick the coating and sheen for the room first, and confirm the primer suits the door material. To compare options spec-for-spec, the material comparison tool lines them up.
What Actually Drives the Cost of a Cabinet Paint Job
A cabinet-paint quote is not a flat per-door rate; the headline number a low bid leads with hides the items below, ranked by how much they move the total.
The Cost Drivers That Move the Total Most
- Prep labor. The biggest line and the one a low bid hides — degreasing, sanding, filling, and grain-filling every face is slow, dirty hours, and it is exactly the work that decides whether the finish lasts.
- Door and drawer count. The other big swing. Painting is priced largely by the number of doors and drawer fronts, because each is removed, prepped, primed, sprayed on both sides, and rehung; a large kitchen has far more pieces than a small one.
- Existing finish and door material. Slick thermofoil and laminate need a specialty bonding primer and extra care; tannin-rich oak needs stain-blocking primer and grain-filling for a smooth look — both add material and labor a paint-ready surface avoids.
- Number of coats and color change. Going from dark to white, or covering a strong stain, takes more primer and color coats than a tonal change, and each coat is labor and cure time.
- Coating grade. A premium waterborne enamel or a sprayed lacquer system costs more than a basic enamel, and the better coating is most of why the finish holds up.
- Spray setup and containment. Removing doors, masking boxes, protecting the room, and spraying in a dust-managed space is real setup labor behind a factory-smooth result.
- Hardware and repairs. New knobs, pulls, or hinges and any door repairs or fills add to the total, and the hardware is drilled and set as part of reassembly.
- On-site vs. shop spraying. Doors sprayed in a controlled shop and boxes sprayed on site is more handling than an all-in-place job, but it buys the cleaner finish.
Because these drivers swing so widely, the only honest number comes from an on-site assessment. Compare what moves the price across the category in our cost guides, and size your own kitchen first with the cabinet cost calculator so you can read a quote critically.
Get an itemized scope, not a headline rate.
A vetted painter prices the prep, primer, coats, and hardware as separate lines — so you see the whole job, free and with no obligation.
The Cabinet Painting Process, Step by Step
A professional paint job runs the same disciplined sequence every time, and each step exists to prevent a specific failure. The six steps below are the full arc from teardown to cured finish.
Label, Remove, and Mask
Every door and drawer front is labeled and removed, hardware is taken off, and the boxes and room are masked and protected. Painting flat and spraying off-site doors is what delivers a factory-smooth finish, so the teardown is the foundation of the result.
Degrease Every Surface
Doors, fronts, and face frames are washed with a degreaser to strip the invisible cooking-oil film that coats kitchen cabinetry, heaviest around the range and pulls. This is the step the whole finish depends on — paint bonds to clean substrate and slides off grease.
Sand, Fill, and Grain-Fill
Every face is scuff-sanded to a uniform 180–220 grit dull key, dents and gouges are filled flush, and open-grained woods are grain-filled where a smooth look is wanted. Paint magnifies flaws, so the smoothness of the final finish is set here.
Apply the Bonding Primer
A bonding primer matched to the substrate goes down — stain-blocking over tannin-rich oak and cherry, a specialty adhesion primer over thermofoil and laminate — then is lightly sanded smooth. This is the layer that turns a slick or bleed-prone surface into one color can hold.
Spray the Color Coats
Cabinet-grade enamel is sprayed in thin, even coats with the maker's recoat windows honored, doors flat and boxes masked, building a level, atomized film with no brush marks. Each coat flows out and dries before the next.
Cure, Reassemble, and Walk Through
The finish is left to harden, doors get bumpers to prevent sticking, and reassembly and hardware happen without slamming a still-soft film. The painter walks the kitchen with you, sets care expectations, and explains the 2–3 week full-cure window before heavy use.
Skip or rush any one of these six steps and the failure it was meant to prevent shows up later — which is why a vetted painter treats the sequence as fixed, not optional.
Talk through your project — free.
A free consultation and a written, itemized quote from a vetted installer. No pressure, no obligation.
Cabinet Painting Glossary
The terms below recur in every cabinet-paint quote, spec sheet, and warranty — each defined as its working meaning on an actual job site, so you can read a scope and judge whether it is complete.
- Degreasing
- Washing the cabinet faces to remove the invisible cooking-oil film that coats kitchen cabinetry. The first step, because paint and primer bond to clean substrate and slide off grease.
- Scuff-sanding
- Abrading the old finish to a uniform dull scratch — around 180–220 grit — to give primer a mechanical key. Not removing the finish, just roughening it.
- Bonding primer
- An adhesion primer that grips slick or non-porous surfaces ordinary primer can't, turning a glossy or thermofoil door into one color can hold.
- Stain-blocking primer
- A primer that seals the natural tannins in woods like oak and cherry so they don't bleed brown stains up through a white finish.
- Tannin bleed
- Brown or yellow discoloration that migrates from tannin-rich wood up through paint when an ordinary primer is used instead of a stain-blocker.
- Cabinet-grade enamel
- A hard, washable topcoat engineered to cure to a durable film, unlike soft wall paint that prints fingerprints and never hardens.
- HVLP spray
- High-volume, low-pressure spraying that atomizes the coating into a fine, even layer — the method behind a factory-smooth, brush-mark-free finish.
- Recoat window
- The manufacturer's specified time range for applying the next coat. Recoating too early or too late can wrinkle or fail to bond the film.
- Cure vs. dry
- Dry-to-touch happens in hours; full cure — when the film reaches its hard, durable state — takes 2–3 weeks, during which the finish is vulnerable.
- Sheen
- The gloss level of the finish — satin and semi-gloss are the cabinet standards for durability and washability; flatter sheens show smudges.
- Grain-filling
- Filling the open pores of woods like oak so the grain doesn't telegraph through a smooth, modern painted finish.
- Door bumpers
- Small pads applied at door and drawer contact points so a freshly painted, still-curing finish doesn't stick to itself or the frame.
Standards, Warranty Conditions, and When Painting Is the Wrong Call
A cabinet-paint warranty is a contract with conditions, and most failures are not about the paint — they are about the prep beneath it and the cure after it.
Warranty Conditions That Hinge on the Work
The conditions are specific: the finish is warranted on the assumption that the surface was properly degreased, sanded, and primed, and that the coating cured before normal use. Paint that peels because grease wasn't removed, or chips because doors were slammed during cure, are workmanship questions, not product defects. Ask in writing for the painter's labor warranty on adhesion and finish, naming the prep steps performed — that document is what a claim is judged against, and one more reason the cheapest quote is rarely the cheapest finish.
The Standards That Set the Bar
Quality cabinet coatings carry the paint manufacturer's published specs for surface prep, primer, recoat timing, and cure, and a painter who follows them is why the finish holds. The primer and enamel makers each define the prep their product needs, and the stricter of the two governs. There is no shortcut around the maker's prep spec; a finish applied outside it is a finish without backing.
When Painting Is the Wrong Call
Painting is the wrong call when the doors or boxes can't be saved or you want a result paint can't give. Delaminating thermofoil, doors damaged beyond filling, or boxes that are failing point to refacing with new doors or new installation. If you want the natural wood grain to show, that's refinishing on real wood, not an opaque paint. Painting earns its place when sound doors and boxes simply need a new, durable color.
A Real Cabinet Painting Decision
One representative scenario shows why prep decides everything: the existing finish, not the color, drove every call below.
How to Vet a Cabinet Painter
Most cabinet-paint failures are prep failures, so the painter matters more than the paint brand. These questions separate a crew that builds a finish to last from one that sprays color over a greasy door.
- They degrease before they sand
- A painter who starts by sanding a kitchen door is sanding grease into the surface. Ask about their first step — a real answer is washing every face with a degreaser until it's truly clean, because paint won't bond to the cooking film.
- They scuff-sand every face to a key
- Ask how they prep a glossy factory finish. A credible answer involves scuff-sanding to a uniform dull key around 180–220 grit — not spraying straight over the gloss, which is why coatings delaminate.
- They match the primer to the door material
- The right painter names a stain-blocking primer for oak and cherry and a specialty bonding primer for thermofoil and laminate. A one-primer-for-everything answer is the red flag — it's how tannins bleed and slick doors peel.
- They spray, and they spray doors flat
- Ask whether they remove the doors and spray, or brush in place. Spraying off doors flat with an HVLP or fine-finish setup is what delivers a factory-smooth finish; brushed doors show stroke marks up close.
- They use a cabinet-grade enamel and explain cure
- Ask what coating they use and how long before normal use. A cabinet enamel or lacquer built to cure hard, plus an honest 2–3 week cure window and door bumpers, is what keeps fingerprints and chips out of the finish.
- They put the prep, coating, and warranty in writing
- Ask for the full scope — the degrease, sand, primer, coats, and cure plan — plus the labor warranty on adhesion, in writing before work starts. A crew willing to name the prep and a finish guarantee is accountable for the result, not just the color.
Why Route Your Cabinet Painting Through Pro Work Home Surface
Pro Work Home Surface is not a contractor and does not paint your cabinets — we are a national authority on home surfaces that matches homeowners with vetted local painters and holds them to a published bar.
- A free consultation and an itemized written scope
- Every connection starts with a no-obligation consult and a written quote that lines out prep, primer, coats, and hardware separately — so you read the whole job, not a headline rate.
- A real vetting standard, applied before we connect you
- Painters are screened on what decides a finish's life: whether they degrease before sanding, scuff to a key, match the bonding primer to the door material, spray rather than brush, and honor the cure window.
- Prep before you paint, every time
- The surface is degreased, sanded to a uniform key, and primed with a bonding primer matched to the substrate before any color goes on — so the finish locks on instead of peeling off.
- National coverage, local crews
- We match you with painters in your area nationwide, so the standard is consistent even though the crew is local — whether your project is a single vanity or a whole kitchen.
Painting is one path among the cabinet services we cover across home surfaces. If your project is really a refinish to show natural wood, a reface for new doors, a repair of failed hardware, or a full new installation when the boxes are gone, the same standards apply — compare what moves the price in our cost guides, dig into the how-and-why in our learning center, size the job with our cabinet tools, and start from the cabinets category hub or the full range of home surfaces.
Brands & Material Authority
Quality and construction drive long-term performance more than the label. These are widely respected names in this category:
- KraftMaid
- Merillat
- Diamond
- Wellborn
- American Woodmark
- Thomasville