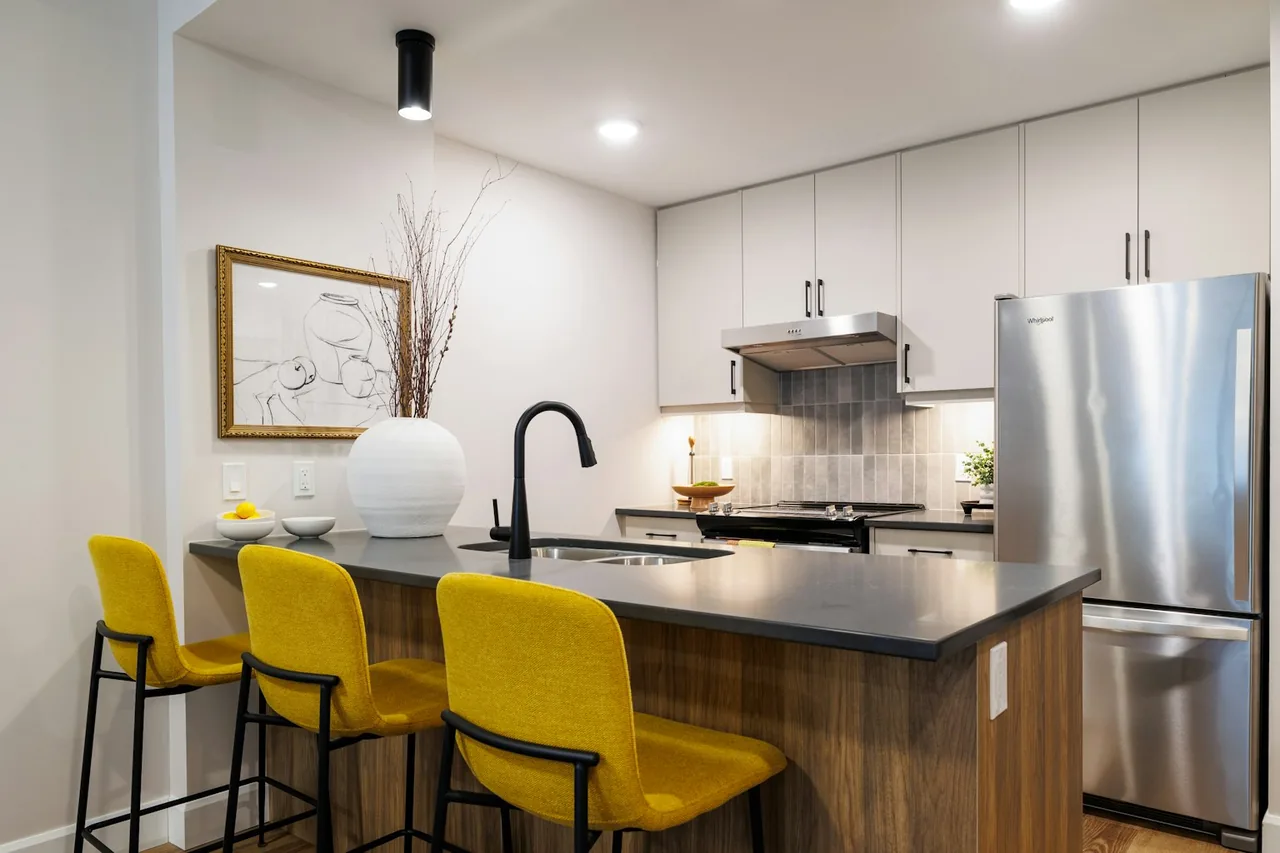
Countertop installation is the precision craft of setting a fabricated slab onto a base so it lands dead level, fully supported, and seamed where the eye and the load both forgive it. Two facts decide whether the finished top performs and almost nothing else does: whether the cabinets were shimmed truly flat before the stone arrived, and whether every unsupported edge and cutout carries the load the material demands. Set a slab on cabinets out of level and a rigid quartz or granite top will rock, telegraph stress, and eventually crack at a sink corner; respect level within 1/8" over 10 ft and the 10" overhang support rule and almost any material lasts. Get a free consultation and a written, itemized scope from a vetted installer before the slab is cut — the cabinet check and the support plan are where a lasting countertop is decided.
Countertop Installation Is a Cabinet Job First, a Stone Job Second
The slab everyone admires matters least to whether the top survives. What separates a countertop still sound in fifteen years from one that cracks in its second is the base it was set on — measured, leveled, and reinforced before a single inch of stone came through the door.
The Cabinet Run Decides What the Finished Top Can Do
The base dictates what is possible; the slab only decides what it looks like inside that constraint, so a credible installer assesses the cabinets before templating:
- A rigid stone slab over cabinets that are out of level bridges the gap, bears on two high points, and cracks under the unsupported span.
- An undermount sink hung from a top with no rail or rodding underneath pulls the cutout edge down until the corner fractures.
- An island overhang run past its support with no brackets or corbels works as a lever and snaps the stone at the cabinet line.
None of those are slab defects — they are base and support failures, the most common reason a new countertop fails.
The Order of Operations Never Changes Across Materials
Base, then top. That sequence holds across quartz, granite, marble, quartzite, porcelain, and butcher block. The base work is always the same: confirm the cabinets are level and plumb, shim them flat to tolerance, verify the boxes are anchored and square, plan the support for every overhang and cutout, and template only once the base is true. The material choice happens inside those facts, not before them.
The Countertop Readiness Gate: Six Checks Before Any Slab Is Set
Before a fabricated top is set, a competent installer runs every base through the same six-check gate. Each check has a published metric or recognized practice, each is a documented cause of countertop failure when skipped, and a base that fails any one is not ready. Call it the Countertop Readiness Gate: pass all six and the top has a foundation to last; fail one and you are buying a future crack.
- 1. Cabinet level
- The full run is read with a long level and laser and shimmed until it sits flat to roughly 1/8" over 10 ft — tighter across any single cabinet. A rigid slab cannot flex to a wavy base; it bridges the low spots, bears on the high ones, and concentrates stress that cracks the stone at its weakest point, usually a sink or cooktop cutout.
- 2. Cabinet plumb and square
- The boxes must be plumb front-to-back and square in plan so the slab seats fully and the reveal at the wall stays consistent. A run that leans throws the overhang off, opens a wedge-shaped gap at the backsplash, and loads the front edge unevenly. This is corrected with shims and fasteners before templating, not after.
- 3. Structural support for the load
- The cabinets and any added framing must carry the slab's real weight — natural stone and quartz run roughly 18 to 30 lb per square foot at standard 3 cm thickness. Stock boxes usually suffice for a continuous run, but tall spans, farmhouse-sink openings, and heavy stone over a dishwasher gap need verified support before the weight lands.
- 4. Overhang and cantilever support
- Any unsupported overhang past the cabinet face is checked against the material's limit. The working rule is that stone cantilevers up to about 10" on its own at 3 cm; beyond that it needs steel rods, flat bar, plywood subtop, or corbels sized to the span. An island eating bar run past the limit with nothing under it is a lever waiting to break.
- 5. Sink and cooktop cutout support
- Undermount sinks are carried from below by a rail, brackets, or epoxy-set rods, never hung on adhesive alone, and cooktop cutouts keep a minimum rim of material so the corners do not crack. The narrow band of stone between a cutout and the front edge is the most fracture-prone zone on the whole top; how it is supported decides whether it survives use.
- 6. Substrate flatness and seam plan
- Where a plywood or backer subtop is used, it is flat and continuous; seam locations are planned to fall where the slab is best supported and least conspicuous — over a cabinet partition, away from a cooktop, short rather than long. A seam set over a dishwasher gap or at a cutout corner is a seam set to fail; matching the plan to the support is what makes the other five checks count.
Three of these six — cabinet level, overhang support, and cutout support — are the corners cut on cheap quotes, because they cost shimming time and hidden steel a low bid skips, yet every one is verifiable on site. That is why the gate is non-negotiable.
Want the base checked before your slab is cut?
We match you with a vetted installer who levels the cabinets, plans the support for every overhang and cutout, and puts it in a written scope — before the stone is ordered.
Countertop Installation Specifications & Standards
The numbers that gate an install are published or recognized practice, and specific to how the material is set — from slab thickness, through the support and overhang limits, to the level and seam tolerances every material shares.
Slab Thickness and Weight Load
Slab thickness is the spec that decides how much the cabinets must carry and how far the stone can span unsupported, because weight and cantilever both scale with it. How it is handled depends on whether the slab is set at standard or reduced thickness.
Standard Stone Thickness
Natural stone and quartz ship in two field thicknesses, and the choice cascades into support, overhang, and edge build-up.
3 cm vs 2 cm Slabs
The default for kitchen countertops is 3 cm (roughly 1-1/4"), thick enough to cantilever and to carry an undermount sink with proper support. 2 cm (about 3/4") is common on vanities and commercial work but typically needs a plywood subtop or a laminated build-up edge to read thick and to span — a real fabrication step, not a free substitution.
Weight Per Square Foot by Thickness
The load the base carries is set by thickness and material density, not guessed. A 3 cm stone top runs roughly 18 to 23 lb per square foot for quartz and granite and higher for dense quartzite, while 2 cm drops it by roughly a third. A full kitchen of 3 cm stone can exceed 500 lb across the run — the reason cabinet anchoring and level are verified before that weight ever lands.
Reduced and Built-Up Edges
A laminated edge mitres a second strip of the same slab to the underside so a 2 cm top reads as a 4 cm or thicker edge. It adds material and shop time but lets a thinner, lighter slab carry a substantial profile — a cost and weight tradeoff the fabricator prices, not a field shortcut.
Overhang Support Limits
An overhang is read against the material's unsupported span, and the rule is specific to thickness and stone.
Overhang and Cantilever Limits
The recognized working limit is that 3 cm stone cantilevers up to about 10" unsupported and 2 cm roughly 6", with brittle stone wanting less. Beyond the limit, support is engineered in — concealed steel flat bar or rods let in flush, a plywood subtop, or visible corbels and brackets sized to the span. An eating bar that pushes a granite or quartzite top to 15" with nothing underneath is the single most common cause of a snapped island.
Cabinet Level Tolerance
Level is the spec every install shares. The cabinet run is read with a long level and laser and shimmed to roughly 1/8" over 10 ft, tighter across any one box, because a rigid slab cannot conform to a base that waves. Correcting it means shimming the low boxes and, where needed, scribing or planing the high ones — not a set-and-go step, and one of the first line items a low bid quietly omits.
Seam Width and Placement
Even a level top fails at a bad seam. Recognized practice holds a stone seam to roughly 1/16", color-matched with a two-part epoxy and set over solid support — a cabinet partition, never a span or a cutout corner. MIA/Natural Stone Institute guidance places seams away from sinks and cooktops and keeps them short; a seam over a dishwasher gap, where the stone bridges thin air on both sides, is the seam most likely to lip or separate.
Support, Overhang, and Tolerance, by Material
The table below collects the recognized install thresholds a competent installer verifies. These are representative figures for 3 cm unless noted — the slab's species, the fabricator, and the room always govern, and where a maker is stricter, the stricter number wins.
| Material / spec | What's measured | Recognized basis | Typical threshold |
|---|---|---|---|
| All stone — cabinet level | Deviation of the base run | Installer / NSI practice | About 1/8" over 10 ft |
| Granite / quartz (3 cm) | Unsupported overhang | Industry cantilever rule | Up to about 10" unsupported |
| Stone (2 cm) | Unsupported overhang | Industry cantilever rule | Up to about 6" unsupported |
| Marble / brittle stone | Unsupported overhang | Conservative practice | Less than granite — support sooner |
| All stone — seam width | Gap between joined slabs | NSI / fabricator standard | About 1/16", epoxy-set over support |
| 3 cm stone — weight | Load on cabinets | Material density | Roughly 18–23 lb/sq ft |
| Undermount sink | Cutout edge support | Sink + fabricator spec | Rail, brackets, or epoxy-set rods — never adhesive alone |
The lesson is that the failures live at the edges and cutouts, not in the field — a slab that looks bulletproof across its face still cracks at a sink corner over a span with no support. Below the overhang limit, stone carries itself; above it, support is mandatory or the top is a lever. Size the job first with the countertop cost calculator, and compare what the material costs to fabricate in our cost guides.
Countertop Setting Methods Compared
How a top meets its base is as consequential as the slab, because each setting method suits a material and a base it loves and one it fails on. There are several mainstream approaches, and the right one is dictated by the material, the cabinet type, and the overhang — never by which is fastest.
The Setting Method Comparison Matrix
The matrix below is the decision the installer is making — base, support need, seam approach, and where each method belongs, side by side.
| Method | Best base | Support need | Seam approach | Typical materials | Main risk if rushed |
|---|---|---|---|---|---|
| Direct-set on cabinets | Level, anchored boxes | Shims + adhesive dabs | Epoxy over a partition | Quartz, granite (3 cm) | Rocking over an unlevel run |
| Plywood subtop set | Cabinets needing a deck | Continuous plywood field | Seam over solid backing | Thin stone, porcelain, tile | Hollow, unsupported spans |
| Steel-reinforced overhang | Islands, eating bars | Let-in flat bar or rods | Plan seam off the cantilever | Stone past 10" overhang | Snapped lever at cabinet line |
| Adhesive build-up edge | Any — edge profile work | Laminated mitre strip | Hairline glue line on edge | 2 cm stone, porcelain | Open or lipped mitre joint |
| Drop-in / self-rimming | Existing deck, budget tops | Rim carries the sink | Caulk line, not a stone seam | Laminate, tile, some solid | Caulk failure at the rim |
Direct-Set and Subtop Methods
Most stone tops are direct-set: leveled on shims, bonded to the cabinets with discreet silicone or construction-adhesive dabs that hold without trapping the stone rigidly, and seamed with epoxy over solid support. A plywood subtop is added where the base needs a continuous deck — under thinner stone, porcelain, or where cabinet rails leave gaps. Too few shims, or skipping the subtop where the span needs it, and the top bears on points instead of a plane.
Reinforced Overhangs and Cantilevers
Where an overhang passes the unsupported limit, steel does the work the stone cannot. Flat bar or rod is let into a kerf or the plywood subtop so it sits flush and hidden, sized to carry the cantilever; visible corbels and brackets are the alternative when concealed steel will not fit. Skipping it on a long eating bar puts the entire leverage of the overhang on the stone at the cabinet line — exactly where islands break.
Undermount Sink Mounting
An undermount sink is supported from below — a mounting rail across the cabinet, brackets, or epoxy-set rods bridging the opening — and only then bonded to the underside of the cutout with clips and adhesive. The weight of the sink plus water plus a loaded basin must never hang on adhesive alone, and the reveal between stone and sink rim is set by the fabricator's polish on the cutout. A sink hung on glue is a sink waiting to drop, taking the cutout corner with it.
Which Countertop Setting Approach Is Right for Your Kitchen?
The setting approach is not a preference — it is the output of a short chain of facts about your base, your overhangs, and your material. Walk the decision in order; each branch eliminates the methods the job cannot support, and what survives is the right call.
- Confirm the cabinets are level, square, and anchored. Read the run with a long level and laser. A flat, plumb, anchored base opens a clean direct-set; a wavy or unanchored one means shimming, reinforcing, or a plywood subtop before any slab is templated.
- Measure every overhang against the material limit. If no overhang passes about 10" at 3 cm (less for marble or 2 cm), the stone carries itself. If an island or bar runs past it, support is mandatory — let-in steel, a plywood subtop, or corbels sized to the span, decided now, not after the crack.
- Plan support for every sink and cooktop cutout. An undermount sink needs a rail, brackets, or epoxy-set rods underneath; a cooktop cutout needs a minimum rim of stone at the corners. The narrow band between a cutout and the front edge is the most fracture-prone zone on the top — its support is non-negotiable.
- Match the slab thickness and edge to the plan. A 3 cm slab direct-sets and cantilevers within the limit; a 2 cm slab usually wants a plywood subtop or a laminated build-up edge to read thick and to span. Confirm the material and edge against the room under the countertops hub.
- Place the seams over support, then verify level once more. Every surviving approach still requires seams over solid backing — a cabinet partition, away from cutouts and spans — and a final level check before the stone is bonded. If the base still waves, the step is more shimming, regardless of which method you chose.
Run honestly, this tree almost always returns a single defensible approach — and an installer who sets every top the same way regardless of overhang is the red flag.
Not sure your island overhang is supported?
Tell us about your layout and we will match a vetted installer who measures every cantilever and cutout, names the support each one needs, and explains it in writing.
Why Countertops Crack, Rock, and Separate — and How the Install Stops It
The most common countertop failures trace back to the base and the support, and all are preventable at install — each paired below with its mechanism, cause, and named prevention.
Cracking at Cutouts: A Stress-Concentration Failure
Cracks almost always start at a sink or cooktop cutout, because the narrow band of stone there carries load with little material to spread it. The cause is a cutout corner left sharp instead of radiused, an undermount sink hung without support, or a top set on an unlevel base that concentrates stress at the opening. The prevention is upstream: radius the cutout corners, support the sink from below, and level the cabinets so no point bears more than its share.
Rocking and Lippage: An Unlevel-Base Failure
A top that rocks or shows a height step at a seam is bearing on an unlevel base. A rigid slab cannot flex to a wavy run, so it touches the high cabinets and bridges the low ones; the same waviness lips a seam where two slabs meet at different heights. The prevention is shimming the cabinets flat to 1/8" over 10 ft before templating and dry-fitting the slabs to confirm the seam sits flush before any epoxy is mixed.
Overhang Breaks: A Cantilever Failure
An island or eating bar that cracks at the cabinet line failed as a lever — the overhang ran past the unsupported limit with nothing to carry it. It points back to a skipped support plan, where the cantilever was treated as decoration instead of structure. The prevention is reading every overhang against the material limit and engineering in steel, a subtop, or corbels before the weight is ever loaded.
Seam Separation and Lipping: A Support-and-Epoxy Problem
The fourth failure — a seam that opens, lips, or shows a dark line — is a support, alignment, and epoxy problem, caught at the Readiness Gate. Placing the seam over solid backing, dry-fitting to flush, and bonding with color-matched two-part epoxy removes it. If a top has already failed, the path is diagnosis-first countertop repair — and if the cause is a slab cracked through, a section restoration or replacement rather than a cosmetic fill.
Common Countertop Installation Mistakes, Consequences, and Prevention
Most countertop failures are the same handful of shortcuts, each with a predictable consequence and a known prevention. Naming them is how you spot a corner being cut before it is buried under your new top.
| Mistake | What it causes | The prevention |
|---|---|---|
| Cabinets not leveled | Rocking top, lipped seams, cracks at cutouts under stress | Shim the run flat to 1/8" over 10 ft before templating |
| Overhang past the limit, unsupported | Island or bar snaps at the cabinet line as a lever | Add let-in steel, a subtop, or corbels sized to the span |
| Undermount sink hung on adhesive | Sink drops, taking the cutout corner with it | Carry it on a rail, brackets, or epoxy-set rods from below |
| Sharp, un-radiused cutout corners | Stress cracks radiating from the corner of the cutout | Radius every inside corner of sink and cooktop cutouts |
| Seam over a span or cutout | Seam lips, opens, or separates with use | Place seams over a cabinet partition, away from spans |
| Mismatched or gray epoxy seam | A dark, obvious line across the top | Tint two-part epoxy to the slab and tool it flush |
| 2 cm stone set with no subtop | Flex, hollow spots, and cracks over unsupported gaps | Add a continuous plywood subtop or a built-up edge |
Every row is a documented callback trigger — which is why "we level the base and support every overhang and cutout, in writing" is the most valuable sentence in a quote.
Choosing the Countertop Material for the Kitchen — and the Spec That Rates It
The best top for a kitchen is matched to its use, its moisture, and the support the layout allows, and every material has published numbers that predict how it installs and holds up — which is why buying on the showroom slab alone lands a beautiful top in the wrong room.
Install-Relevant Properties by Material
Each material installs differently — hardness, porosity, and weight decide the cutting, the support, and the sealing, so match the spec to how the kitchen lives.
- Quartz is an engineered slab, non-porous, and consistent edge to edge, so it cuts predictably and never needs sealing; it is heat-sensitive at its resin binder, so trivets matter. It cantilevers and seams cleanly, which is why it is the default for a low-maintenance kitchen — compare it head to head in our quartz vs. granite guide.
- Granite is natural stone graded on the Mohs hardness scale around 6 to 7; it is porous to varying degrees and is sealed at install and periodically after. It takes heat well and cantilevers within the limit, but slab-to-slab variation means seam and pattern planning matters — see granite countertops and price it in the granite cost guide.
- Marble and quartzite diverge sharply despite looking alike: marble is softer (Mohs ~3), porous, and etches with acid, wanting conservative overhangs and diligent sealing; quartzite is harder than granite (Mohs ~7) and far more durable. The marble vs. quartz guide separates them.
- Porcelain is a dense, ultra-thin sintered slab, non-porous and heat- and UV-stable, but its thinness demands a continuous subtop and specialized cutting; it excels where weight and outdoor exposure rule out stone. See porcelain countertops.
- Butcher block, concrete, and soapstone each install on their own terms — wood needs movement room and oiling, concrete is poured or set and sealed, soapstone is soft, non-porous, and oiled rather than sealed. Match the material to maintenance you will actually do.
Matching the Spec to the Room
Room context overrides preference. A kitchen countertop needs heat tolerance and a hard, sealable or non-porous surface; a bathroom vanity can run thinner stone over a subtop; an outdoor kitchen demands a UV- and freeze-stable material like porcelain or the right stone; a kitchen island lives or dies on overhang support. Pick the spec for the room first, then compare materials spec-for-spec in the material comparison tool.
What Actually Drives the Cost of a Countertop Installation
A countertop quote is not a flat per-square-foot rate; the headline number a low bid leads with hides the items below, ranked by how much they move the total.
The Cost Drivers That Move the Total Most
- Material grade and slab. The stone and its rarity set the baseline — an exotic quartzite, a bookmatched marble, or a premium quartz color all change the slab cost before a cut is made, and slab yield drives how many you buy.
- Edge profile and thickness. A simple eased edge is least; ogee, bullnose, mitred waterfall, and built-up laminated edges add shop time, and a 2 cm slab built up to read thick is real fabrication labor.
- Overhang support and reinforcement. Let-in steel, plywood subtops, and corbels are material and skilled labor a within-limit run avoids — cheap insurance against a snapped island, but a real line item the lowest bid tends to omit.
- Cutouts and edge work. Each sink, cooktop, faucet, and outlet cutout is a separate priced operation, and an undermount sink with a polished reveal costs more than a drop-in dropped through the top.
- Seam count and slab layout. More seams mean more epoxy work and more slab; an installer who lays out the job to minimize seams and match pattern across them is buying more material for a better result.
- Old-top removal and disposal. Tear-out is labor and haul-away is a fee — and removal can expose unlevel or unanchored cabinets that change scope, which is why it belongs in the written quote up front.
- Plumbing and appliance disconnect. Disconnecting and resetting a sink, faucet, disposal, and cooktop, and coordinating the plumber, adds labor an empty cabinet run does not.
- Backsplash and template complexity. A full-height stone backsplash, an out-of-square room, or many corners and returns add templating time and cutting beyond a straight galley run.
Because these drivers swing so widely, the only honest number comes from a template and an on-site assessment. Compare what moves the price across the category in our cost guides, and size your own kitchen first with the cost estimator so you can read a quote critically.
Get an itemized scope, not a headline rate.
A vetted installer prices the slab, edge, cutouts, support, and removal as separate lines — so you see the whole job, free and with no obligation.
The Countertop Installation Process, Step by Step
A professional install runs the same disciplined sequence every time, and each step exists to prevent a specific failure. The six steps below are the full arc from on-site templating to final walkthrough.
On-Site Template and Cabinet Check
The installer verifies the cabinets are level, plumb, and anchored, then templates the actual run — digitally or with physical battens — capturing every wall variation, cutout, and overhang. Scope, seam plan, and support are decided here against the Readiness Gate, not over the phone, before the slab is cut.
Slab Layout and Fabrication Review
The template drives slab layout so pattern and veining flow across seams and the best of the stone lands where it shows. Cutouts are positioned with radiused corners, edge profiles confirmed, and seam locations fixed over support — every cut planned before the saw runs.
Cabinet Leveling and Support Prep
The run is shimmed flat to 1/8" over 10 ft, any plywood subtop is set continuous and level, and the overhang reinforcement — let-in steel, flat bar, or corbels — is installed and the cabinets anchored to carry the load before the stone arrives.
Dry-Fit and Seam Alignment
The fabricated pieces are set without adhesive to confirm fit, reveal, and overhang, and the seam is dry-aligned until it sits flush with no lippage. Adjustments happen now — a shim, a scribe, a re-level — not after the epoxy has grabbed.
Set, Seam, and Mount the Sink
The slabs are bonded to the base with discreet adhesive dabs, the seam is joined with color-matched two-part epoxy and tooled flush, and the undermount sink is supported from below and bonded to the cutout. Faucet and cooktop cutouts are confirmed against the fixtures.
Caulk, Connect, and Walkthrough
The backsplash junction and sink rim are sealed, the plumber reconnects the sink and disposal, and porous stone is given its first seal where the material calls for it. The site is cleaned and the installer walks the top with you to confirm the result, review care, and explain any cure time before heavy use.
Skip or rush any one of these six steps and the failure it was meant to prevent shows up later — which is why a vetted installer treats the sequence as fixed, not optional.
Talk through your project — free.
A free consultation and a written, itemized quote from a vetted installer. No pressure, no obligation.
Countertop Installation Glossary
The terms below recur in every quote, spec sheet, and warranty — each defined as its working meaning on an actual install, so you can read a scope and judge whether it is complete.
- Template
- The exact pattern of the finished top — taken digitally or with battens after the cabinets are set and level — that drives every cut. A template made before the cabinets are true reproduces the error in stone.
- Seam
- The joint where two slabs meet, held to roughly 1/16", bonded with color-matched two-part epoxy over solid support. Its placement — over a partition, away from cutouts — matters as much as its width.
- Overhang / cantilever
- The unsupported stone past the cabinet face. Up to about 10" at 3 cm the stone carries itself; beyond it, support is required or the overhang acts as a lever.
- Corbel and bracket
- Visible angled supports under an overhang that carry the cantilever the stone cannot — the alternative when concealed steel will not fit the design.
- Let-in steel
- Flat bar or rod recessed flush into the subtop or a kerf so it reinforces an overhang invisibly, hidden under the stone.
- Undermount
- A sink mounted beneath the top with no rim on the surface, supported from below by a rail, brackets, or epoxy-set rods — never hung on adhesive alone.
- Subtop
- A continuous plywood or backer deck under thin stone, porcelain, or tile that turns a gappy cabinet run into a flat, fully supported plane.
- Laminated / built-up edge
- A second strip of slab mitred to the underside so a 2 cm top reads as a thicker edge — added material and shop time, not a free upgrade.
- Eased edge
- The simplest finished edge — a slightly softened square — least expensive to fabricate and the baseline against which ogee, bullnose, and mitred profiles add cost.
- Lippage
- A height step between two pieces at a seam or against a wall, caused by an unlevel base or a misaligned dry-fit — felt with a hand, the mark of a rushed set.
- NSI
- The Natural Stone Institute, successor to the MIA, whose standards govern stone fabrication, seam, and install practice.
- 3 cm / 2 cm
- The two standard slab thicknesses — 3 cm (~1-1/4") for kitchens, 2 cm (~3/4") for vanities or built-up edges — the spec that sets weight, overhang, and edge approach.
Standards, Warranty Conditions, and When a Permit Applies
A manufacturer's warranty is a contract with conditions, and most denials are not about the slab — they are about how it was fabricated and set.
Warranty Conditions That Hinge on the Install
The conditions are specific and verifiable: the top set on a level, supported base; overhangs reinforced to the material's spec; undermount sinks carried from below; cutouts radiused; and quartz kept from the direct heat its resin cannot take. An installer who hangs a sink on adhesive or cantilevers a slab past its limit has voided your warranty before you notice. Ask in writing that the fabrication and install follow the maker's and the Natural Stone Institute's published practice — that document is what a claim is judged against, and one more reason the cheapest quote is rarely the cheapest top.
The Standards Bodies That Set the Bar
Standards bodies govern the rest. The NSI (formerly MIA) governs stone fabrication, seam, overhang, and install practice; ANSI A108 governs tile-set tops; quartz and porcelain makers publish their own fabrication and handling specs. A top built to these holds its warranty and its shape.
When a Countertop Permit Is Required
Permits rarely attach to the countertop itself, but the work around it can trigger one. A like-for-like swap usually does not, while moving plumbing for a relocated sink, adding electrical for a cooktop or outlets, or a countertop change tied to a larger kitchen remodel often does. A reputable installer tells you when a permit applies rather than working around it — and structural questions about the cabinets carrying the load belong settled before the slab is cut.
A Real Countertop Installation Decision
One representative scenario shows why the base decides everything: the cabinets and the overhang, not the slab, drove every call below.
How to Vet a Countertop Installer
Most countertop failures are install failures, so the installer matters more than the slab on the showroom floor. These questions separate a crew that sets tops to last from one that simply drops stone fast.
- They level and verify the cabinets before they template
- An installer who templates over an unchecked base reproduces the error in stone. Ask whether they level the run first and to what tolerance — a real answer names a level, a laser, and shimming, not "the cabinets looked fine."
- They measure and support every overhang to spec
- Ask how they handle your island or bar overhang. A credible answer names the unsupported limit for your material and the reinforcement — let-in steel, a subtop, or corbels — sized to the span, not "the stone is strong enough."
- They support undermount sinks from below
- The right installer carries an undermount sink on a rail, brackets, or epoxy-set rods, never on adhesive. A shop that hangs sinks on glue is a shop whose cutouts crack.
- They plan seams over support and color-match the epoxy
- Ask where your seams will fall and how they are filled. A professional places them over a partition, away from cutouts, and tints two-part epoxy to the slab — a one-seam-anywhere answer is a red flag.
- They handle removal, plumbing coordination, and cutouts cleanly
- Ask whether tear-out, disposal, plumbing disconnect-and-reset, and every cutout are included and itemized. The edges and the reconnect are where rushed work shows.
- They put the scope and schedule in writing and stand behind the work
- Ask for the full scope, the timeline, and the labor warranty in writing before fabrication starts. A crew willing to name a workmanship guarantee — and to return if a seam lips or a corner cracks — is accountable for the install, not just the slab the maker covers.
Why Route Your Countertop Installation Through Pro Work Home Surface
Pro Work Home Surface is not a fabricator and does not set your top — we are a national authority on home surfaces that matches homeowners with vetted local installers and holds them to a published bar.
- A free consultation and an itemized written scope
- Every connection starts with a no-obligation consult and a written quote that lines out slab, edge, cutouts, support, and removal separately — so you read the whole job, not a headline rate.
- A real vetting standard, applied before we connect you
- Installers are screened on what decides a top's life: whether they level the base, support every overhang and cutout, place seams over backing, and fabricate to the Natural Stone Institute's practice rather than for speed.
- Level the base and support the load, every time
- The cabinets are leveled to about 1/8" over 10 ft and every overhang and cutout is reinforced to the material's limit before the stone is bonded — the steps that decide whether a top cracks or lasts.
- National coverage, local crews
- We match you with installers in your area nationwide, so the standard is consistent even though the crew is local — whether your project is a single vanity or a full kitchen and island.
Installation is one of several countertop services we cover across home surfaces. If your project also touches custom slab fabrication, sealing a porous stone, restoring the finish, fixing a chip or crack, or full restoration of an aging top, the same standards apply — and because countertops sit on cabinets, coordinate the base with cabinet work too. Compare what moves the price in our cost guides, dig into the how-and-why in our buying guides, size the job with our spec-comparison tools, and start from the countertops category hub or the full range of home surfaces.
Brands & Material Authority
Quality and construction drive long-term performance more than the label. These are widely respected names in this category:
- Cambria
- Caesarstone
- Silestone
- MSI
- Cosentino
- Corian
- Wilsonart