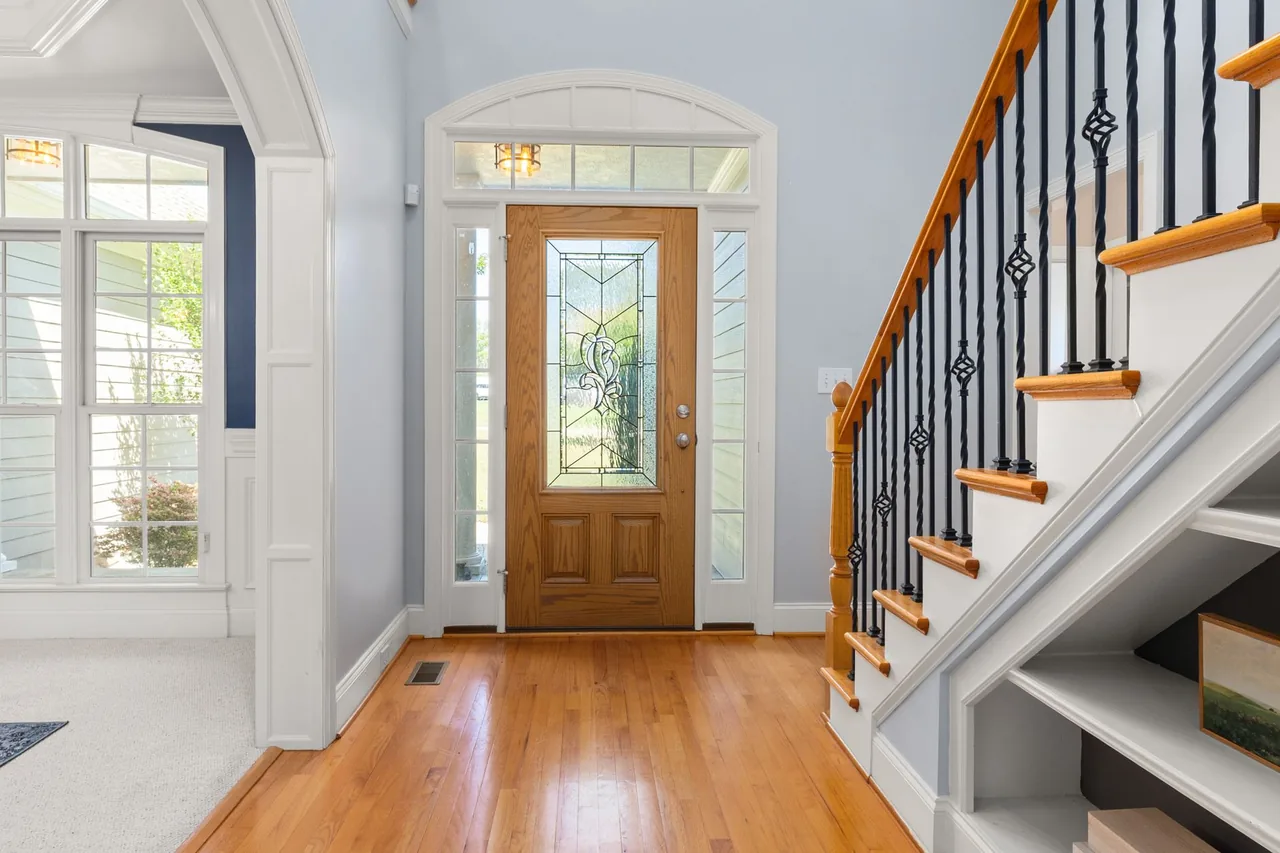
Stair installation is the code-governed trade of framing, fastening, and finishing a staircase so every step lands at the same height, carries its load without flex, and meets the safety geometry written into the building code. One fact decides whether a stair is safe above all others: dimensional uniformity — a flight where every riser and every tread run is the same, because people climb and descend on muscle memory, not by looking, and the one step that is taller or shorter than its neighbors is the one that trips them. The International Residential Code (IRC) section R311.7 holds the variation across a whole flight to within 3/8", and gates riser height, tread depth, headroom, handrails, and guards. Get a free consultation and a written, code-referenced scope from a vetted installer before any stringer is cut, because a stair built outside the geometry fails inspection and endangers everyone who uses it.
Stair Installation Is a Geometry Job First, a Carpentry Job Second
The finished tread everyone sees matters least to whether the stair is safe. What separates a staircase that passes inspection and feels effortless from one that fails or trips its users is the geometry calculated before the first stringer is marked.
The Total Rise Decides Every Dimension Above It
The vertical distance from finished floor to finished floor — the total rise — dictates the whole stair; the materials only decide what it looks like inside that math, so a credible installer calculates it before quoting:
- A flight laid out without dividing the total rise into equal risers leaves one odd step at the top or bottom — the classic trip hazard, and an automatic inspection failure.
- A run squeezed into too short an opening forces risers taller than code allows, making every step a strain and a fall risk.
- A stringer cut before headroom is checked can leave the flight short of the 6 ft 8 in. clearance the code requires, so tall users duck or strike the opening above.
None of those are carpentry defects — they are geometry failures, the most common reason a new stair fails inspection or feels wrong underfoot.
The Order of Operations Never Changes Across Stair Types
Geometry, then structure, then finish. That sequence holds across wood stairs, floating stairs, metal stairs, and glass stairs. The geometric work is always the same: measure the total rise, divide it into equal risers within the code limit, set the matching tread run, confirm headroom and width, and design the handrails and guards to code — then build the structure to carry it and finish the treads and nosing. The material choice happens inside those numbers, not before them.
The Stair Readiness Gate: Six Checks Before Any Stringer Is Cut
Before a staircase is built, a competent installer runs the opening through the same six-check gate. Each check is a published code requirement, each is a documented inspection failure when missed, and a stair that fails any one will not pass. Call it the Stair Readiness Gate: pass all six and the flight is safe and code-compliant; fail one and you are buying a failed inspection or a fall.
- 1. Total rise and equal-riser division
- The finished floor-to-floor height is measured precisely and divided into equal risers, each within the code maximum of 7-3/4". The number of risers sets the number of treads, and dividing evenly is what keeps every step the same. A total rise that does not divide cleanly is reworked on paper — never absorbed into one odd step at the end.
- 2. Tread run and the available opening
- Each tread's horizontal run must be at least 10" deep, and the sum of all runs is the stair's total horizontal travel — its run length, which has to fit the floor opening with code headroom maintained. If the opening is too short for the run the rise demands, the opening or the layout changes; the risers are never raised past code to make a stair fit a space.
- 3. Width, headroom, and clearances
- The finished stair must be at least 36" wide above the handrail, with a minimum 6 ft 8 in. of headroom measured plumb from the tread nosings to the ceiling or opening above. These are checked against the framed opening before the stringers are cut, because a flight that is too narrow or too low cannot be widened or raised after it is built.
- 4. Structural capacity of stringers and landings
- The stringers that carry the stair, and any landings, must be sized and supported to carry the load without flex — a bouncy stair squeaks, cracks finishes, and feels unsafe. Cut stringers are checked for adequate remaining material behind the notches, and landings are framed and anchored to carry both the stair and the people on it.
- 5. Handrail and guard geometry
- A graspable handrail is required on at least one side, set 34" to 38" above the tread nosings, and any open side more than 30" above the floor needs a guard at least 34" high on the stair (36" for guards at landings and level areas), with balusters spaced so a 4" sphere cannot pass. These dimensions are designed into the layout, not added as an afterthought.
- 6. Finish, nosing, and slip safety
- The tread material, the nosing profile, and the walking surface are matched to the geometry and to safe footing. Where treads have a solid riser, the nosing projects 3/4" to 1-1/4" over the riser below, and the nosing's projection is held uniform within 3/8" just like the risers. A slick tread or an inconsistent nosing turns a code-correct frame into a fall risk.
Three of these six — equal risers, run depth, and headroom — are the geometry that a rushed or untrained build gets wrong, because each requires calculation a quick layout skips. That is why the gate is non-negotiable: an inspector checks every one.
Want the geometry calculated and the code checked before any cut?
We match you with a vetted installer who measures the total rise, lays out equal risers to code, and puts the geometry in a written scope — before a stringer is marked.
Stair Installation Specifications & Code
The numbers that gate a stair are published in the building code and are specific, testable, and non-negotiable — from the controlling section, through riser and run, to the handrail, guard, and headroom dimensions an inspector measures.
Stair Geometry Under IRC R311.7
The geometry of a residential stair is governed by IRC section R311.7, and the dimensions there are the difference between a flight that passes and one an inspector rejects — local codes may amend them, so the adopted code in your jurisdiction governs.
Maximum Riser Height and Minimum Tread Depth
The two core dimensions are a maximum riser height of 7-3/4" and a minimum tread depth (run) of 10", measured from nosing to nosing. A riser taller than the maximum makes the climb a strain and the descent a fall risk; a run shallower than the minimum leaves no room for the foot. Together they set how a stair feels and whether it is safe.
Why the 7-3/4 and 10-Inch Limits Exist
The limits encode how a human stride works on a slope. A riser near the 7-3/4" ceiling paired with a run at or above the 10" floor produces a stair the body can climb and descend rhythmically without looking. Push the riser higher or the run shorter and the stride breaks; the foot lands short, the knee strains, and the descent becomes the dangerous direction. The numbers are not arbitrary — they are the geometry of a safe step.
The 3/8-Inch Uniformity Tolerance
Beyond the individual limits, the code enforces consistency: the largest and smallest riser in a flight may differ by no more than 3/8", and the same tolerance applies to tread depth and to the nosing projection. This uniformity rule is the single most safety-critical line in the stair code, because the body climbs on muscle memory and the one step that breaks the rhythm is the one that causes the fall. A flight that meets every other dimension but varies more than 3/8" between steps still fails.
Handrail Height and Graspability
A graspable handrail is required on at least one side of a flight with four or more risers, set 34" to 38" measured vertically from the tread nosings, and continuous along the flight. The handrail must be graspable — a round profile of roughly 1-1/4" to 2" diameter, or an equivalent graspable shape — so a hand can close around it in a fall. A rail too high, too low, or too thick to grip fails inspection and fails the user at the worst moment.
Guard Height and Baluster Spacing
Any open side of a stair or landing more than 30" above the floor below requires a guard. On the stair the guard is at least 34" high measured from the nosings; at landings and other walking surfaces it is at least 36". The infill — balusters or other pattern — must reject a 4" sphere, with a tighter 4-3/8" triangle limit at the open triangle formed by the tread, riser, and bottom rail. The spacing exists to keep a small child from passing through.
Stair Dimensions at a Glance, by Code Element
The table below collects the recognized IRC R311.7 figures a competent installer designs to. These are the model-code dimensions — your local amendments always govern, and where they are stricter, the stricter number wins.
| Code element | What's measured | Reference | Model-code requirement |
|---|---|---|---|
| Riser height (max) | Vertical step height | IRC R311.7 | No more than 7-3/4" |
| Tread depth / run (min) | Nosing-to-nosing run | IRC R311.7 | At least 10" |
| Riser / tread uniformity | Variation within a flight | IRC R311.7 | No more than 3/8" |
| Nosing projection | Tread overhang on solid risers | IRC R311.7 | 3/4"–1-1/4", uniform within 3/8" |
| Stair width | Clear width above the rail | IRC R311.7 | At least 36" |
| Headroom | Plumb clearance over nosings | IRC R311.7 | At least 6 ft 8 in. |
| Handrail height | Top of rail above nosings | IRC R311.7 | 34"–38", graspable |
| Guard height & infill | Open-side protection | IRC R312 | 34"+ on stair; rejects a 4" sphere |
The lesson is that a stair can use beautiful materials and still be unsafe and uninspectable if the geometry is wrong — the 3/8" uniformity rule alone fails more stairs than any finish defect. The geometry is the product; the wood, metal, or glass is the surface on top of it. Size the layout against your opening before you commit, and compare what the materials cost in our cost guides.
Stair Installation Types Compared
How a staircase is built and what carries it is as consequential as the geometry, because each type has a structure it suits and a setting it fails in. There are four mainstream types, and the right one is dictated by the structure, the span, and the look — but all of them obey the same R311.7 geometry.
The Stair Type Comparison Matrix
The matrix below is the decision the installer is making — structure, engineering demand, look, and cost driver, side by side, with the code geometry constant across every column.
| Type | Structure | Engineering demand | Open or closed | Typical look | Main cost driver |
|---|---|---|---|---|---|
| Wood stairs | Cut or housed stringers | Standard carpentry | Closed or open riser | Traditional, warm | Material + finish carpentry |
| Floating stairs | Hidden or mono-stringer, cantilever | High — engineered for load | Open riser by design | Modern, airy | Engineering + steel + glass rail |
| Metal stairs | Steel or aluminum stringers | Fabrication + welding | Open or closed | Industrial, contemporary | Fabrication + finish (powder-coat) |
| Glass stairs | Structural glass on steel | Highest — specialized hardware | Open by design | Light, minimalist | Tempered glass + custom hardware |
Conventional Framing: Wood Stairs
Wood stairs are built on stringers — sawtooth-cut stringers that the treads and risers sit on, or housed stringers routed to receive them — and are the most common and most repairable type. They carry load with ordinary carpentry, finish in stain or paint, and accept nearly any tread material. Their failure modes are familiar: a stringer with too little material left behind the notches flexes, and treads fastened without glue and a tight fit squeak. Done to geometry and fastened well, a wood stair is refinishable for the life of the home.
Engineered Open Stairs: Floating and Metal
Floating and metal stairs trade conventional framing for engineering. A floating stair cantilevers open treads off a hidden stringer or a single mono-stringer, and because there is no riser and often no visible support, the structure is engineered for load and the open risers are held to the code gap limit. Metal stairs carry load on fabricated steel or aluminum stringers, welded and finished. Both still obey R311.7 — the open-riser gap on a floating stair must still reject a 4" sphere — and both demand a fabricator or engineer, not just a carpenter; an under-engineered floating stair is dangerous in a way a conventional one is not.
Specialized Assemblies: Glass and Hybrid Stairs
Glass stairs and glass-railed hybrids are the most specialized assembly, using tempered or laminated structural glass on a steel frame with purpose-made hardware. They maximize light but demand engineered glass thickness, anti-slip treatment on the treads, and hardware rated for the load — there is no improvising. The same geometry governs, but the consequences of getting structure or slip safety wrong are higher; this is the type where the installer's specialization matters most, and where a generalist crew is the wrong call.
Which Stair Type Is Right for Your Home?
The type is not a preference alone — it is the output of a short chain of facts about your opening, your structure, and the geometry the space allows. Walk the decision in order; each branch eliminates what the space or structure cannot support, and what survives is the right call.
- Does the total rise and opening allow a code-compliant flight? Measure the floor-to-floor height and the opening first. The total rise divided into equal risers under 7-3/4" sets the riser count, and the runs at 10"-plus must fit the opening with 6 ft 8 in. headroom. If they do not, the opening or layout changes before any type is chosen — geometry comes before style.
- Open or closed risers? A closed-riser stair (every step backed) reads traditional and suits wood; an open-riser stair reads modern and points toward floating or metal — but open risers must still reject a 4" sphere through the gap, which constrains the design.
- Does the design need engineering? A conventional wood stair is standard carpentry; a floating or cantilevered stair, a long unsupported span, or a glass assembly needs an engineer or specialized fabricator. If the look you want is open and structural, the budget and timeline absorb that engineering — there is no skipping it safely.
- Match the material to the structure and the setting. Wood suits almost any home and is the most repairable; metal suits contemporary and industrial settings; glass suits light-driven minimalist spaces and needs anti-slip treads. Confirm the material against the home under the stairs category hub, and only then commit.
- Design the handrail and guard into the type from the start. Every type needs a graspable handrail at 34"–38" and, on open sides over 30", a guard that rejects a 4" sphere. The rail and guard are part of the design, not a finish-stage add-on — especially on floating and glass stairs where they are structural.
Run honestly, this tree returns a type the space and structure can actually carry to code — and an installer who pitches a dramatic floating stair without mentioning engineering is the red flag.
Not sure which staircase your opening can carry to code?
Tell us about your space and we will match a vetted installer who checks the geometry, names the right type, and explains the engineering the others need — in writing.

Why Stairs Squeak, Trip, and Fail Inspection — and How the Install Stops It
The most common stair failures trace back to geometry, fastening, and code, and nearly all are preventable at install — each paired below with its mechanism, cause, and named prevention.
The Odd Step: A Uniformity Failure
The single most dangerous stair failure is a riser or run that does not match the rest of the flight, because the body climbs on rhythm and the off step is the one that catches a toe or drops a foot. It comes from a total rise divided unevenly, leaving one short or tall step at an end. The prevention is arithmetic, done before any cut: divide the total rise into equal risers within code, and hold the flight to the 3/8" uniformity tolerance across every step.
Squeaks: Movement Between Tread and Frame
A squeak is the sound of a tread moving against a riser, a stringer, or a fastener that has worked loose — the wood rubbing as weight shifts. It traces to treads installed without glue, a loose fit, or fasteners that did not draw the parts tight. The prevention is in the assembly: glue and mechanically fasten treads to the stringers and risers so the joints are locked solid, because a stair built tight does not develop the movement a squeak announces. A stair that already squeaks is a diagnosis-first stair repair.
Bounce and Flex: Undersized or Over-Notched Stringers
A stair that feels bouncy underfoot has stringers that flex — either undersized for the span or cut so deeply for the treads that too little material remains behind the notches to carry the load. The flex cracks finishes, loosens treads, and feels unsafe. The prevention is structural: size and support the stringers for the load, keep adequate material behind the cuts, and add a center stringer on wider stairs so nothing carries more than it should.
Inspection Failure: A Code Dimension Missed
The fourth failure is the one caught before the stair is even used — a handrail at the wrong height, a guard gap that passes a 4" sphere, headroom under 6 ft 8 in., or risers over 7-3/4". Each is a documented inspection rejection. The prevention is designing every code dimension into the layout from the start and verifying it against the adopted code, so the inspector confirms what was already built right rather than writing it up. The relevant geometry also governs the treads and nosing at the finish stage.
Common Stair Installation Mistakes, Consequences, and Prevention
Most stair failures are the same handful of shortcuts, each with a predictable consequence and a known prevention. Naming them is how you spot a corner being cut before it becomes a trip hazard or an inspection rejection.
| Mistake | What it causes | The prevention |
|---|---|---|
| Total rise divided unevenly | One odd step — a trip hazard and inspection failure | Divide into equal risers within 7-3/4"; hold 3/8" uniformity |
| Risers raised to fit a short opening | Steps too steep; strain and fall risk | Change the opening or layout — never exceed the riser limit |
| Treads fastened without glue | Squeaks and loose treads within a season | Glue and mechanically fasten treads to stringers and risers |
| Over-notched or undersized stringers | Bouncy, flexing stair; cracked finishes | Size stringers for the load; keep material behind the cuts |
| Handrail at the wrong height | Inspection failure; no grip in a fall | Set the rail 34"–38" above the nosings, graspable |
| Guard gap passes a 4" sphere | Child-safety hazard; inspection rejection | Space infill so a 4" sphere cannot pass |
| Headroom not checked before cutting | Flight short of 6 ft 8 in. clearance | Verify headroom against the opening before cutting stringers |
Every row is a documented inspection rejection or safety hazard — which is why "we build to R311.7 and verify every dimension, in writing" is the most valuable sentence in a stair quote.
Choosing the Stair Material — and the Property That Rates It
The best material for a staircase is matched to its traffic, its setting, and the structure it sits on, and every option has a property that predicts how it holds up — which is why choosing on the look alone lands a beautiful stair in the wrong setting or a slick tread on a busy flight.
Performance Drivers by Stair Material
Each material is governed by its own property — the property, not the showroom photo, predicts the result, so match it to how the stair will actually be used.
- Wood is governed by species hardness on the Janka scale and by its refinishability. Harder species like oak (around 1290 lbf) and maple resist the dents and wear of stair traffic; wood treads can be sanded and recoated repeatedly. It suits almost any home and is the most repairable type.
- Metal is governed by the fabrication and the finish — steel and aluminum stringers welded for strength and powder-coated for durability and color. It suits contemporary and industrial settings and pairs with wood, glass, or open treads.
- Glass is governed by engineered thickness and anti-slip treatment. Tempered or laminated structural glass treads need a rated thickness for the load and a slip-resistant surface, because a smooth glass tread is a fall risk. It suits light-driven minimalist spaces and demands specialized hardware.
- Tread material — wood, stone, carpet, or vinyl over the structure — is governed by slip resistance and depth. Whatever the surface, the run still meets the 10" minimum and the nosing stays uniform; a carpet runner or a stone cap changes the feel but not the geometry.
- Nosing is governed by profile and traction — a square, bullnose, or slip-resistant edge that projects 3/4" to 1-1/4" over a solid riser. Aluminum and rubber nosings add grip on high-traffic or slick treads; the projection stays uniform within 3/8".
Matching the Material to the Setting
Setting context overrides preference. A high-traffic family staircase wants a hard, refinishable wood or a durable nosing for grip; a contemporary open space suits metal or floating treads; a light-driven entry suits glass with anti-slip treatment; a stair that continues a wood floor often takes matching treads and refinishing to blend. Pick the property for the setting first. To compare materials spec-for-spec, the material comparison tool lines them up.
What Actually Drives the Cost of a Stair Installation
A staircase quote is not a flat per-step rate; the headline number a low bid leads with hides the items below, ranked by how much they move the total.
The Cost Drivers That Move the Total Most
- Type and engineering. The biggest swing by far — a conventional wood stair is standard carpentry, while a floating, cantilevered, or glass stair carries real engineering, steel fabrication, and specialized hardware that multiply the cost. The structure you can see least of often costs the most.
- Material and finish carpentry. The tread and rail material and the level of finish carpentry — stained hardwood treads, a custom railing, mitered returns — set the baseline above the structure, and skilled finish hours add up fast.
- Railing and guard system. Balusters, newel posts, the handrail, and the guard infill are a substantial line of their own, and a cable, glass, or metal rail costs well above a standard wood balustrade.
- Opening and structural changes. If the floor opening must be reframed, a landing added, or headroom corrected to make a code-compliant flight fit, that framing is real labor a ready opening avoids.
- Demolition and removal of an old stair. Tearing out and hauling away an existing staircase is labor and a disposal fee — and removal often reveals framing or opening issues that change scope, which is why it belongs in the written quote up front.
- Site conditions and access. A tight stairwell, a tall flight, or a difficult site slows every step and adds staging and handling time beyond an open, easy space.
- Nosing, treads, and slip detailing. Stair-nosing, tread caps, and anti-slip detailing are slow, exacting work priced beyond the field carpentry, especially on glass or stone treads.
- Permit and inspection. A new or rebuilt staircase generally requires a permit and inspection, and that process — and any engineering stamp a floating or glass stair needs — is a real cost a code-compliant job includes.
Because these drivers swing so widely, the only honest number comes from an on-site assessment of the opening and the design. Compare what moves the price across the category in our cost guides, and read any quote critically against the type you actually chose.
Get an itemized stair scope, not a per-step rate.
A vetted installer prices the structure, the railing, any opening work, and the finish as separate lines — so you see the whole job, free and with no obligation.
The Stair Installation Process, Step by Step
A professional stair install runs the same disciplined sequence every time, and each step exists to prevent a specific failure or inspection rejection. The six steps below are the full arc from on-site measurement to final inspection.
On-Site Measurement and Geometry
The installer measures the finished floor-to-floor total rise, the opening, and the headroom, then divides the rise into equal risers within 7-3/4" and sets the matching 10"-plus runs. The full geometry is calculated here against the Readiness Gate — not estimated on site — before any material is ordered or cut.
Layout and Code Verification
The stringer layout is marked from the calculated geometry, and every code dimension is verified on paper — width, headroom, the 3/8" uniformity tolerance, and where the handrail and guard will land at 34"–38" and rejecting a 4" sphere. Any opening or framing change needed to meet code is identified now.
Structure: Stringers and Landings
The stringers are cut or fabricated and the landings framed and anchored to carry the load without flex, with adequate material kept behind the notches and a center stringer added on wider stairs. Floating and glass assemblies are set to their engineered structure and hardware here.
Risers, Treads, and Nosing
Risers and treads are fitted and both glued and mechanically fastened so the joints are locked solid against squeaks, with the nosing projecting 3/4"–1-1/4" uniformly over solid risers. Each tread is checked for a tight, consistent fit before the next goes on.
Handrail, Guard, and Balusters
The graspable handrail is installed continuous at 34"–38" above the nosings, and the guard and balusters are set on open sides so the infill rejects a 4" sphere. On floating and glass stairs this is structural work, not trim, and is fastened to the engineered design.
Finish, Inspection, and Walkthrough
Treads are finished with attention to slip safety, the stair is cleaned, and the flight is presented for the required inspection. The installer walks it with you to confirm every step feels even, the rail is solid, and the geometry is right, and explains any finish cure time before heavy use.
Skip or rush any one of these six steps — especially the geometry in the first two — and the failure it was meant to prevent shows up as a trip, a squeak, or a red-tagged inspection, which is why a vetted installer treats the sequence as fixed, not optional.
Talk through your project — free.
A free consultation and a written, itemized quote from a vetted installer. No pressure, no obligation.
Stair Installation Glossary
The terms below recur in every quote, code reference, and inspection — each defined as its working meaning on an actual job site, so you can read a scope and judge whether it is complete.
- Total rise
- The vertical distance from finished floor to finished floor that the staircase must climb. Dividing it into equal risers within the code maximum sets the entire stair's geometry.
- Riser
- The vertical face of each step, and its height — capped at 7-3/4" by code and held uniform within 3/8" across the flight. The dimension that most directly governs how steep and how safe the stair is.
- Tread and run
- The horizontal walking surface of each step (tread) and its depth measured nosing to nosing (run), with a code minimum run of 10", also held uniform within 3/8".
- Stringer
- The inclined structural member that carries the treads and risers — sawtooth-cut or housed. Its size and the material left behind the notches determine whether the stair flexes or stays solid.
- Nosing
- The tread's leading edge where it projects over the riser below — 3/4" to 1-1/4" on solid risers, uniform within 3/8" — improving footing and meeting code.
- Uniformity (3/8")
- The code rule that the largest and smallest riser, run, and nosing in a flight may differ by no more than 3/8" — the most safety-critical dimension, because the body climbs on rhythm.
- Handrail
- The graspable rail required on at least one side, set 34"–38" above the nosings and shaped so a hand can close around it in a fall.
- Guard
- The barrier on any open side more than 30" above the floor — at least 34" high on the stair — with infill that rejects a 4" sphere to keep a child from passing through.
- Baluster
- The vertical infill members of a guard or railing, spaced so the gap between them stops a 4" sphere. Also called spindles.
- Headroom
- The plumb clearance from the tread nosings to the ceiling or opening above — at least 6 ft 8 in. by code, verified before stringers are cut.
- Janka hardness
- The pounds-force needed to embed a steel ball into a wood species — the dent-resistance rating that predicts how a wood tread survives stair traffic; red oak sits near 1290 lbf.
- IRC R311.7
- The section of the International Residential Code governing residential stairs — riser, run, uniformity, width, headroom, nosing, and handrails. The reference an inspector measures against, as amended locally.
Code, Inspection, and When a Permit Applies
A staircase is governed by code more strictly than almost any surface in the home, because it is a fall hazard by nature — and the conditions that matter most are the ones an inspector measures.
The Code That Governs Every Stair
Residential stairs are governed by IRC section R311.7 for the geometry — riser, run, uniformity, width, headroom, nosing, and handrails — and R312 for guards, as adopted and sometimes amended by your local jurisdiction. These are not guidelines; they are the dimensions an inspector measures, and a flight outside them is rejected regardless of how well it is built. The single most-failed line is the 3/8" uniformity rule, followed by handrail height and guard-gap spacing. An installer who designs to R311.7 from the first measurement is the one whose stair passes the first time.
Engineering for Floating and Glass Stairs
Some stairs need more than the code minimums. A floating or cantilevered stair, a long unsupported span, and a structural-glass assembly require engineering — sized members, rated hardware, and often a stamped design — because the open structure carries load in ways a conventional stringer does not. Substituting eyeball judgment for engineering on these types is dangerous, not thrifty; the open, dramatic stair is exactly the one that must be engineered before it is built.
When a Stair Permit Is Required
Building or rebuilding a staircase generally requires a permit and inspection, because the work is structural and safety-critical. Replacing treads or refinishing the surface may not, but altering the geometry, reframing the opening, changing the structure, or installing a new flight almost always does — and a floating or glass stair may need an engineering stamp on top of the permit. A reputable installer pulls the permit and schedules the inspection rather than working around them, because an uninspected stair surfaces at sale and insurance time. When the existing stair is sound and only worn, the better path may be refinishing or targeted repair rather than a full rebuild.
A Real Stair Installation Decision
One representative scenario shows why geometry decides everything: the total rise and the opening, not the material, drove every call below.
How to Vet a Stair Installer
Most stair failures are geometry and code failures, so the installer's discipline matters more than the material. These questions separate a crew that builds to R311.7 from one that lays out a flight by eye.
- They calculate the geometry before quoting
- An installer who quotes a stair without measuring the total rise and dividing it into equal risers is guessing. Ask how they lay out the risers and runs — a real answer references the total rise, equal division, and the 7-3/4" and 10" limits.
- They build to R311.7 and name the dimensions
- Ask which code they build to and what the key numbers are. A credible answer cites IRC R311.7, the 3/8" uniformity rule, handrail height, and the 4" guard-gap limit — not "we've built plenty of stairs."
- They engineer floating and glass stairs, not eyeball them
- For any open, cantilevered, or glass design, a professional involves an engineer or specialized fabricator and rated hardware. An installer who offers a dramatic floating stair with no mention of engineering is a serious red flag.
- They glue and fasten treads against squeaks
- Ask how they keep the stair from squeaking. A real answer is gluing and mechanically fastening treads and risers to the stringers for a locked, tight fit — not face-nailing and hoping.
- They pull the permit and schedule the inspection
- Ask whether the job is permitted and inspected. A reputable installer pulls the permit, builds to pass, and schedules the inspection rather than working around it — and provides any engineering stamp the design requires.
- They put the geometry, scope, and warranty in writing and stand behind it
- Ask for the layout, the full scope, and the labor warranty in writing before work starts. A crew willing to guarantee the workmanship — and to return if a tread squeaks or a rail loosens — is accountable for the build, not just the materials.
Why Route Your Stair Installation Through Pro Work Home Surface
Pro Work Home Surface is not a contractor and does not build your staircase — we are a national authority on home surfaces that matches homeowners with vetted local installers and holds them to a published bar.
- A free consultation and an itemized written scope
- Every connection starts with a no-obligation consult and a written quote that lines out the structure, railing, any opening work, and finish separately — so you read the whole job, not a per-step rate.
- A real vetting standard, applied before we connect you
- Installers are screened on what decides a stair's safety: whether they calculate the geometry, build to IRC R311.7, engineer open and glass stairs, and fasten against squeaks rather than working by eye.
- Geometry and code before any cut, every time
- The total rise is measured and divided into equal risers, the runs and headroom verified, and the handrail and guard designed to code before a stringer is marked — so the flight is safe, even underfoot, and passes inspection.
- National coverage, local crews
- We match you with installers in your area nationwide, so the standard is consistent even though the crew is local — whether your project is a single flight or a whole-home staircase.
Stairs are one of eight categories we cover across home surfaces. If your project also touches wood, floating, metal, or glass construction, new treads or nosing, refinishing a worn flight, or fixing a squeak or loose tread, the same standards apply — and where the stair continues a finished floor or matches hardwood, the trades connect. Compare what moves the price in our cost guides, dig into the how-and-why in our learning center, narrow the material with our comparison tool, and start from the stairs category hub or the full range of home surfaces.
Brands & Material Authority
Quality and construction drive long-term performance more than the label. These are widely respected names in this category:
- Zamma
- StairSupplies
- L.J. Smith
- Bullnose
- Coterie