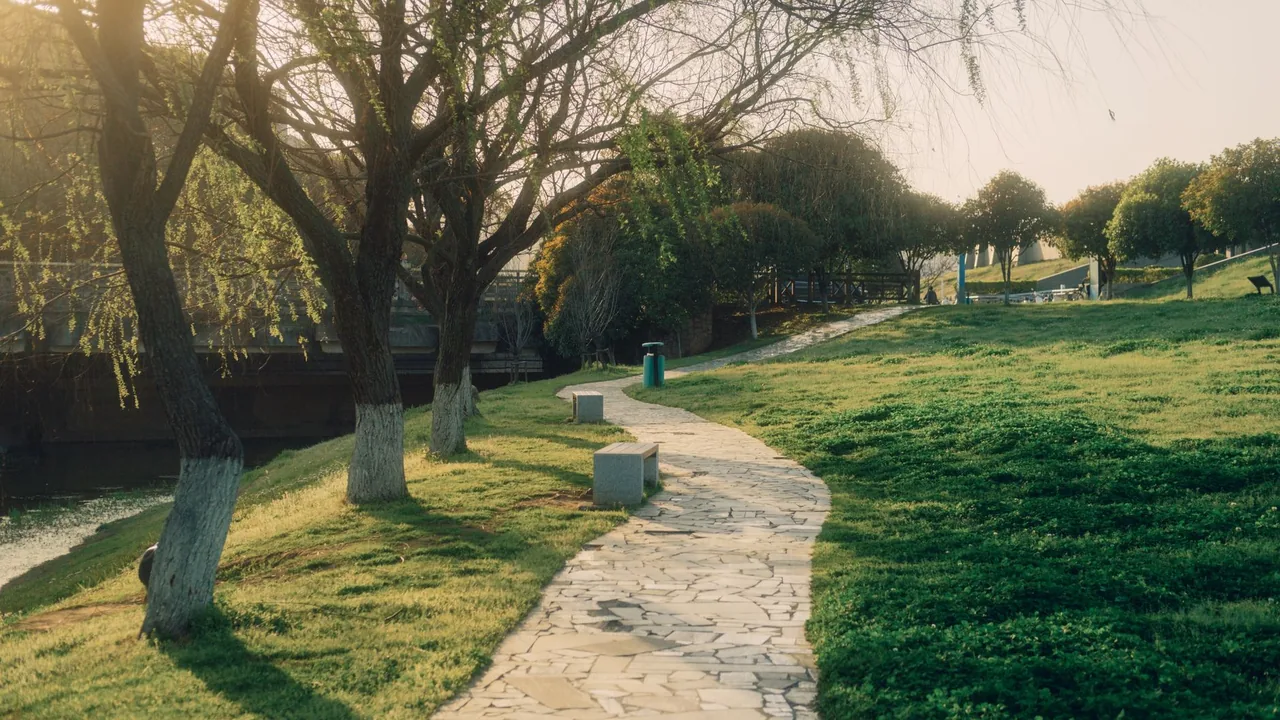
Walkway installation is the engineered process of building a path that stays even, slip-resistant, and trip-free underfoot through years of weather and ground movement, while shedding water cleanly to the side. Two things decide whether a walkway is safe and lasts and almost nothing else does: how flat and lippage-free the surface stays, and how wide and accessible the path is. Hold every joint flush — no unit heaved above its neighbor — and a usable clear width with gentle slopes, and the walkway serves everyone in every season; let one unit settle or heave and you get the defining failure of a path, a trip hazard in the dark. A walkway is a surface people move across carrying things, not a place to sit, so it is built to a different bar. Get a free consultation and a written, itemized scope from a vetted installer before a single unit is set — that document is where a safe walkway is decided.
A Walkway Is a Trip-Free, Accessible Job First, a Looks Job Second
The stone color or paver pattern everyone shops for matters least to whether the path is safe and lasts. What separates a walkway someone can cross in the dark carrying groceries from one that catches a toe in two winters is the flat, continuous, accessible surface built on a base that holds it even.
Flatness and Width Decide Whether the Path Is Safe
A flush, lippage-free surface and a usable clear width dictate whether the walkway works for everyone; the look only decides the rest inside those constraints, so a credible installer leads with both:
- A single unit heaved or settled above its neighbor — even a small lip — is the classic trip hazard a walkway exists to avoid, worst at night and for anyone less steady.
- A path pinched too narrow forces people single-file, off the surface, or out of reach of a wheelchair, walker, or stroller it should serve.
- A walkway with too steep a running slope or too much cross slope sheds people as well as water, becoming hard to use and slick when wet.
None of those are material defects — they are surface-flatness, width, and slope failures, the most common reason a new walkway disappoints or becomes a hazard.
The Order of Operations Never Changes Across Materials
Flat, accessible surface first, look second. That sequence holds across pavers, natural stone, and poured concrete. The work is always the same: excavate to firm subgrade, build a compacted base, set a usable clear width, hold a gentle running slope and a slight cross slope for drainage, set every joint flush, and lock the edges so the path cannot spread and lippage cannot start. The look is chosen inside those facts, not before them — and a walkway often shares its material and base logic with an adjoining patio or driveway.
The Walkway Readiness Gate: Six Checks Before Any Surface Goes Down
Before a walkway surface is set, a competent installer runs every path through the same six-check gate. Each check has a measurable target, each is a documented cause of walkway failure when skipped, and a path that fails any one is not ready. Call it the Walkway Readiness Gate: pass all six and the walkway stays safe and even; fail one and you are buying a trip hazard.
- 1. Usable clear width
- The path is set to a usable clear width — a residential walkway commonly at least 36 inches so a person passes comfortably, and wider where two people or a wheelchair, walker, or stroller must pass. An accessible route follows ADA-style guidance for a minimum clear width and passing space. A pinched path forces people off the surface.
- 2. Flush, lippage-free surface
- Every unit is set flush with its neighbors so no edge stands proud — the lippage between adjacent units kept to a minimum, because a small lip is exactly the trip hazard a walkway must avoid. The base and edge work that holds units flush over time is what keeps the surface continuous.
- 3. Running slope and cross slope
- The path holds a gentle running slope along its length and a slight cross slope across it — commonly about 1% to 2% to one side — to shed water without shedding people. An accessible route limits running slope and keeps cross slope shallow, so it drains yet stays easy and safe to walk and roll across.
- 4. Compacted base for foot traffic
- The walkway rests on a compacted aggregate base sized for pedestrian loads and the climate — built in 2" to 4" lifts of angular crushed stone, deepened in freeze-prone or clay-heavy ground. Lighter than a driveway base, but never skipped: an un-compacted base is what lets a unit settle into a lip.
- 5. Edge restraint and flush joints
- A continuous edge restraint locks the perimeter of a sand-set path so units cannot creep, and joints are filled and locked — increasingly with polymeric sand — so the surface stays tight and even. A path with loose edges spreads, opens joints, and starts lifting units out of plane.
- 6. Slip resistance and freeze-thaw match
- The surface is slip-aware for wet and icy use — a textured finish on stone, paver, or concrete — and in freeze regions a flexible system over a free-draining base tolerates freeze-thaw movement better than a rigid slab, so frost doesn't heave a unit into a lip. A grippy surface over a base built to drain is what keeps the path safe year-round.
Three of these six — flush flatness, clear width, and the slope limits — are the corners cut on cheap quotes, because they take care and constrain the layout a low bid skips, yet every one is verifiable. That is why the gate is non-negotiable on a path people walk in the dark.
Want a flat, trip-free, accessible path before you buy a walkway?
We match you with a vetted installer who sets a usable width, holds the slopes gentle, sets every joint flush, and puts the dimensions in a written scope — before you commit to a material or a price.
Walkway Construction Specifications & Standards
The numbers that gate a walkway are measurable and pedestrian-specific — from the clear width and slope limits through the surface flatness to the base depth and joints that hold every unit even.
Clear Width and Accessibility
Clear width is the spec that decides whether a walkway serves everyone, because a path is only as useful as the space it gives people to move. How wide it must be depends on who uses it and whether it is an accessible route.
Minimum and Passing Widths
A walkway is sized for comfortable passage, not the narrowest line that fits, with extra width where people or mobility devices must pass each other.
Residential vs. Accessible-Route Width
A residential walkway is commonly set to at least 36 inches of clear width so one person passes comfortably, and stepped wider — often 48 inches or more — where two people walk abreast or a main entry path must feel generous. An accessible route follows ADA-style guidance for a minimum clear width with periodic passing space. It is the recognized way to size a path because a pinched walkway pushes people off the surface and onto the lawn or mulch beside it.
Running Slope and Cross Slope Limits
Slope is the companion accessibility spec. A walkway holds a gentle running slope along its length and a slight cross slope across it — commonly about 1% to 2% — to drain without becoming hard to walk or roll across. An accessible route limits the running slope and keeps cross slope shallow, because too much of either sheds people along with water and turns slick when wet. The path drains to the side, not down its length into a puddle at the door.
Slip Resistance for a Walking Surface
The surface is chosen for traction in wet and icy conditions, because a walkway is used in every season and often in the dark. A textured finish — flamed or tumbled stone, textured pavers, or broom-finished concrete — gives the grip a smooth surface lacks, and the same wet-traction logic measured by DCOF on tile applies. A slick path is a fall waiting for the first rain or frost.
Surface Flatness and Lippage Tolerance
Flatness is the spec every walkway shares, and on a path it is about the joint between units. Adjacent units are set flush so lippage — one edge standing above its neighbor — is held to a minimum, because even a small lip is the trip hazard the whole path is built to avoid. Achieving it means a true base, a screeded bedding course, and careful setting, then locking the result so it stays flush as the ground moves.
Base Depth and Joints for a Pedestrian Path
A walkway base carries people, not vehicles, so it is lighter than a driveway base but built the same way: angular crushed aggregate compacted in 2" to 4" lifts to a depth set by the soil and climate, deeper in freeze-prone or clay-heavy ground so frost cannot heave a unit out of plane. A sand-set path gets a continuous edge restraint and joints filled with polymeric or jointing sand; a poured path is built to slab thickness with control joints so shrinkage cracks land in planned lines rather than across the walking surface.
Walkway Width, Slope, and Base Specs, by Element
The table below collects the recognized targets a competent installer verifies. These are representative figures — local accessibility and building codes and the material maker's instructions govern, and where they are stricter, the stricter number wins.
| Element | What's measured | Why it matters | Typical target |
|---|---|---|---|
| Clear width (residential) | Usable walking width | Comfortable single-person passage | At least 36"; wider for two abreast |
| Accessible route | Minimum clear width + passing space | Serves wheelchairs, walkers, strollers | ADA-style minimum width with passing |
| Cross slope (drainage) | Fall across the path | Sheds water without shedding people | About 1%–2% to one side |
| Surface flatness | Lippage between adjacent units | Eliminates the trip hazard | Units set flush; minimal lippage |
| Compacted aggregate base | Lift thickness during compaction | Holds units even; frost drainage | Placed in 2"–4" lifts, each compacted |
| Concrete path joints | Control joint spacing | Directs cracks off the walking line | Planned grid; isolate at fixed structures |
The lesson is that a walkway's safety lives in dimensions you can measure — width, slope, and lippage — and those are exactly what a low bid trims to hit a number. A narrow, steep, or uneven path is a hazard, not a saving; size the project honestly with the hardscape cost guides first.
Walkway Materials Compared
How a surface stays flush and grips underfoot is as consequential as the look, because each material holds flatness, traction, and repair differently. There are three mainstream walkway surfaces, and the right one is dictated by how flush it stays, its wet traction, and the climate — never by which is cheapest per square foot.
The Walkway Material Comparison Matrix
The matrix below is the decision the installer is making — how it stays even, wet traction, frost behavior, repairability, and cost driver, side by side.
| Material | How it stays even | Wet traction | Frost behavior | Repairability | Main cost driver |
|---|---|---|---|---|---|
| Concrete pavers | Re-level a settled unit | Good — textured faces | Flexes with heave | Easiest — lift and replace | Base depth + edge restraint |
| Brick pavers | Re-level individual units | Good — textured surface | Flexes with the field | Easy — individual units | Unit cost + pattern cutting |
| Flagstone | Reset a rocked stone | High — natural cleft grips | Dry-laid flexes | Moderate — match the stone | Stone cost + fitting labor |
| Poured concrete | Rigid — no unit movement | Good — broom finish | Rigid — cracks at joints | Hardest — repairs show | Slab prep + finish |
| Stepping stones / gravel | Reset stones; regrade gravel | Varies — set stones level | Tolerant; needs upkeep | Easy — reset and top up | Setting + containment edging |
Flexible Systems: Pavers and Dry-Laid Stone
Pavers, brick, and dry-laid flagstone rest on a compacted base over a screeded bedding course and lock to each other and an edge restraint. Their advantage on a path is that any unit that does settle can be lifted and re-leveled to kill a lip before it becomes a trip hazard, and the system flexes with frost. The trade-off is joints to maintain and the need to set every unit flush at install. Flagstone's natural cleft grips strongly when wet; textured pavers and brick provide the same traction.
Rigid Systems: Poured and Stamped Concrete
A concrete walkway is a single slab that gives a seamless, joint-light surface with no individual units to settle out of plane — its flatness is poured in. It must be finished with a slip-resistant broom texture rather than a smooth trowel, and jointed with control joints so shrinkage cracks land in planned lines instead of heaving a trip edge across the path. Over clay or in hard-freeze ground the rigid slab is the assembly most exposed to freeze-thaw heave, and a heaved or cracked slab is harder to fix invisibly than a single re-leveled paver — so its base must drain reliably.
Which Walkway Material Is Right for Your Path?
The material is not a preference — it is the output of a short chain of facts about how the path is used, your climate, and your soil. Walk the decision in order; each branch eliminates the options the conditions rule out, and what survives is the right call.
- Set the width and accessibility need first. Is this an accessible route or a main entry that must serve wheelchairs, walkers, and strollers? That fixes a minimum clear width and gentle slope limits any material must meet, and rules out a narrow, stepping-stone path where a continuous accessible surface is required.
- Solve wet and icy traction. The surface must grip when wet and through frost — a textured finish on stone, paver, or concrete. Any smooth or polished surface is eliminated here, because a path is used in rain, snow, and the dark.
- Weigh how it stays flush and how it's repaired. If lifting and re-leveling a single settled unit to kill a lip matters, a paver or flagstone path wins; if a poured-in, unit-free flat surface is the priority and the base can drain a rigid slab, concrete fits. Confirm the surface against the route under the outdoor-surfaces hub.
- Read the climate for the base and material. In hard-freeze regions a flexible paver or stone system over a free-draining base tolerates frost movement better than a rigid slab — and the base is deepened so frost cannot heave a unit into a lip. Match the assembly to the freeze depth and the soil.
- Confirm the base, slope, and flush joints for the surviving material. Every option that remains still needs a compacted base, a gentle running and cross slope, and units set flush with locked joints. If the subgrade or grading can't deliver that, the prep is excavation, base-building, and re-grading — regardless of which material you chose.
Run honestly, this tree almost always returns a single defensible material — and an installer who proposes a narrow, smooth, or steep path, or skips the base on a walkway, is the red flag.
Not sure which surface keeps your path flat and safe?
Tell us how the walkway is used and we will match a vetted installer who sets the right width and slopes, picks a grippy surface, and explains why the others don't fit — in writing.

Why Walkways Heave, Settle, and Catch a Toe — and How the Base Stops It
The most common walkway failures trace back to base, frost, slope, and edges, and all are preventable on installation day — each paired below with its mechanism, cause, and named prevention.
Lippage and Trip Hazards: Units Out of Plane
A trip hazard is a flatness failure: one unit heaves or settles above its neighbor, leaving a lippage lip that catches a toe, worst at night. It comes from an un-compacted base, frost heave, or a unit never set flush in the first place. The prevention is upstream: a true compacted base, every unit set flush at install, and locked edges and joints so the surface stays continuous as the ground moves.
Frost Heave: Trapped Water That Lifts a Unit
Frost heave is the cold-climate signature on a path: water trapped in or under the base freezes, expands, and lifts a unit or a slab section, then drops it unevenly on the thaw, creating exactly the out-of-plane lip a walkway must avoid. The prevention is a free-draining angular base, deepened for the local freeze depth, that lets water move down and out instead of pooling and freezing in place.
Hard to Walk and Slick: A Slope and Surface Problem
A path that is hard to walk or slick is a slope-and-surface failure: too steep a running slope, too much cross slope, or a smooth surface sheds people and turns dangerous when wet. The prevention is holding the gentle slope limits — about 1% to 2% cross slope and a limited running slope on an accessible route — and choosing a textured, grippy surface from the start.
Spreading and Settling Edges: An Edge and Drainage Problem
The fourth failure — units creeping at the borders, joints opening, and edges settling — is an edge-restraint and drainage problem, caught at the Readiness Gate. A continuous edge restraint, locked joints, and a surface pitched to shed water remove it. If a walkway has already failed, the path is diagnosis-first re-leveling of the affected units — and if the base is the cause, a rebuild over a correct base rather than repeatedly resetting the same lip. Where the path ties into a raised structure, the equivalent repair lives under deck repair.
Common Walkway Installation Mistakes, Consequences, and Prevention
Most walkway failures are the same handful of shortcuts, each with a predictable consequence and a known prevention. Naming them is how you spot a corner being cut before it becomes a trip hazard in the dark.
| Mistake | What it causes | The prevention |
|---|---|---|
| Units not set flush | Lippage between units — the classic trip hazard | Set every unit flush; hold lippage to a minimum |
| Path too narrow | People pushed onto the lawn; not wheelchair-usable | Set at least 36" clear; wider for passing/access |
| Un-compacted base | Units settle into lips and rocking spots | Build a base in compacted 2"–4" lifts |
| Too much running or cross slope | Hard to walk or roll; slick when wet | Hold gentle slopes (~1%–2% cross) for access |
| Smooth surface | A slick path in rain, snow, and frost | Use a textured stone, paver, or broom-finished concrete |
| No edge restraint | The field creeps, joints open, edges settle | Lock the perimeter with a continuous edge restraint |
| Shallow base in a freeze region | Frost heaves a unit into a trip lip | Deepen the free-draining base for the local freeze depth |
Every row is a documented hazard or re-do trigger — which is why "we set every unit flush, to a usable width, on a compacted base, in writing" is the most valuable sentence in a walkway quote.
Choosing the Walkway Surface for the Use — and the Spec That Rates It
The best surface for a walkway is matched to how it is used, its traction needs, and its climate, and every option carries a property that predicts how it holds up underfoot — which is why buying on the showroom sample alone lands a path that catches a toe or turns slick.
Behavior Underfoot by Walkway Material
Each material is judged on the properties that decide its path life — how flush it stays, wet traction, and freeze behavior — so match those to how people use the walkway.
- Concrete pavers in textured faces give wet traction and a flexible, individually re-levelable field — strong on accessible routes and in freeze climates over a proper base, where any settled unit is lifted and reset flush. See pavers.
- Brick pavers bring a traditional path look and the same flush-and-re-level behavior; choose paving brick rated for freeze, not reclaimed wall brick that can spall. They pair with a matching patio.
- Flagstone grips strongly with its natural cleft and suits informal paths; dry-laid it flexes with frost, and each stone must be set level to avoid a rocking trip point. See natural stone.
- Poured concrete is judged on its broom finish for traction and its joint plan for cracking; its flatness is poured in, with no units to settle, but a heaved slab is harder to fix invisibly. See concrete.
- Stepping stones and gravel suit casual garden paths and are the most forgiving and cheapest to refresh, but are not an accessible continuous surface and need each stone set level and the gravel contained.
Matching the Spec to the Path
Use context overrides preference. An accessible route needs a continuous surface, a minimum width, and gentle slopes; a high-traffic entry wants the highest wet traction and an even, generous surface; a freeze-climate path needs a flexible set over a deep base; a casual garden path can use stepping stones or gravel. Pick the spec for the use first. To weigh paver, brick, and stone makers before you commit, see our brand directory.

What Actually Drives the Cost of a Walkway Installation
A walkway quote is not a flat per-square-foot rate; the headline number a low bid leads with hides the items below, ranked by how much they move the total.
The Cost Drivers That Move the Total Most
- Length, width, and layout. The biggest swing on most paths — a longer, wider, or curving walkway with steps and turns is more excavation, base, material, and skilled cutting than a short, straight run, and width set for accessibility raises the area.
- Excavation and base depth. Building a compacted base to soil and climate depth, deeper over clay or in freeze regions, is real machine or hand time and stone that a thin, leveled-by-eye base skips — and the first thing a low bid trims under the surface.
- Material and finish. The surface sets the baseline — flagstone, brick, textured pavers, or broom-finished concrete all cost differently, and the slip-resistant finish and flush setting are not where to economize on a path.
- Site access and grading. A path through tight side yards, around obstacles, or up a grade adds hand-work and grading; an accessible route on a slope may need careful layout or a gentle ramp the flat site avoids.
- Steps and grade changes. Where a path climbs, steps or a ramp are slow, exacting, code-aware work priced separately from the field, and a grade change may need a retaining wall to hold it.
- Edge restraint and jointing. A continuous edge restraint and a hardening polymeric joint fill are standard on a lasting paver path — cheap insurance against creeping edges and lippage the lowest bid tends to omit.
- Lighting and drainage details. Path lighting for safe night use and any drain or channel where the route crosses a low spot are real line items beyond the surface itself.
- Removal and disposal. Tearing out an old, heaved path is labor plus haul-away — and removal often exposes base or drainage problems that change scope mid-job, which is why it belongs in the written quote up front.
Because these drivers swing so widely, the only honest number comes from an on-site assessment. Compare what moves the price across the category in our cost guides and hardscape cost ranges so you can read a quote critically.
Get an itemized scope, not a headline rate.
A vetted installer prices the excavation, base, surface, edging, and any steps as separate lines — so you see the whole job, free and with no obligation.
The Walkway Installation Process, Step by Step
A professional walkway build runs the same disciplined sequence every time, and each step exists to prevent a specific failure. The six steps below are the full arc from layout and width to the final walkthrough.
Layout, Width, and Grading Plan
The installer marks the path, sets a usable clear width and any accessible-route minimum, establishes finished elevations, and plans a gentle running and cross slope so water sheds to the side. Width, slope, and drainage are decided here against the Readiness Gate — not after the surface is down.
Excavation to Firm Subgrade
Topsoil and soft organics are dug out to firm, undisturbed subgrade at a depth that accounts for the surface, the bedding course, and the base. Under-excavating to save labor is the root of later settling and lippage, so the depth is verified, not estimated.
Base in Compacted Lifts
Over soft or clay soil a separation fabric is laid, then angular crushed aggregate is placed and compacted in 2" to 4" lifts to a depth matched to the climate, each lift compacted before the next, building a free-draining foundation already pitched to shed water to the side.
Bedding and Flush Setting
A thin, screeded course of coarse sand is struck flat to receive the units, and pavers or stone are set flush with one another to the pattern, with clean cuts at curves and edges. Holding every unit in plane here is what prevents the lippage that catches a toe later.
Edge Restraint, Joints, and Steps
A continuous edge restraint locks the perimeter, the field is compacted to seat the units, and joints are filled and locked with polymeric or jointing sand; any steps or grade transitions are built to a safe, uniform rise. A poured path is instead jointed with control joints at this stage.
Drainage Check, Cleanup, and Walkthrough
The installer confirms the path sheds water to the side rather than puddling, sets any path lighting or drain, cleans the site, and walks the walkway with you to check for flush joints, review the set or cure time, and explain joint-sand and surface care.
Skip or rush any one of these six steps and the failure it was meant to prevent shows up later — which is why a vetted installer treats the sequence as fixed, not optional, on a path people walk in the dark.
Talk through your project — free.
A free consultation and a written, itemized quote from a vetted installer. No pressure, no obligation.
Walkway Installation Glossary
The terms below recur in every walkway quote, spec sheet, and warranty — each defined as its working meaning on an actual job site, so you can read a scope and judge whether it is complete.
- Trip hazard
- Any out-of-plane edge on a path that can catch a toe — most often a unit heaved or settled above its neighbor. The defining failure a walkway is built to prevent, worst in the dark.
- Lippage
- The height difference between two adjacent units' edges. Held to a minimum by setting every unit flush, because even a small lip becomes a trip hazard on a walking surface.
- Clear width
- The usable width of the walking surface — commonly at least 36 inches residential, wider for passing or an accessible route — the dimension that decides whether people stay on the path.
- Accessible route
- A continuous path built to ADA-style guidance for minimum clear width, passing space, and limited slope, so a wheelchair, walker, or stroller can use it.
- Running slope
- The gradient along the length of the path. Kept gentle, and limited on an accessible route, so the walkway is easy to walk and roll and doesn't turn into a ramp.
- Cross slope
- The slight fall across the width of the path — commonly about 1% to 2% to one side — that sheds water without making the surface hard to walk on.
- Compacted base
- The angular crushed-stone layer beneath the path, built and compacted in lifts to hold units even and drain water. Lighter than a driveway base, but never skipped.
- Bedding sand
- The thin, screeded course of coarse angular sand that units are set into for flush, fine leveling — a setting bed only, never a way to build grade.
- Edge restraint
- The continuous perimeter lock that stops a sand-set path from creeping outward, keeping joints tight and units in plane so lippage doesn't start at the borders.
- Polymeric sand
- Jointing sand blended with a binder that hardens when wetted, locking path joints against weeds and washout so the surface stays tight and even.
- Control joint
- A tooled or saw-cut groove in a concrete walkway that directs the inevitable shrinkage crack into a planned line instead of heaving a trip edge across the path.
- Freeze-thaw
- The cold-climate cycle of water freezing and expanding under the path, then thawing — the force that heaves a unit out of plane into a trip lip over repeated winters.
Accessibility Guidance, Warranty Conditions, and When a Walkway Needs a Permit
A walkway interacts with accessibility, drainage, and safety, and the conditions that protect it are as much about width, slope, and flatness as the surface — most disputes are not about the stone but about a lip, a pinch, or a puddle.
Warranty and Workmanship Conditions That Hinge on the Build
The conditions are specific and verifiable: the path excavated to firm subgrade and built on a compacted base; units set flush with minimal lippage; a usable clear width and gentle slopes held; an edge restraint and locked joints on a sand-set path. An installer who skips the base or leaves units out of plane has built the trip hazard in before you notice. Ask in writing that the work meet these conditions and name a workmanship guarantee — that document is what a re-level claim is judged against, and one more reason the cheapest quote is rarely the cheapest walkway.
Accessibility and Slip Guidance
A walkway that serves an entry or a public-facing path often falls under accessibility expectations. ADA-style guidance covers a minimum clear width, periodic passing space, limited running slope, and a shallow cross slope so the route works for wheelchairs, walkers, and strollers — and the slip-resistance of the surface is part of safe use. Even on a private path these are sound targets, because a narrow, steep, or slick walkway excludes people and invites falls. A reputable installer treats width, slope, and traction as design inputs rather than afterthoughts.
When a Walkway Permit Applies
Permits enter the picture for paths more often than people expect when the work goes beyond a simple surface. Grading that alters how water leaves a property, impervious-coverage limits, work in a drainage easement or near a property line, and steps or a ramp that climb a grade can each trigger review; an accessible route on a commercial-adjacent property may carry its own requirements. A reputable installer tells you when a permit or accessibility rule applies rather than working around it, because a path that fails a grading or access rule can become an expensive correction — and a grade-change that needs a retaining wall carries its own engineering and permit.
A Real Walkway Installation Decision
One representative scenario shows why flatness and width decide everything: how the path is used and the freeze, not the look, drove every call below.
How to Vet a Walkway Installer
Most walkway failures are flatness, width, slope, and base failures, so the installer matters more than the stone brand. These questions separate a crew that builds safe, even paths from one that lays units on dirt.
- They set a usable clear width, not the narrowest line
- An installer who doesn't ask how the path is used is guessing at width. Ask the clear width and whether it meets an accessible minimum — a real answer names at least 36 inches, wider for passing or access, not "as wide as the stone runs."
- They set every unit flush to kill lippage
- Ask how they keep the surface even and prevent trip lips. A credible answer involves a true base, careful flush setting, and locked joints — not "it'll settle in," which is how lippage starts.
- They hold gentle running and cross slopes
- Ask how the path drains and how steep it runs. The right answer states a slight cross slope around 1% to 2% and a limited running slope for access, not a vague "it'll run off to the side."
- They build a compacted base, even on a path
- Ask the base depth and how they compact it. A pro names a base built in lifts with a plate compactor and deepened for frost — not laying units straight on graded soil because "it's just a walkway."
- They choose a slip-resistant surface and lock the edges
- Ask about wet traction and how the perimeter is restrained. A credible answer names a textured surface and a continuous edge restraint, the details that keep a path grippy and from creeping.
- They put the scope and a workmanship guarantee in writing
- Ask for the full scope, dimensions, any steps, and the labor warranty in writing before work starts. A crew willing to name a workmanship guarantee — and to return if a unit settles into a lip — is accountable for the build, not just the material the maker covers.
Why Route Your Walkway Installation Through Pro Work Home Surface
Pro Work Home Surface is not a contractor and does not build your walkway — we are a national authority on home surfaces that matches homeowners with vetted local installers and holds them to a published bar.
- A free consultation and an itemized written scope
- Every connection starts with a no-obligation consult and a written quote that lines out excavation, base, surface, edging, and any steps separately — so you read the whole job, not a headline rate.
- A real vetting standard, applied before we connect you
- Installers are screened on what decides a walkway's safety and life: whether they set a usable width, hold units flush, keep the slopes gentle, and build a compacted base — rather than laying units on graded dirt.
- Flat, accessible, and slip-aware, every time
- The path is set to a usable clear width — at least 36 inches, wider for access — with units flush to minimize lippage, a gentle 1% to 2% cross slope, and a textured surface, all on a compacted base.
- National coverage, local crews
- We match you with installers in your area nationwide, so the standard is consistent even though the crew is local — whether your project is a short garden path or a full front-entry walkway.
Walkways are one project within outdoor surfaces, which is one of eight categories we cover across home surfaces. If your project also touches a patio, a driveway, a pool deck, or a retaining wall to manage the grade, the same base-and-drainage standards apply — compare what moves the price in our cost guides, weigh paver and stone makers in our brand directory, and start from the outdoor-surfaces hub or the full range of home surfaces.
Brands & Material Authority
Quality and construction drive long-term performance more than the label. These are widely respected names in this category:
- Trex
- TimberTech
- Belgard
- Techo-Bloc
- Unilock
- Fiberon