Living-room walls are the largest, most-seen, hardest-working interior surfaces in a home — and three demands the room makes at once decide their finish: raking light that exposes every flaw in a flat wall, the reflected sound that turns an open plan into an echo chamber, and the daily contact that wears the lower wall and corners. Get the drywall finish level right for the light, break up enough hard surface to tame the sound, and protect the contact zone, and the room reads calm, quiet, and expensive; miss any one and a beautifully painted wall looks lumpy by mid-afternoon, sounds harsh, or scuffs within a year. The benchmark for a smooth living-room wall under critical light is a Level 5 finish, and the lever for the echo is a paneled or acoustic surface rated by its NRC. Get a free consultation and a written, itemized scope from a vetted installer that names the finish level, the acoustic plan, and how heavy mounts anchor into framing before any board goes up.
What Living-Room Walls Actually Demand — Light, Sound, and Daily Contact at Scale
The living room asks more of its walls than any other room, and for different reasons than people expect. The demands are not about moisture or slip — they are about scale, light, sound, and daily life, and each one shapes the right finish and each has a spec that predicts it.
Raking Light: The Most Underrated Demand
Living rooms have the biggest windows in the house, which means the most raking light — daylight that strikes the wall at a shallow angle and turns every ripple, fastener dimple, and seam into a visible shadow. A finish that looks flawless under flat overhead light can look terrible when the afternoon sun rakes across it. This is why the drywall finish level matters more here than in any bedroom or hallway, and why smooth, high-end living-room walls are specified to a higher finish level than the rest of the house. Glossier paint sheens magnify the same flaws, which is why a flatter sheen forgives an imperfect wall and high gloss broadcasts it.
Reflected Sound: The Demand Nobody Names Until It Is Wrong
Open-plan living rooms with hard floors, large windows, and tall ceilings are reverberant — sound bounces off the hard surfaces, speech gets less intelligible, and the TV has to be turned up. The walls are the largest surface available to fix it, which is why slat and wood paneling and dedicated acoustic panels have become a living-room staple: they add warmth and tame the echo at the same time. People live in a hard, flat, all-drywall room for a year, blame the TV speakers, and never realize the walls are reflecting all the sound. The number that predicts how much a surface helps is its Noise Reduction Coefficient (NRC).
Durability at Chair Height: The Demand That Shows First
These are the walls a sofa backs into, kids brush past, furniture scuffs, and a TV and shelving anchor to. Large fields of wall take wear, and one band takes the most: chair height — roughly the 32" to 36" zone where furniture backs, chair rails, and hands reach, the exact height a sofa or dining chair rubs the wall. A finish and a substrate built for that daily contact — robust corner protection, paint or paneling that cleans up, anchoring that holds real weight — outlasts one chosen on looks alone. The right living-room strategy balances all three: a finish that survives the light, a surface that survives the family, and enough soft or broken-up area to survive the acoustics.
Where Living-Room Walls Go Wrong — Lumpy, Loud, and Scuffed
The signature living-room failures each appear at a different moment — one at a certain time of day, one after a year of living in the room, one after the first season of use — and understanding them is how you avoid paying for them.
The Lumpy Wall Under Raking Light
A living-room wall finished to an ordinary level — fastener spots and seams taped and sanded, but the broader field left as bare board texture — looks fine under overhead light. Then the sun drops to a low angle through the big windows, rakes across the wall, and every joint, every screw dimple, every slight ripple casts a shadow. The wall that read smooth at noon reads lumpy at four o'clock. This is not bad painting; it is the wrong finish level for the light the room actually has. The fix — a full skim coat over the entire surface, a Level 5 finish — has to happen before paint, not after.
The Echo Chamber
A large living room finished entirely in hard, flat surfaces — drywall, glass, hard floor — reverberates. Speech sounds harsh, the TV never quite gets intelligible, and the room feels louder than it should. Broken-up wall texture, wood slats, or acoustic treatment on even one or two walls changes the room's sound dramatically, because the walls are the biggest surface available to absorb reflected sound rather than bounce it.
The Wall That Can't Hold the TV or the Shelves
Living-room walls carry the heaviest mounted loads in the home — a large flat-panel TV, floating shelves, heavy art. Lag bolts into drywall alone, or a mount that misses the studs, ends with the load pulling out of the wall. Real weight needs fastening into the framing, and sometimes blocking added behind the drywall before the finish goes on — planned before the wall closes, not retrofitted after.
The Best Wall Finishes for a Living Room, Ranked by What the Room Needs
The living room rewards a layered approach, so the ranking below is not one winner but a matrix — each finish against the three demands (light, sound, contact) and the job it does best. Most living rooms combine two or three: a flawless smooth base on the light-catching fields, plus texture or paneling where you want durability, warmth, or quiet.
| Finish | Under raking light | Acoustic effect | Durability at chair height | Best job in the room |
|---|---|---|---|---|
| Smooth drywall at Level 5 | Flawless — the reason it exists | Reflective, no absorption | Paint cleans up in a washable sheen | The light-catching main fields you see first |
| Wood panels & slat walls | Texture reads intentional, not flawed | Softens sound; real absorption with a backer | Takes contact better than paint | The multi-tasker — warmth, sound, and a feature at once |
| Acoustic panels / acoustic-backed slat | Matte, non-reflective face | NRC up to ~0.90+ — the targeted fix | Fabric or felt face, vacuum-clean | The echo cure for a reverberant open plan |
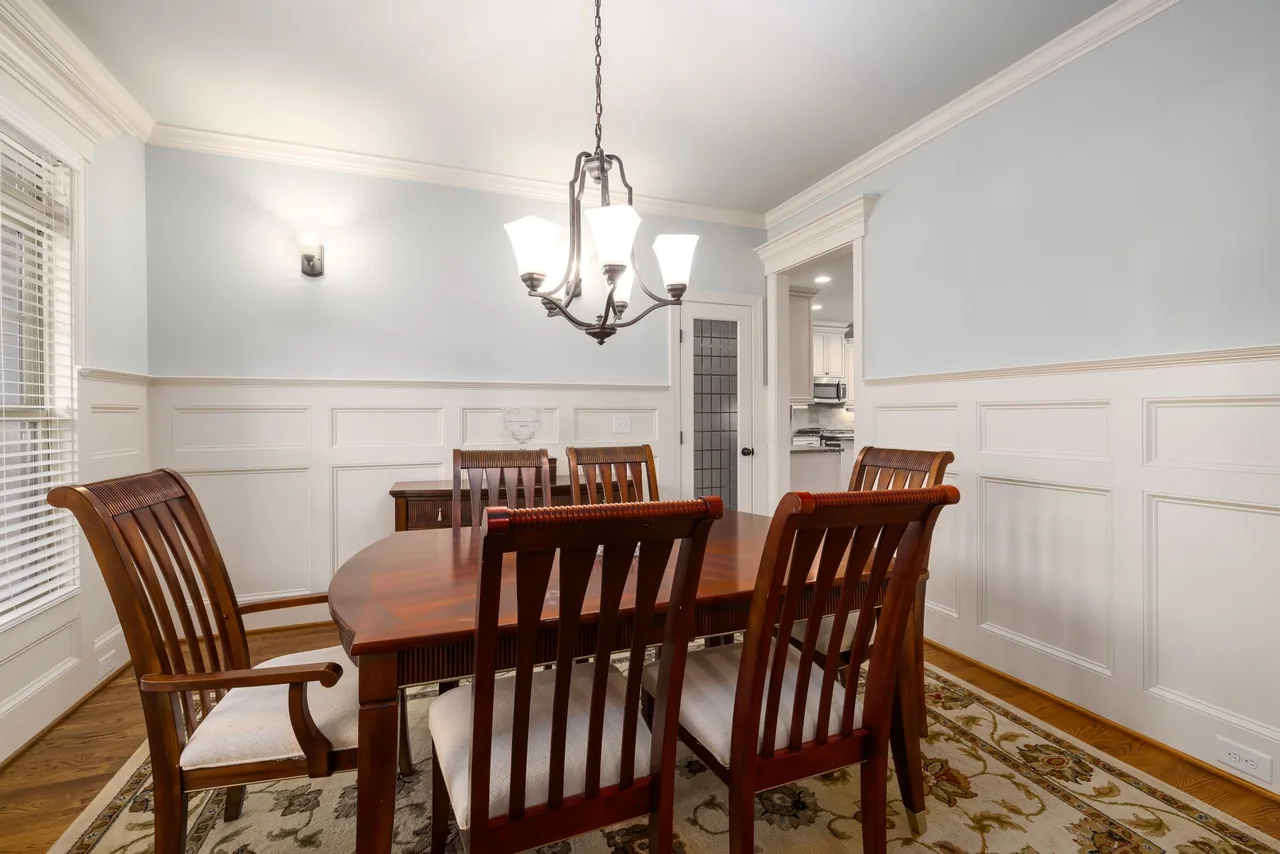
| Wainscoting | Paneled shadow reads deliberate | Minor break-up of the lower wall | Best — armors the exact contact band | Protecting the 32"–36" chair-height zone |
| Shiplap | Hides minor flaws better than smooth paint | Slight break-up of the reflective plane | Durable, forgiving field for a busy room | A textured feature or whole accent run |
| Stone veneer | Dramatic, light-and-shadow face | Hard and reflective | Essentially permanent indoors | The fireplace or feature-wall anchor |
Most living rooms use two or three of these together: Level 5 smooth on the light-catching fields, a paneled or slat feature for warmth and acoustics, and wainscoting or a durable finish in the contact zone. See the full range from the walls hub, and if you want a single statement wall, the accent-wall approach scopes it to one surface. Compare what each finish costs across a large room in the cost guides.
The Living-Room Wall Fit Test: Six Checks Before Any Finish Wins
A living-room wall is decided on the room's real conditions, not the swatch. Each of the six checks below has a documented failure attached to ignoring it, and a wall that fails any one is the wrong plan no matter how it looks the day the painters leave. Call it the Living-Room Wall Fit Test: pass all six and the room reads calm, quiet, and durable; miss one and you are living with a lumpy, loud, or scuffed wall.
- 1. Light exposure
- The finish level must match the light the wall actually gets. A wall under big-window raking light needs a Level 5 skim coat to read smooth; a wall away from harsh light can live with Level 4. Spec the finish to the light, not the budget — this is the single most common living-room regret.
- 2. Reflected-sound load
- A large, open, hard-surfaced room reverberates, and the walls are the biggest lever to fix it. If the room echoes, at least one wall wants a sound-absorbing surface — slat, wood, or acoustic panels rated by NRC — because leaving every surface hard guarantees a room you fight forever.
- 3. Mounted-load anchoring
- A large TV or loaded shelving must fasten into the framing, ideally with blocking added between studs before the wall is finished. Lag bolts into a bare drywall skin, or a mount that misses the studs, ends with the load on the floor — plan the media wall early so the anchoring is built in.
- 4. Contact-zone protection
- The lower wall and outside corners take the daily wear. Wainscoting or durable paneling in the 32" to 36" chair-height band, plus robust corner bead, keeps a high-traffic room looking finished — the detail that outlasts a finish chosen on looks alone.
- 5. Board thickness and type
- Standard walls use 1/2" gypsum board; 5/8" board adds stiffness, sag resistance, and better sound performance. On a long living-room wall you want flatter and quieter, specifying the heavier board is a cheap upgrade that pays off under light and sound both.
- 6. Scope — one statement or a whole room
- A single dramatic wall is an accent-wall decision; a cohesive durable, quiet, light-stable room is a whole-wall strategy. Deciding the scope before pricing keeps the plan coherent and stops a feature from being tacked onto walls that were never solved for light or sound.
Three of these six — the finish level for the light, the acoustic plan, and the anchoring built in before the wall closes — are exactly the corners a low bid rounds off, because they cost labor and forethought a headline rate skips. That is why the fit test is non-negotiable: every check predicts a specific way the room can win or lose.
Want the finish level, acoustics, and anchoring confirmed before you buy?
We match you with a vetted installer who reads the room's light and sound, names the finish level and acoustic plan, and details the anchoring in a written scope — before you commit to a color or a price.
The Specs That Matter for Living-Room Walls, and What to Look For
The quality of a living-room wall comes down to a few specific standards — the right finish level, the right acoustic rating, the right anchoring, and the right board. Before the install sequence, it helps to see each deciding spec on its own — what it measures, why it matters in this room, and the number or detail to demand.
| Spec | Why it matters in a living room | What to look for |
|---|---|---|
| Drywall finish level | Raking light from big windows exposes every flaw below the top level | Level 5 under critical light; Level 4 for flat paint away from harsh light |
| Acoustic rating (NRC) | An open plan reverberates; the walls are the biggest absorption surface | A panel NRC near 0.70–0.90+ for a noticeably quieter room |
| Sound-blocking (STC) for shared walls | A wall to a media room or a loud space passes noise through | A higher-STC assembly — heavier board, insulation, resilient channel |
| Board thickness & type | A long wall you want flat and quiet benefits from more mass | 5/8" board over 1/2" for stiffness, sag resistance, and sound |
| Anchoring & blocking | TVs and floating shelves are the heaviest mounted loads in the home | Blocking between studs before finishing, fastening into framing |
| Corner protection | Outside corners take furniture, vacuums, and traffic first | Durable corner bead in the traffic path, not paper tape alone |
Every row is a spec-sheet number or a documented detail, not a matter of taste — which is why "we finish for the light the room has and anchor into framing, in writing" is the most valuable sentence in a living-room quote. The full finish-level system lives under drywall, and the acoustic and shared-wall assemblies alongside wall installation.
Reading an Acoustic Panel's NRC for a Living Room
Of all these specs, the one buyers misread most is the acoustic rating, because a panel's NRC is not a promise about the whole room — it is a rating of that one surface. Understanding how the number behaves is what turns a hopeful purchase into a measurable reduction in echo.
Panel NRC Versus Whole-Room Reverberation
A single panel rated 0.85 NRC absorbs most of the sound that strikes it, but the room's overall liveliness depends on how much total absorptive area you install against all the hard, reflective area — the glass, the drywall, the hard floor. One small panel on a big reverberant wall barely moves the room; a full feature wall of the same panel changes it audibly. The NRC tells you the surface's efficiency; the coverage tells you the result.
Why Coverage Area Multiplies the Effect
Absorption adds up by area, so doubling the treated square footage roughly doubles the sound the walls soak up. This is why a living-room acoustic plan is specified as both a panel NRC and a wall area — a high-NRC panel across an entire media wall, not a token strip — and why treating one or two full walls beats scattering small panels around the room.
Where the First Panel Earns the Most
The highest-return placement is the largest flat wall facing another hard surface — typically the media wall opposite a wall of windows or a hard floor — because that is where sound reflects back and forth most. Put the first, largest run of high-NRC panel there, on the wall the seating already faces, and the same material buys more measurable quiet than it would anywhere else in the room.
How a Living-Room Feature Wall Is Installed — the Room-Specific Sequence
Installing living-room walls well is mostly doing the unglamorous finish work at scale and planning the anchoring and acoustics before the wall closes. The six steps below are the full arc for a paneled or acoustic feature wall — the most involved living-room job — each aimed at the room's real demands.
Read the Room's Light, Sound, and Loads
The installer reads how much raking light the walls get, whether the open room reverberates, and what will mount to the wall — a TV, floating shelves, heavy art. Finish level, acoustic plan, and anchoring are decided here against the room's real conditions, not chosen from a swatch, before any board or panel is ordered.
Add Blocking and Set the Board
Where a TV or shelf will hang, blocking is added between the studs so the mount fastens into solid backing, not a bare drywall skin. On a long wall you want flat and quiet, 5/8" board is set for stiffness and sound — the moment to build in the anchoring and the mass, because retrofitting either into a finished wall is far more limited.
Skim the Light-Catching Fields to Level 5
After the board is up and the seams are taped, the fields that catch the raking light get a full skim coat — a thin layer of compound troweled over the entire surface, then sanded dead-flat — to reach a Level 5 finish. On a large room with big windows this is real labor and the step where a smooth wall is won or lost.
Mount the Acoustic Backer and Set the Level Line
For a sound-absorbing feature, the acoustic backer goes up first where the system uses one, then a dead-level reference line is struck across what are usually long living-room walls. The layout — board direction, seam placement, slat spacing — is planned so the feature reads square and continuous before anything is fixed.
Fasten the Paneling into Framing
The panels or slats are fastened into the located studs with consistent spacing and clean alignment, the rhythm held plumb across the run. The longer the wall, the more the layout and level line decide whether the result looks precise — an off-level start compounds visibly across a wide living-room wall.
Detail the Terminations, Corners, and Walk It
The edges finish the job: clean junctions at the corners and ceiling, durable corner bead in the traffic path, and wainscoting or trim capping the contact zone where it applies. The site is cleaned and the installer walks the room with you to confirm the wall reads finished under the room's own light and sounds right in the space.
Skip or rush any one of these six and the failure it was meant to prevent shows up later — a lumpy field, a load on the floor, an echo that never leaves — which is why a vetted installer treats the sequence as fixed, not optional. The broader method set lives under wall installation, and the skim-coat detail under wall finishing.
Common Living-Room Wall Mistakes, Consequences, and Prevention
Most living-room wall failures are the same handful of shortcuts, each with a predictable consequence and a known prevention. Naming them is how you spot a corner being cut before it is buried in your wall.
| Mistake | What it causes | The prevention |
|---|---|---|
| Ordinary finish on a light-flooded wall | Every seam and screw dimple casts a shadow by mid-afternoon | Full skim coat to Level 5 on walls under raking light |
| All-hard, all-flat open-plan room | A reverberant echo chamber you fight forever | Slat, wood, or acoustic panels (rated by NRC) on one or two walls |
| Heavy mount into bare drywall | The TV or loaded shelf pulls out and ends on the floor | Blocking between studs before finishing; fasten into framing |
| No contact-zone protection | Scuffs and dents in the 32"–36" band within a year | Wainscoting or durable paneling plus robust corner bead in the traffic path |
| High-gloss paint on an imperfect wall | The sheen magnifies every ripple the way raking light does | A flatter sheen on any wall not finished flawlessly |
| Acoustic afterthought retrofit | Limited options and a compromised result added after the fact | Plan the acoustic wall and its backer before the walls are finished |
| Off-level start on a long paneled wall | The error compounds visibly across the whole run | Strike a dead-level reference line before the first board or slat |
Every row is a documented way a living-room wall disappoints — which is why "we finish for the light, solve the acoustics, and anchor into framing, in writing" is the most valuable sentence in a living-room quote.
Which Wall Finish Is Right for Your Living Room?
The right living-room finish is the output of a short chain of honest answers about the light, the loads, the sound, and the wear the space takes. Walk it in order; each branch eliminates options the room rules out, and what survives is your defensible plan.
- How much raking light do the walls get? Big windows and low afternoon sun mean the light-facing walls need a Level 5 skim-coat finish to read smooth. Walls away from harsh light can live with Level 4. Spec the finish to the light first — it is the corner most worth not cutting.
- Does the room echo? If speech or audio sounds harsh in a large, open, hard-surfaced room, plan a slat or wood wall or acoustic panels on one or two walls to absorb reflected sound. The walls are the biggest lever you have — leaving them all hard guarantees the echo stays.
- What is mounting to the wall, and how heavy? A large TV or floating shelves need anchoring into framing, ideally with blocking added before the wall is finished. Decide the media and shelving layout early so the anchoring is built in, not retrofitted into a closed wall.
- Where does the wall take the most abuse? The lower wall and outside corners take the daily contact. If the room is high-traffic, wainscoting or durable paneling in the 32"–36" chair-height band, plus robust corner bead, keeps it looking finished for years.
- Do you want one statement or a whole-room feel? A single dramatic wall is an accent-wall decision, scoped to one surface; a cohesive durable, quiet, light-stable room is a whole-wall strategy. Decide the scope before you price the materials so the plan stays coherent.
Run honestly, this tree almost always returns a single defensible plan — and an installer who paints four walls flat and calls it done regardless of the room's light and sound is the red flag.
Not sure what your living room actually needs?
Tell us how the room lives — its light, its sound, its loads — and we will match a vetted installer who names the right finish for the space, solves the echo, and puts it in writing.
Installation Reality in a Living Room
Installing living-room walls well is mostly about doing the unglamorous finish work at scale and planning the anchoring and acoustics before the wall closes. The realities differ by what you are after.
Smooth Painted Walls: The Work Is in the Finishing
For smooth painted walls, the difference between an ordinary and a flawless living-room wall is the full skim coat — troweling a thin layer of compound over the entire surface, then sanding it dead-flat, to reach a Level 5 finish. On a large room with big windows this is real labor and the step where quality is won or lost. Texturing — knockdown, orange-peel — is a different path that hides imperfection through texture instead of perfection; see wall texturing.
Paneling and Slat Walls: Layout Across Long Runs
For paneling and slat walls, the installer locates the studs, establishes level reference lines across what are usually long living-room walls, and fastens into the framing with consistent spacing and clean terminations at the corners and ceiling. The longer the wall, the more the layout and level line decide whether the result looks precise. Acoustic slat systems mount over their backer to the wall, adding the sound absorption the open room needs.
Anchoring: Plan Before the Wall Closes
For anchoring, the time to plan a TV or shelf wall is before the drywall is finished, when blocking can be added between the studs to give a solid attachment point exactly where the mount will go. Retrofitting an anchor into a finished wall is possible but more limited, which is why the media layout is a construction decision, not a decorating one.
Stone or a Heavy Feature: The Structural Job
For stone or a heavy feature, the fireplace or media wall is built over lath and into framing, with the wall confirmed to carry the weight — the most involved work in the room and the clearest case for a vetted installer. The broader method set lives under wall installation.
Talk through your project — free.
A free consultation and a written, itemized quote from a vetted installer. No pressure, no obligation.
Care and Longevity of Living-Room Walls
Living-room walls see the most daily life, so their longevity is about cleanability, contact protection, and a finish that ages gracefully under the room's light. Smooth painted walls clean up with a damp cloth in a washable sheen; a flawless Level 5 base stays looking smooth for years because there are no ridges for light to catch as paint ages. Wainscoting and lower-wall paneling absorb the scuffs that would otherwise mark the most-touched band of wall and wipe clean far more readily than flat paint.
Wood and slat walls keep their warmth with light dusting and, for oiled finishes, periodic re-oiling; the gaps in a slat wall collect dust and benefit from an occasional pass. Acoustic panels are largely maintenance-free beyond vacuuming the fabric or felt face. Stone veneer on the fireplace is essentially permanent and asks little beyond dusting.
The longevity story across all of them is the corners and the contact zone. The outside corners furniture and traffic hit, and the lower wall feet and pets reach, are where wear shows first — which is exactly why durable corner bead and a protected lower wall pay off in a living room more than anywhere else. When damage does happen — a dented corner, a scuffed panel, a crack at a seam — spot wall repair restores it cleanly when the original work was sound.
Ready for a living room that reads calm and sounds right?
We match you with a vetted installer who finishes for the room's light, solves the echo, and anchors the media wall into framing — starting with a free consultation and an itemized written scope, no obligation.
What Actually Drives the Cost of Living-Room Walls
A living-room wall quote is not a flat per-square-foot rate; the headline number a low bid leads with hides the items below, ranked by how much they move the total across a large, hard-working room.
- Finish level across the light-catching fields. The biggest swing on a smooth-wall room — a full Level 5 skim coat over large window-facing fields is real material and labor a Level 4 wall skips, and the exact item a low bid omits before the flaws show up in the afternoon light.
- Acoustic treatment and its backer. Slat, wood, or dedicated acoustic panels on one or two walls, with the backer they mount over, add material and skilled labor — the cost of curing an echo a hard, flat room would otherwise keep forever.
- Feature-wall material and structural prep. A stone or heavy paneled feature adds the material plus the lath, scratch coat, and blocking that carry it — a line item a plain painted wall never sees, and the priciest single element when it is stone.
- Anchoring and blocking. Adding blocking between studs for a TV and shelves before the wall closes is a small, cheap step at the right time — and a disruptive, limited retrofit if it is skipped and needed later.
- Contact-zone protection. Wainscoting or durable paneling in the chair-height band, plus upgraded corner bead in the traffic path, is finishing work beyond flat paint — the cost of a room that still looks finished after a year of use.
- Board upgrade for flatness and sound. Specifying 5/8" board over 1/2" across long walls adds material for a stiffer, quieter, flatter result — a modest cost that pays off under both light and sound.
- Wall size and ceiling height. Tall, open-plan living rooms have the most square footage of wall and the highest reach, so every step above scales with the room — the reason a great-room finish costs more than the same finish in a small den.
Because these drivers swing so widely, the only honest number comes from an on-site assessment. Compare what moves the price across the category in our cost guides, and see where walls sit among the eight categories we cover across home surfaces so you can read a quote critically.
Living-Room Wall Glossary
The terms below recur in every living-room wall quote, spec sheet, and warranty — each defined as its working meaning on an actual job, so you can read a scope and judge whether it is complete.
- Raking light
- Low, sidelong daylight from big windows that strikes a wall at a shallow angle and casts a shadow off every ripple, seam, and screw dimple — the condition that decides a living-room wall's finish level.
- Level 5 finish
- A full-surface skim coat over drywall, sanded dead-flat, that reads smooth under raking light — the standard for a high-end living-room wall the big windows hit.
- Level 4 finish
- Taped and sanded joints and fasteners without a full skim coat — acceptable for flat-painted walls away from harsh light, but exposed by raking light on a window wall.
- NRC
- Noise Reduction Coefficient — the fraction of sound a surface absorbs, on a 0 to 1 scale. The higher the panel's NRC, the quieter a reverberant open-plan room gets.
- STC
- Sound Transmission Class — how much sound a wall assembly blocks between rooms. A higher-STC wall (heavier board, insulation, resilient channel) keeps a media room's noise out of the living room.
- Acoustic panel
- A fabric-wrapped or felt panel, often with a slat face, engineered to absorb reflected sound and rated by its NRC — the targeted cure for a living room that echoes.
- Chair height
- The roughly 32" to 36" band where furniture backs, chair rails, and hands reach — the contact zone of a living-room wall that scuffs first and wainscoting protects.
- Blocking
- Extra framing added between studs behind the drywall to give a solid attachment point for a heavy TV or shelf, exactly where the mount will land — installed before the wall is finished.
- Corner bead
- The reinforcing edge — metal, vinyl, or paper-faced — that protects an outside drywall corner from the furniture, vacuums, and traffic that hit it first in a high-use room.
- Slat wall
- Vertical wood battens spaced over a backer — a living-room multi-tasker that adds warmth, reads as a feature, and, with an acoustic backer, absorbs reflected sound.
- Skim coat
- A thin, full-surface layer of joint compound troweled over a wall and sanded flat to erase texture and flaws — the labor that turns a Level 4 wall into a Level 5 one.
- Resilient channel
- A springy metal channel that decouples drywall from the framing to cut sound transmission — part of a higher-STC assembly on a wall shared with a loud space.
Standards, Warranty Conditions, and Our Living-Room Wall Bar
A living-room wall's result is a matter of standards and conditions, not luck — and most of what disappoints traces to the finish level, the acoustics, and the anchoring, not to the paint or panel itself.
Conditions That Hinge on the Install
The conditions are specific and testable: a finish level matched to the wall's light, a sound-absorbing surface where the open room reverberates, blocking behind any heavy mount, and durable protection in the contact zone. An installer who finishes a window wall to Level 4 or lag-bolts a TV into bare drywall has built in a failure before you notice. Ask in writing that the smooth fields be finished to the GA-published level the light requires and that heavy mounts anchor into framing — that document is what a callback, and the room's finished look, is judged against.
Our Living-Room Wall Standards
Pro Work Home Surface is not a contractor and does not finish your walls — we match you with vetted local installers and hold them to a published bar. These are the standards we expect on every living-room wall project we connect.
- Finish for the light the room has
- Walls under critical or raking light are finished to Level 5 — a full-surface skim coat — so the smooth result holds up under big-window daylight, not just under overhead light the day it is painted.
- Solve the room's acoustics, not just its look
- For a large, reverberant open-plan space, a credible installer recommends slat, wood, or acoustic treatment (rated by NRC) on the walls to tame reflected sound — addressing how the room sounds, not only how it looks.
- Anchor into framing, planned ahead
- TVs, floating shelves, and heavy mounts are fastened into the studs, with blocking added behind the drywall before finishing where the load demands it — never lag-bolted into a bare drywall skin.
- Protect the contact zone
- The chair-height band and the outside corners get durable paneling or wainscoting and robust corner bead where traffic warrants, so a high-use room still reads finished after years, not months.
A Real Living-Room Wall Decision
The clearest way to see why light and sound drive the living room is to walk through one representative decision where the room's conditions, not the homeowner's first instinct, set the spec.
How to Vet an Installer for Living-Room Walls
A living-room wall disappoints at the finish level, the acoustics, or the anchoring far more often than at the material — so the installer matters more than the swatch. These questions separate a crew that builds a living-room wall for the room's real conditions from one that paints four walls flat and leaves.
- They spec the finish level to the light
- Ask what finish level they will use on the window walls and why. A real answer names Level 5 for walls under raking light and a full skim coat — an installer who quotes one finish for the whole house is not reading the room's light.
- They have an answer for the echo
- Ask how they would quiet a reverberant open room. A credible answer names slat, wood, or acoustic panels rated by NRC on one or two walls — not "add a rug," which ignores the biggest surface in the room.
- They plan anchoring before the wall closes
- Ask how a large TV or floating shelves will be held. The answer should describe blocking between studs added before finishing and fastening into framing — not lag bolts into a finished drywall skin.
- They protect the contact zone
- Ask how the lower wall and corners will survive furniture and traffic. Wainscoting or durable paneling in the chair-height band and robust corner bead in the path are the details that keep a high-use room looking finished.
- They match board and assembly to the wall
- Ask whether they would upgrade to 5/8" board on long walls or build a higher-STC assembly on a wall shared with a loud space. An installer who considers the board and the cavity, not just the surface, is solving the whole wall.
- They put the scope and workmanship warranty in writing
- Ask for the full scope — finish level, acoustic plan, anchoring, and contact-zone detail — plus a labor warranty, in writing before work starts. A crew willing to name a workmanship guarantee, and to return if a seam cracks or a corner dents, is accountable for the install, not just the product.
Why Route Your Living-Room Walls Through Pro Work Home Surface
Pro Work Home Surface is not a contractor and does not finish your walls — we are a national authority on home surfaces that matches homeowners with vetted local installers and holds them to a published bar.
- Finished for the light the room actually has
- The window-facing fields are brought to a Level 5 skim coat so the smooth wall holds up under raking light, not just under the overhead light on the day it is painted — the flaw that ruins otherwise-good living-room walls.
- The echo solved at the biggest surface
- Where the open room reverberates, a slat, wood, or acoustic wall rated by NRC absorbs the reflected sound — using the walls, the largest surface available, to quiet the room rather than blaming the speakers.
- Heavy loads carried by the framing
- TVs, floating shelves, and heavy art anchor into the studs with blocking added before the wall closes — a solid, planned attachment point, never a lag bolt into a bare drywall skin.
- Built to still look finished in years
- The chair-height contact band and the outside corners get durable protection, so a high-use room keeps its finished look through daily life instead of scuffing within a season.
Every connection starts the same way: a free consultation and a written, itemized quote from a vetted installer, with no obligation. If your living-room project also touches wall finishing, texturing, or a single statement accent wall, the same standards apply — a feature can extend overhead to a ceiling treatment, and a calmer scheme pairs a quiet living room with restful bedroom walls. Compare what each finish costs in our cost guides, dig into the how-and-why in our guides, and start from the walls hub to see where your project fits among the eight categories we cover across home surfaces.
Brands & Material Authority
Quality and construction drive long-term performance more than the label. These are widely respected names in this category:
- James Hardie
- Metrie
- USG
- Sherwin-Williams
- Armstrong
- DPI