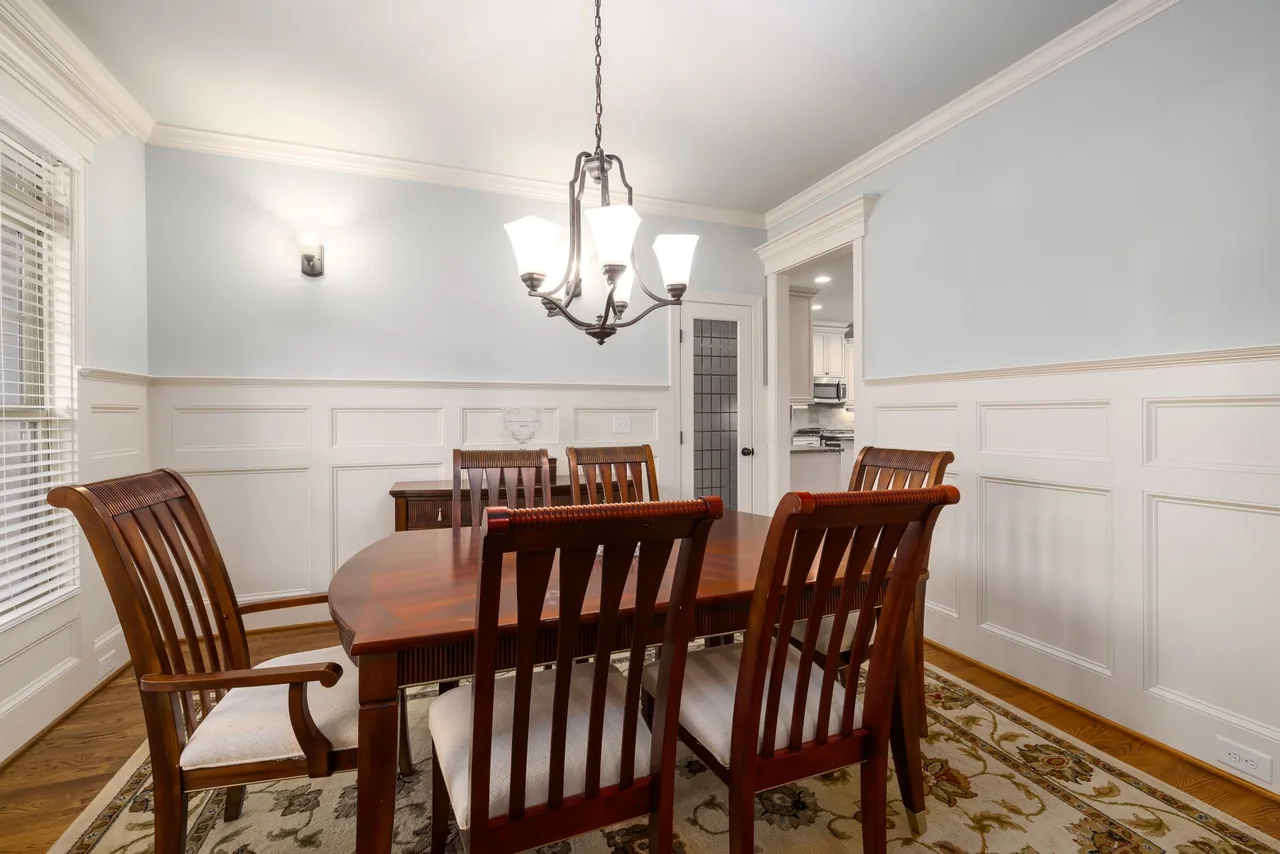
Wainscoting is decorative paneling applied to the lower portion of a wall and finished with a horizontal cap rail — often a chair rail — where it meets the painted wall above. Two things decide whether wainscoting looks architectural or looks like an afterthought, and the millwork itself is neither: the height and proportion, because a cap rail set wrong for the room or colliding with sills and switches reads off no matter how nice the panels are; and even panel spacing, because panels sized to divide the wall evenly are what make it read built-in rather than off-the-rack. Most wainscoting lands between 32" and 48" high, but the right number is set by the room's ceiling, windows, and switches — not a single rule. Get a free consultation and a written, itemized scope from a vetted carpenter before anything is cut — that document, which fixes the height to your room, is where wainscoting that looks right is decided.
Wainscoting Is a Proportion-and-Layout Job First, a Panel Job Second
The panel style everyone debates matters less than the height it's set at and how its panels divide the wall. What separates wainscoting that reads architectural from millwork that looks bolted on is the proportion planned to the room and the layout set before anything is cut.
Lower-Wall Millwork With Two Jobs
Wainscoting began as a practical wall protector and never stopped being one, and a credible carpenter treats both jobs as the point:
- It clads the lower wall — the zone that takes chair backs, scuffs, kicks, and bag bumps — with a hard, washable, repaintable surface that shields the most-abused part of the room.
- It gives the eye a clean horizontal line and a literal ledge at the cap rail, finishing the room with rhythm and detail.
- Because it stops partway up, it pairs with paint, wallpaper, or a different finish above the cap — which is why it reads as deliberate, layered design.
That dual nature — decorative above, protective below — is what separates wainscoting from a feature wall: it isn't trying to be the focal point, it's giving the room finish and durability where it's needed most.
Where Wainscoting Earns Its Keep
Wainscoting works in the high-traffic, formal, and transitional spaces of a home. It dignifies a living-room or dining-room wall, makes a hallway and staircase feel finished and protects them from constant brushing, and brings a calm, tailored backdrop to a bedroom. It's a natural fit for entries, mudrooms, and powder rooms, where the lower wall both gets abused and benefits from a wipeable surface. Pairing with a different finish above the cap is part of why it reads as layered design rather than a single cladding choice.
Height Is the Spec That Makes or Breaks It
The single most important decision is the height, and it's tied to the room, not a formula. Traditional chair-rail-height wainscoting runs about 32" to 36"; taller "high wainscoting" can reach roughly two-thirds of the wall. A common guideline ties the height to the ceiling — but the room's windows, switches, and ceiling height set the final number. Get it wrong and even beautiful millwork reads off in a way that's hard to name but impossible to unsee.
Where Wainscoting Fails — Wrong Height, Loose Panels, and Moisture
The most common wainscoting failures aren't structural — they're proportion and layout — and the structural ones are about fastening and wood movement. All are preventable before anything is cut.
Wrong Proportion and Uneven Panel Spacing
Run too high or too low for the ceiling, or with a cap rail that collides with window sills, light switches, and door casing, and the whole installation looks wrong. The spacing problem is where most raised-panel work goes wrong: the individual panels have to be sized to divide the wall evenly, with equal frame members between them, so a long wall and a short wall get different panel widths to keep the look balanced. Buy a fixed-size kit and force it onto a wall it doesn't divide cleanly, and you end up with a skinny half-panel in a corner that announces the whole thing was off the rack.
Loose Panels From Adhesive-Only Attachment
Wainscoting that's only glued to drywall, with no fastening into framing, loosens and pulls away over time — exactly the abuse zone where it gets bumped. The fix is fastening into studs or added blocking with construction adhesive plus finish nails, so the most-bumped wall in the house stays put.
Wood Movement and Moisture in the Wrong Material
Solid-wood raised panels that weren't allowed to move, or that went up before acclimating, can crack or split as humidity swings — because a raised panel must float in its frame rather than be locked tight. And in damp rooms, MDF wainscoting that gets repeatedly wet at the base swells and crumbles, since MDF has no moisture tolerance. None of these are design flaws in wainscoting; they're failures of height planning, fastening, and material choice for the room.
Wainscoting vs. the Other Wall Treatments
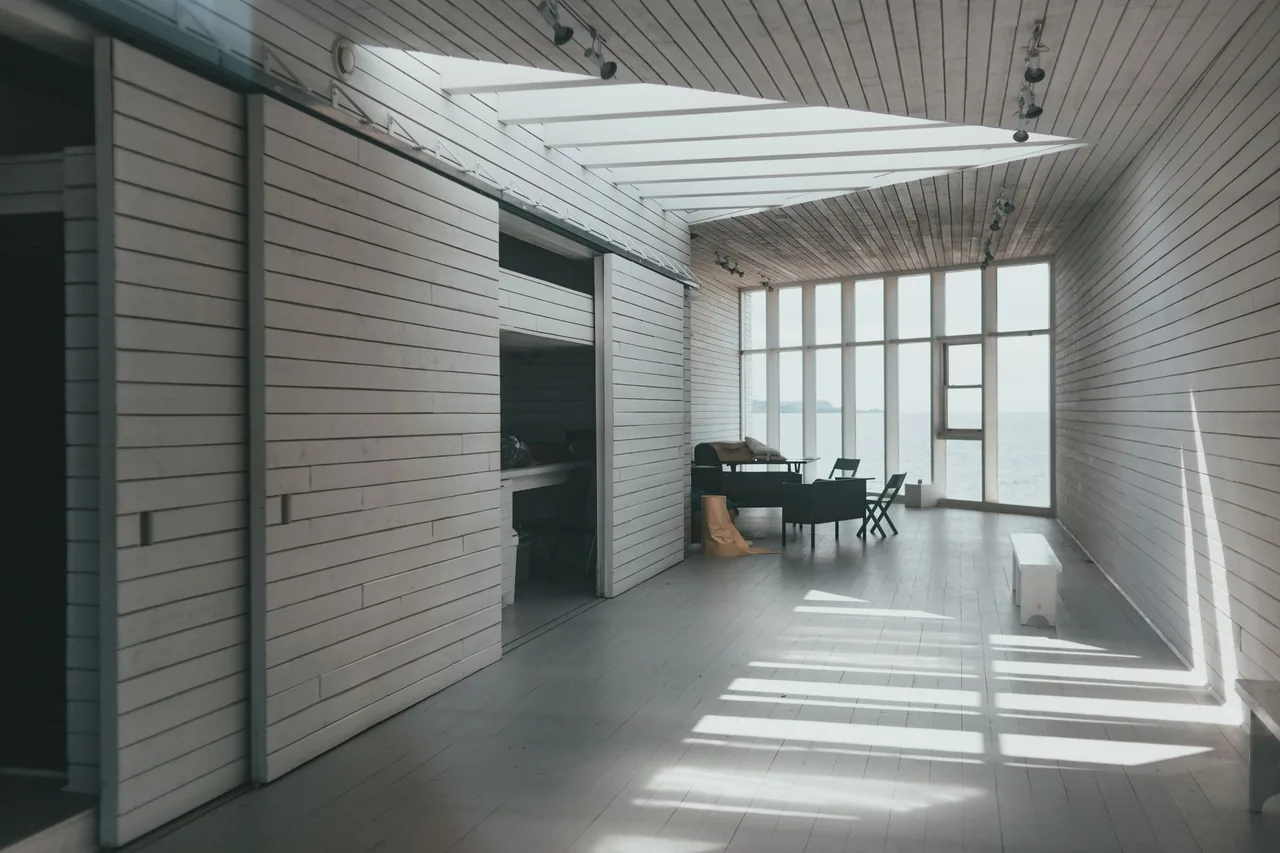
Wainscoting overlaps with several wall finishes, but its defining trait — it covers only the lower wall — sets the comparisons. The matrix below rates each on the specs that decide the call.
| Treatment | Coverage | Lower-wall protection | Look | Moisture tolerance | Best use |
|---|---|---|---|---|---|
| Wainscoting | Lower wall + cap rail | Yes — its core job | Traditional framed millwork | MDF dry; PVC for damp | Abused & formal rooms, layered look |
| Shiplap | Full-height or feature wall | Incidental | Horizontal shadow line | Dry & above-splash | Classic plank feature walls |
| Wood panels | Full wall, format-driven | Incidental | Slat, sheet, board-and-batten | Dry; engineered for damp | Warmth, acoustics, coverage |
| 3D wall panels | Full surface | Some (PVC) | Modern sculpted relief | PVC tolerant; MDF dry | Modern texture, fast install |
| Painted drywall | Whole wall | None | Flat | Standard dry | The unprotected default |
The honest read: wainscoting is, in effect, wood paneling confined to the lower wall — many board-and-batten and raised-panel treatments are full-height versions of the same millwork. Choose it when you want the lower-wall protection and the layered look above the cap; choose shiplap or full wood panels when you want a full-height feature. To weigh wainscoting against full-wall treatments for your room, the guides walk through which finish fits where.
Want the height planned to your room before anything is cut?
Tell us the room and we'll match a vetted carpenter who sets the proportion to your ceiling, windows, and switches — and puts the layout in a written scope.
The Specs and Standards That Matter for Wainscoting
Wainscoting has no durability rating, but a handful of measurable dimensions and material specs decide whether it looks right and lasts — from the height and proportion through the material's moisture tolerance to the panel construction and the cap-and-base detail.
Height and Proportion
The single most important spec, and the one tied to the room rather than a number on a box.
The Working Height Ranges
Traditional chair-rail-height wainscoting runs about 32" to 36"; taller "high wainscoting" can reach roughly two-thirds of the wall. These are starting ranges, not rules — the final number is set against the room.
Why the Ceiling, Windows, and Switches Set the Final Number
A cap rail that collides with window sills, light switches, or door casing reads wrong, so the height is chosen against every interruption on the wall. A common guideline ties it to the ceiling height, but the actual obstructions on your walls override the formula.
Even Panel Spacing Across the Wall
Within the chosen height, the panels are sized to divide each wall evenly with equal frame members between them — so a long wall and a short wall get different panel widths. This even division is what makes the run read intentional instead of off-the-rack, and it's planned per wall before cutting.
Material and Moisture Tolerance
Paint-grade MDF is stable and budget-friendly but has zero moisture tolerance; solid wood takes stain and tolerates damp better; PVC or cellular trim is the choice for genuinely wet or exterior-adjacent spots. The material follows the room's moisture, never the other way around — MDF at a wet base is a swelling failure waiting to happen.
Panel Construction
Raised panels must float in their frame to allow wood movement; flat (recessed) and beadboard styles are more forgiving. The construction dictates how the piece handles humidity, which is why a raised-panel run in a swinging climate needs more care than a flat-panel one.
Cap Rail and Base Detail
The cap (chair rail) profile and the base or shoe at the floor are what make the installation read finished — and where the protective ledge actually lives. A thoughtful cap-and-base detail is the difference between millwork that looks built-in and panels that look stuck to the wall.
Styles and What to Buy
Wainscoting comes in a few distinct styles and formats, and matching the style to the room's character and your budget is the real decision. Wainscoting is bought by style and material rather than a sub-page per type.
The Four Styles, Compared
The table below lays out the common styles, their formality, and where each belongs — the comparison that keeps a formal raised panel out of a casual cottage bath and beadboard out of a grand dining room.
| Style | What it is | Formality | Labor / cost | Best for |
|---|---|---|---|---|
| Raised-panel | Panels projecting within a frame | Most formal | Highest | Formal traditional rooms |
| Flat- (recessed-) panel | Clean frames with a flat center | Transitional | Moderate | Modern and traditional alike |
| Beadboard | Narrow vertical beads, sheet or plank | Casual / cottage | Lowest, fast | Baths, cottages, budgets |
| Board-and-batten | Flat boards with battens over seams | Structured | Moderate | Entries, mudrooms, full-height too |
You can buy these as panel-by-panel millwork, as sheet beadboard, or as kit systems that speed installation. The brand matters less than choosing a moisture-appropriate material and a style that suits the room's age and formality. Cost factors — style, raised vs. flat vs. beadboard, material, linear footage, and how many corners and interruptions the wall has — are worth comparing in the cost guides, and the material comparison tool lines the finishes up spec-for-spec.
Want the right style and a moisture-appropriate material?
We match you with a vetted carpenter who picks the style for your room's formality and the material for its moisture — and floats the raised panels, all in a written scope.
How Wainscoting Is Installed
Wainscoting is finish carpentry, and the result lives in the planning and the level lines. The six steps below are the full arc from setting the height to the final caulk-and-paint, each preventing a specific failure.
Set the Height and Snap a Level Line
The height is decided first — against the room's ceiling, windows, and switches — and a level reference line is snapped around the room. Every panel, the cap rail, and the base register to it, and the line accounts for floors that aren't level.
Acclimate the Components
Solid-wood components sit in the conditioned room until they reach the home's humidity, so they stop moving after install. Skipping this is how raised panels crack or split over the first heating season.
Plan Even Panel Spacing Per Wall
Panels are sized to divide each wall evenly with equal frame members between them, so a long and a short wall get different panel widths and corners resolve cleanly. This is what makes the layout look intentional instead of off-the-rack.
Fasten Into Framing, Float the Raised Panels
The pieces are fastened into studs or added blocking with construction adhesive plus finish nails — never glued to bare drywall alone, since the lower wall takes the bumps. Raised panels are set to float rather than pinned tight, so the wood can move.
Set the Cap Rail and Base Dead Level
The cap (chair rail) goes on dead level, the base and shoe finish the bottom, and outside corners are mitered. The cap and base are where the run reads finished and the protective ledge lives.
Caulk, Fill, Prime, and Paint
The millwork is caulked at the seams, nail holes filled, and primed and painted. The caulk-and-paint stage is what makes separate pieces read as one built-in — and it ties into the finish on the wall above the cap.
Two professional non-negotiables: planning the height and layout to the actual room before cutting, and fastening into framing so the most-abused wall in the house stays put. When blocking has to be added behind the drywall first, the work overlaps with general wall installation, and the painting and caulking tie into wall finishing on the wall above the cap.
Common Wainscoting Mistakes, Consequences, and Prevention
Most wainscoting disappointments are the same handful of shortcuts, each with a predictable consequence and a known prevention. Naming them is how you spot a corner being cut before it's nailed up.
| Mistake | What it causes | The prevention |
|---|---|---|
| Wrong height for the room | Cap rail collides with sills/switches; reads off | Set height to ceiling, windows, and switches before cutting |
| Forced fixed-size kit | Skinny half-panel in a corner; off-the-rack look | Size panels to divide each wall evenly, 32–48" range |
| Glued to drywall only | Panels loosen and pull off the abuse zone | Fasten into studs or added blocking, glue plus nails |
| Raised panel pinned tight | Panel cracks or splits as the wood moves | Set raised panels to float in their frame |
| MDF at a wet base | Swelling and crumbling at the floor | Use solid wood or PVC where there's damp or splash |
| Cap rail not level | The whole run reads crooked | Snap a level line; set the cap dead level to it |
| Seams left uncaulked | Pieces read separate, not built-in | Caulk seams, fill nail holes, prime and paint |
Every row is a problem you can see coming in the quote — which is why "we plan the height to your room, divide panels evenly, and fasten into framing, in writing" is the most valuable sentence a carpenter can offer.
The Wainscoting Fit Test: Six Questions Before You Buy
Before any millwork is ordered, run the wall through the same six-question fit test a careful carpenter uses. Each question has a measurable or material answer, and a wall that fails one points to a different height, style, or material entirely.
- 1. What height suits this room?
- Decide the height against the ceiling, the windows, and the switches before anything is cut. A cap rail that collides with sills or casing reads wrong. Lower chair-rail height suits standard rooms; taller wainscoting suits high ceilings.
- 2. How do the panels divide the wall?
- Each wall's panels must be sized to divide it evenly with equal frame members, so corners resolve cleanly. A fixed kit forced onto a wall it doesn't divide leaves a tell-tale half-panel.
- 3. What style fits the room's age and formality?
- Raised panel for formal traditional rooms; flat panel for transitional and modern; beadboard for cottage, baths, and budgets; board-and-batten for a structured look. The style sets the room's character.
- 4. How much moisture is at the base?
- Paint-grade MDF is perfect for dry living and dining rooms; solid wood for stain or damp tolerance; PVC for genuinely wet or splash-prone spots. Never put MDF where water sits at the base.
- 5. Will it fasten into framing?
- Plan where studs fall and where blocking is needed, because the lower wall takes the bumps and adhesive alone lets panels loosen. A wall that can't take blocking changes how the millwork attaches.
- 6. Will raised panels be set to float?
- If the style is raised-panel, confirm the panels float in their frame rather than pinned tight, so the wood can move. A run that locks the panels is a run that cracks them.
Run honestly, the fit test usually returns a single defensible height, style, and material for one specific room — and a shop that quotes the same fixed-size kit for every wall regardless of the answers is the red flag.
Is Wainscoting Right for Your Wall?
The decision isn't a preference — it's the output of a short chain of facts about the room, its moisture, and its formality. Walk it in order; each branch eliminates the styles and materials the wall can't carry, and what survives is the right call.
- Does the lower wall take abuse or want a layered look? Hallways, dining rooms, mudrooms, and baths that get bumped or want a tailored, layered look are wainscoting's home. A wall that wants a full-height feature points to shiplap or full wood panels instead.
- How wet is the base? A dry room takes paint-grade MDF; a damp or splash-prone base (powder room, mudroom) needs solid wood or PVC. MDF at a wet base is the wrong material.
- What's the room's formality? Formal rooms point to raised panel; transitional and modern to flat panel; casual and budget to beadboard; structured to board-and-batten.
- What height does the room set? Set the height against the ceiling, windows, and switches — standard rooms take chair-rail height, high ceilings take taller wainscoting. The obstructions override any formula.
- Can the wall take framing and even spacing? Confirm studs and blocking, and that panels can divide each wall evenly. If a fixed kit won't divide cleanly, switch to panel-by-panel millwork before ordering.
Run end to end, this tree almost always returns one defensible height, style, and material for one specific room — and the answer is rarely "the off-the-shelf kit on every wall."
What Actually Drives the Cost of Wainscoting
A wainscoting quote is not a flat per-foot rate; the headline number hides the items below, ranked by how much they move the total.
- Style and construction. Raised-panel millwork is the most labor and cost; flat-panel and board-and-batten are moderate; beadboard is the fastest and cheapest. The style is the first lever.
- Material. Paint-grade MDF, solid wood, and PVC sit at different price points — and the room's moisture often dictates the more expensive material.
- Linear footage and ceiling height. More wall is more material and labor, and taller wainscoting on high ceilings adds both.
- Corners and interruptions. Every inside and outside corner, window, door, and switch adds cutting, fitting, and detailing beyond a plain run.
- Even-spacing layout. Sizing panels to divide each wall evenly is design and layout time a forced fixed kit skips — and it's what makes the run look built-in.
- Blocking and wall prep. Walls that need blocking added so panels hit framing, or an uneven wall corrected first, are real labor a ready wall avoids.
- Finish — caulk, prime, and paint. The caulk-fill-prime-paint stage that makes pieces read as one built-in is exacting work priced into the job.
Because these drivers swing widely, the only honest number comes from seeing the room. Compare what moves the price across the category in our cost guides so you can read a quote critically.
Want millwork that reads built-in, not off-the-rack?
We match you with a vetted carpenter who divides the panels evenly, sets the cap dead level, and fastens into framing — and prices it as a written, itemized scope.
Caring for a Wainscoted Wall
Caring for wainscoting is easy, which is part of the point — it's built to take abuse and wipe clean. Dust the cap rail and any ledges and recesses, which collect more dust than a flat wall, with a microfiber cloth. Wash painted wainscoting with a barely damp cloth and mild soap; the durable paint film is what shrugs off the scuffs the lower wall attracts, so a quick wipe handles most marks. Keep water off the base in damp rooms — MDF wainscoting will swell if it sits wet at the floor. The great advantage of wainscoting is repairability: scuffs sand and repaint, and because it's painted millwork, the whole run can be refreshed in a new color for decades. If a panel cracks, a miter opens, or the base is water-damaged, it can be patched or replaced — see wall repair.
Talk through your project — free.
A free consultation and a written, itemized quote from a vetted installer. No pressure, no obligation.
Wainscoting Glossary
The terms below recur in every quote, spec sheet, and millwork order — each defined as its working meaning on an actual job, so you can read a scope and judge whether it is complete.
- Cap rail
- The horizontal molding — often a chair rail — that finishes the top of the wainscoting where it meets the wall above. It gives the eye a clean line and a protective ledge.
- Chair rail
- A molding traditionally set at chair-back height (around 32–36") that protects the wall and often doubles as the cap rail on shorter wainscoting.
- Raised panel
- A panel that projects within a surrounding frame for the most formal look. It must float in its frame to allow wood movement, or it cracks.
- Flat (recessed) panel
- A panel with a flat center set back in its frame — cleaner and more forgiving of humidity than a raised panel, at home in modern and traditional rooms.
- Beadboard
- Narrow vertical beads in sheet or plank form — the casual, cottage style, the most budget-friendly and fastest to install.
- Board-and-batten
- Flat boards with narrow battens over the seams for a structured grid — equally a wainscoting or a full-height treatment.
- Float
- To set a raised panel loosely in its frame so it can expand and contract with humidity without cracking. Pinning a panel tight is a leading cause of splits.
- Studs
- The vertical framing behind the drywall. Wainscoting fastens into studs (or added blocking) so the abuse-zone lower wall stays put; adhesive alone loosens.
- Blocking
- Short framing added between studs so the millwork has solid wood to fasten into where a stud doesn't fall — the fix for panels that would otherwise loosen.
- Base and shoe
- The baseboard and the small shoe molding at the floor that finish the bottom of the wainscoting and bridge to an uneven floor.
- Stile and rail
- The vertical (stile) and horizontal (rail) frame members that surround each panel. Even, equal stiles and rails are what make the layout read intentional.
- High wainscoting
- Wainscoting run taller than chair-rail height — roughly two-thirds of the wall — suited to high ceilings where standard height would look short.
Standards, Finish Quality, and When Wainscoting Is the Wrong Call
Wainscoting's success is a function of proportion, layout, and fastening far more than the millwork's brand, which is exactly why the standards below are about practice, not a product promise.
The Conditions That Decide a Wainscoted Wall's Life and Look
The conditions are specific and checkable: the height planned to the room's ceiling, windows, and switches; panels sized to divide each wall evenly; a structural attachment into studs or blocking; raised panels set to float; the material matched to the base's moisture; and a clean caulk-fill-prime-paint finish. A run built to those reads built-in and survives the bumps; one that forces a fixed kit, glues to drywall, or pins panels tight looks off or fails. Ask in writing that the work follow those practices — that is what wainscoting that looks right is judged against.
When Wainscoting Is the Wrong Material
The clearest standard is knowing where it doesn't fit. A wall that wants a full-height statement is a shiplap or full wood-panel job, not lower-wall wainscoting; a wet shower wall is tile territory; and MDF anywhere water sits at the base is the wrong material. A reputable carpenter redirects those rather than forcing wainscoting onto them — and the wall above the cap, with its paint or texture, is wall finishing and texturing, handled alongside the millwork.
A Real Wainscoting Decision
One representative scenario shows why proportion and material drive the call: the same homeowner wainscoted a dining room and a powder room, and the height and material — not the concept — changed between them.
How to Vet a Wainscoting Installer
Wainscoting is finish carpentry, so the installer decides the result far more than the brand of millwork. These six questions separate a carpenter who builds a run that reads built-in from one who forces a kit on the wall.
- They plan the height to your room first
- Ask how they set the height. A real answer references the ceiling, windows, and switches — not a fixed number, because a cap rail that hits a sill reads wrong.
- They divide the panels evenly per wall
- Ask how they size the panels. A credible answer is dividing each wall evenly with equal stiles and rails — a forced fixed kit leaves a half-panel in a corner.
- They fasten into framing, not just drywall
- Ask how they handle spots with no stud. Adding blocking so the millwork hits solid wood is the right answer; glue-only loosens the abuse-zone lower wall.
- They float raised panels and acclimate wood
- Ask how they handle wood movement. Floating raised panels and acclimating solid wood are the steps that keep panels from cracking over the first heating season.
- They match the material to the base's moisture
- The right installer keeps MDF in dry rooms and uses solid wood or PVC where water sits at the base — rather than putting MDF where it will swell.
- They put the scope and finish in writing and stand behind it
- Ask for the style, height, material, and a workmanship guarantee in writing before work starts. A crew willing to return if a panel cracks or a miter opens is accountable for the install.
Why Route Your Wainscoting Project Through Pro Work Home Surface
Pro Work Home Surface is not a contractor and does not install your wainscoting — we are a national authority on home surfaces that matches homeowners with vetted local carpenters and holds them to a published bar.
- A free consultation and an itemized written scope
- Every connection starts with a no-obligation consult and a written quote that lines out the style, material, height, and finish separately — so you read the whole job, not a headline rate.
- Proportion planned to the room first
- The height and cap-rail line are set against the room's ceiling, windows, and switches before anything is cut, so the millwork reads architectural instead of colliding with sills and casing.
- Fastened into framing for the abuse zone
- Components are glued and nailed into studs or added blocking — never bare drywall alone — because the lower wall is exactly where bumps would loosen panels over time.
- Material matched to the room's moisture
- MDF stays in dry rooms, solid wood or PVC goes where there's damp or splash, and raised panels are set to float — so wainscoting doesn't swell, crack, or crumble where it shouldn't be.
Wainscoting is one finish within eight categories we cover across home surfaces. If your project also touches wall finishing or texturing on the wall above the cap, the same standards apply — compare what moves the price in our cost guides, weigh wainscoting against full-wall treatments in our guides, line the finishes up with our material comparison tool, explore related vertical surfaces like ceilings, and start from the walls hub or the full range of home surfaces.
Brands & Material Authority
Quality and construction drive long-term performance more than the label. These are widely respected names in this category:
- James Hardie
- Metrie
- USG
- Sherwin-Williams
- Armstrong
- DPI