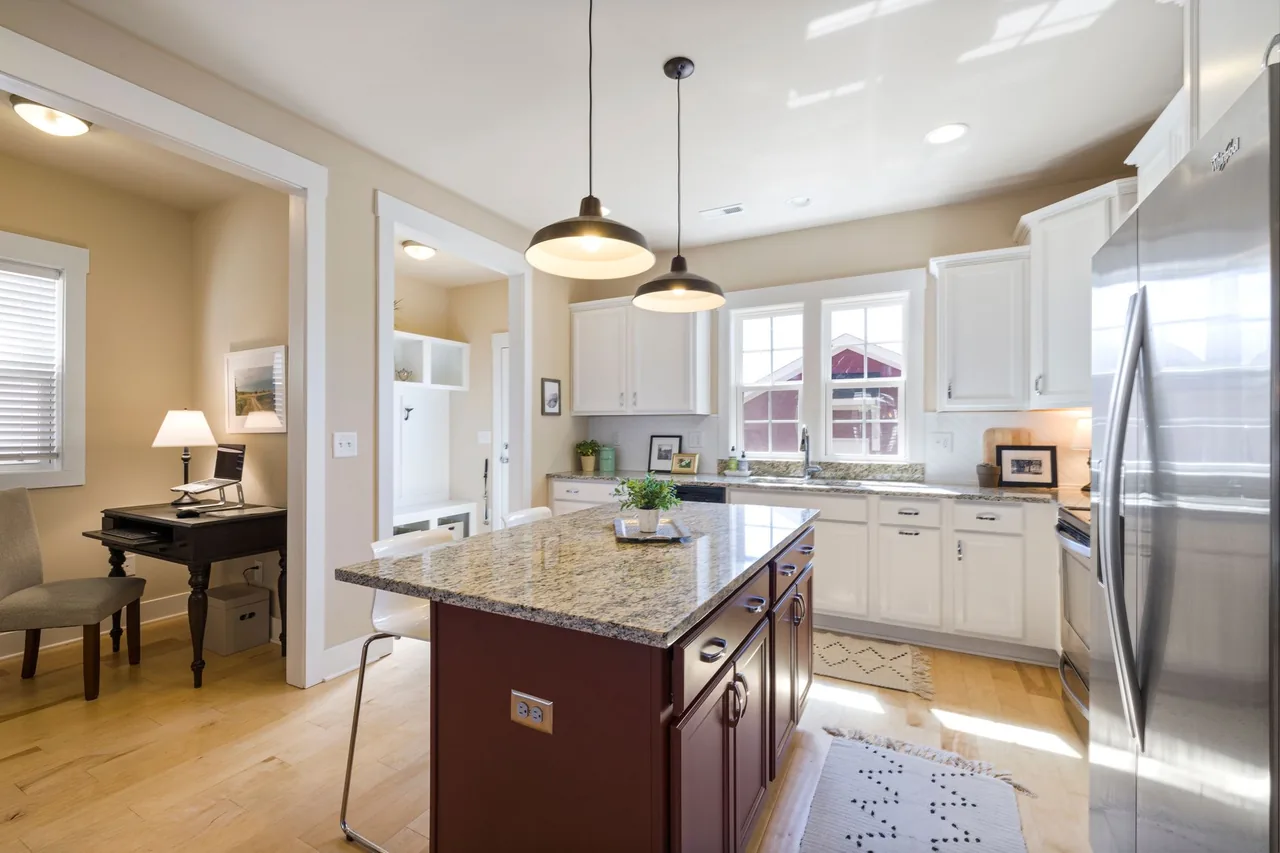
A kitchen island countertop is judged less on the material and more on the engineering — the large span, the seating overhang, and the visible seams an island's size makes unavoidable. The one constraint that decides success is structural support: any unsupported overhang past roughly 10 inches for 3 cm stone needs steel rods, corbels, or a substructure, or the cantilever cracks at the edge where people lean. Get the support, the seam placement, and the cabinet load right and almost any durable slab works — quartz, granite, quartzite, porcelain, even butcher block; miss them and a beautiful island fails exactly where people use it. Get a free consultation and a written, itemized scope from a vetted fabricator that names the overhang support, the seam plan, and the cabinet load before a single slab is ordered.
An Island Is an Engineering Problem Dressed as a Design Choice
The slab everyone falls for in the showroom matters least to whether an island survives and looks right. What separates an island still solid and seamless in ten years from one that cracks at the overhang in two is not the material — it's whether the support, the span, and the seams were engineered before anyone picked a finish.
An Island Lives by Structural Rules a Wall Counter Never Faces
An island is the one countertop that's a freestanding structure, not a run against a wall, and that changes everything that matters. A perimeter counter is supported continuously by cabinets and braced by the wall behind it; an island stands alone, and four demands the wall run never faces dominate it:
- Overhang support — an island almost always has a seating side where the top extends past the cabinet for knees, and an unsupported stone overhang has a hard limit before it cracks under the leverage of someone leaning or sitting on it.
- Span and cabinet load — a large island in stone is heavy, hundreds of pounds of slab, and the cabinets, the floor, and any overhang support must carry that weight without sagging or deflecting.
- Seam placement — because slabs have a maximum size, a big island frequently exceeds one slab, making at least one seam unavoidable, and on a surface seen from every angle that seam has to be placed and matched deliberately.
- A finished look on all four sides — an island is furniture in the round, so the edge profile, any waterfall, and the back face all show, and the design has to resolve cleanly where a wall run could hide a rough edge.
The thread is that an island punishes shortcuts in support and proportion. The slab you fall for matters, but whether it survives and reads right depends on the engineering — which is why support, span, and seams come first, and the material choice opens up once they're solved.
Read the Island as Structure First, Slab Second
Most people shop an island backward — slab first, overhang and seam as afterthoughts — and end up with a cracked cantilever or an obvious joint on the room's focal point. Read the island in its real order: the overhang and its support first, then the span and cabinet load, then the seam plan, then the material. The same material logic that governs your kitchen counters still applies for heat, stains, and scratch — but the island adds a cantilever and a span the perimeter never has, and those decide it. Everything below builds that order into a decision you can hand a fabricator.
The Island Countertop Deciders: Four Specs Before Any Slab Wins
An island is bought on structural and dimensional properties as much as material ones, and four of them predict whether it stands up and looks right. Each has a documented failure attached to ignoring it, and an island that fails any one is the wrong design no matter how the slab photographs. Call it the Island Engineering Test: pass all six checks and the material almost takes care of itself; miss one and you're buying a cracked overhang or a visible seam on the room's centerpiece.
- 1. Overhang limit and support
- The key island spec. Unsupported stone overhang is held to roughly 10 inches for 3 cm material — less for 2 cm — beyond which steel rods, corbels, or a substructure are required, because stone is strong in compression but weak in tension and a cantilever cracks under a leaning load. Ask exactly how an overhang past the limit will be supported before you commit to the dimension.
- 2. Slab thickness for the span
- 3 cm is the island default — more rigid over a span, running a single-thickness edge and supporting a bigger overhang; 2 cm is lighter and cheaper but needs more continuous support and a built-up edge, and flexes more over a long island. The thickness drives both the edge look and how much overhang the slab carries.
- 3. Cabinet and floor load
- A large stone island weighs hundreds of pounds, so the island cabinets, the floor below, and any overhang support must carry the load without deflecting. This is a real structural check on big islands, not an afterthought — an undersized base sags, opens seams, and stresses the slab from below.
- 4. Slab size versus island size, and seams
- Slabs have a maximum size, so if the island exceeds it, a seam is unavoidable. Know your island's dimensions against available slab sizes so seam count and placement are planned, not discovered on install day — and never located over an unsupported overhang, where the joint can separate.
- 5. Veining continuity for a waterfall
- For a waterfall edge — where the top turns 90 degrees and runs to the floor — the material needs continuous, matchable veining and a precise mitered corner so the pattern appears to flow over the edge. It's a spec of the slab and the fabrication together, not just the look, and quartz, quartzite, and marble carry it best.
- 6. Material fit for how the island is used
- Once the structure is solved, the material follows the island's job — a hard-working family prep island wants tough, non-porous quartz or Mohs 7 quartzite; a warm gather-and-prep island suits butcher block away from the sink; a pure showpiece can carry dramatic veined stone. The room's heat, stain, and scratch rules from the kitchen still apply.
Three of these six — the overhang support, the cabinet load, and the seam plan — are exactly what a showroom sample can't tell you, because they're structure and geometry, not appearance. That's why the engineering test is non-negotiable: every check predicts a specific way an island stands or fails, before the slab is even chosen.
Want the overhang support and seam plan confirmed before you buy?
We match you with a vetted fabricator who names the overhang support, the seam placement, and the cabinet load in a written scope — before you commit to a slab or a price.
Kitchen Island Countertop Specifications That Decide the Build
The specs that gate an island are structural and dimensional — from the overhang limit that separates a solid seating bar from a cracked cantilever, through the slab thickness and cabinet load, to the seam and waterfall geometry that decide whether the room's focal point reads clean.
The Overhang Limit Is the Island's Controlling Spec
A seating overhang that cracks is the failure that ruins an island, so the overhang and its support govern the design before the slab enters. How far a top can safely cantilever depends entirely on its thickness and whether it's reinforced.
Why an Unsupported Overhang Cracks
When a stone top extends too far past its support, the weight of the cantilever plus the force of someone leaning, sitting, or pushing up from a stool creates a bending stress at the edge of the cabinet — and stone is strong in compression but weak in tension, so it cracks along that line. It often shows up months later, after enough leaning, as a clean crack running parallel to the cabinet edge.
The 10-Inch Rule and When Support Is Required
The working guideline is that unsupported overhang tops out around 10 inches for 3 cm stone and less for 2 cm — beyond that, the cantilever needs help. A comfortable seating overhang for stools is often 12 to 15 inches, which exceeds the unsupported limit, so it must be carried by added structure. The dimension you want for knee room drives the engineering, not the other way around.
Steel Rods, Corbels, and Support Panels
Three methods carry an overhang past the limit, all installed before the slab. Steel rods (flat bar or rod) are epoxied into channels cut in the cabinet top, hidden and giving a clean floating look; corbels are visible brackets under the overhang, a design feature as much as a support; and a support panel or hidden steel bracket extends the bearing. Which one fits depends on the overhang depth, the look you want, and the load — and a fabricator names it before setting the slab, not after the edge cracks.
Slab Thickness and the Span
Thickness is the other structural lever. A 3 cm slab is rigid enough to run a single-thickness edge and carry a larger overhang; a 2 cm slab flexes more over a long island and usually needs a built-up (laminated) edge plus more continuous support underneath. Speccing 2 cm to save cost on a big island without addressing the span invites deflection — the thickness and the span are decided together.
The Specs That Matter on an Island, and What to Look For
Before the material-by-material verdict, it helps to see each island-deciding spec on its own — what it measures, why it matters on a freestanding surface specifically, and the number or feature to demand.
| Spec | Why it matters on an island | What to look for |
|---|---|---|
| Overhang limit & support | A seating overhang cracks past the unsupported span under leaning load | Support for anything past 10" (3 cm); steel rods, corbels, or a panel |
| Slab thickness | Rigidity over the span and the overhang the slab can carry | 3 cm for a big island; 2 cm needs a built-up edge & more support |
| Cabinet & floor load | Hundreds of pounds of slab can sag an undersized base | Island cabinets and floor confirmed to bear the weight without deflecting |
| Slab size vs. island size | An island past the max slab size forces an unavoidable seam | Dimensions checked against slab sizes so seams are planned, not found |
| Veining continuity (waterfall) | A waterfall must flow the vein over a mitered corner | Matchable veining and a precise 45° miter on quartz, quartzite, marble |
| Edge profile (all sides) | An island is finished in the round, so every edge shows | A profile ground on all visible sides, not just the front run |
Island Material Fit, Rated for Span and Look
The table below is the island ranking made explicit: each candidate material against how it handles span, overhang, and the dramatic look an island invites, with a verdict for a freestanding surface. These are recognized properties — the printed spec for your product always governs.
| Material | Span & overhang | Waterfall & veining | Weight & upkeep | Verdict for an island |
|---|---|---|---|---|
| Quartz | Carries overhang well at 3 cm | Uniform — waterfall flows cleanly | Heavy; non-porous, no sealing | Most popular — uniform & low-maintenance |
| Quartzite | Strong at 3 cm with support | Dramatic real-stone veining | Heavy; porous, needs sealing | Premium statement — tough Mohs 7 |
| Granite | Very strong; handles spans | Bold movement, matchable | Heavy; porous, needs sealing | Durable natural workhorse for an island |
| Porcelain | Thin — needs reinforcement | Large-format, printed veining | Lighter; non-porous, no sealing | Big seamless tops; detail the thin edge |
| Butcher block | Lighter — eases load & support | Warm grain, no stone veining | Light; needs oiling, hates water | Warm gather-and-prep island, away from sink |
| Marble | Strong but soft surface | Unmatched veining for waterfalls | Heavy; porous, etches | Showpiece/baker's island — honed, eyes open |
The pattern is that an island opens the material field once the structure is solved: with the overhang supported and the seam planned, the choice turns on the look you want and how the island is used, not on whether the slab survives. To weigh the two most cross-shopped island stones, see our quartz vs. granite guide, and size the build with the countertop cost calculator.
The Best Kitchen Island Countertop Materials, Ranked — and Why
An island can take almost any durable kitchen material — the ranking turns on how a material handles span, weight, overhang, and the dramatic look an island invites, more than on day-to-day abuse. Every option below is matched to how an island lives and shows.
Quartz: The Most Popular Island Surface
Quartz is the most popular island surface for good reason: it's hard, non-porous, and — crucially for an island — uniform slab to slab, so a big island and the perimeter read as one material, and a waterfall edge keeps its pattern flowing because the veining is engineered rather than random. It supports overhangs well at 3 cm with proper bracing, and its one rule, a trivet, matters less on an island used mostly for plating and seating than on a prep run beside the range. Lines like Cambria, Caesarstone, and Silestone back it with long warranties — the low-maintenance default for a statement island.
Quartzite: The Premium Statement Choice
Quartzite is the premium statement pick. A natural stone near Mohs 7, harder than granite, it delivers dramatic real-stone veining for a showpiece island and is tough enough for a seating overhang when properly supported; it's porous, so it needs sealing. For an island meant to be the room's focal point, its one-of-a-kind veining is the draw — and unlike marble, it carries that veined look with the hardness to survive a working surface, so it can be both the showpiece and the everyday prep zone.
Granite: The Durable Natural Workhorse
Granite is the durable natural workhorse for an island: heat-tolerant, very strong, and unique slab to slab. It's heavy and porous (needs sealing), but it handles overhangs and spans well with the right support, and a bold, high-movement granite makes a striking island that also takes the hot pans a prep-and-serve island sees. When you want a real geological slab that works as hard as it looks, granite is the proven choice.
Porcelain and Butcher Block: The Specialists
Porcelain earns a place for large, seamless-looking tops: non-porous, heat-resistant, and available in big formats, though its thin profile wants reinforcement over a span and careful edge detailing on an overhang. Butcher block shines specifically as an island, where its warmth as a prep-and-gather surface stands out and it's away from the standing water that challenges it at a sink; lighter than stone, it eases the load and overhang-support demands, making it a natural fit for a warm, informal island.
What to Avoid on a Kitchen Island
Island mistakes are usually about engineering and proportion rather than the wrong material outright, and avoiding them prevents the most visible kitchen regret. An unsupported overhang past the limit is the cardinal error — designing a generous seating overhang, say 15 inches for comfortable knee room, without adding steel rods, corbels, or a support panel is asking the slab to crack, because it exceeds what stone carries in tension on its own; the fix isn't a different material, it's proper support engineered before the slab is set. A thin slab over a big span without support is the related trap: a 2 cm slab on a large island flexes more and needs more continuous support and a built-up edge than 3 cm, so speccing 2 cm to save cost without addressing the span invites deflection. A seam placed carelessly on a surface seen from all sides is the visible failure — a joint in a high-sightline spot, poorly color-matched, or set over an unsupported gap reads as an obvious line or can separate. Soft marble as a hard-working family island is the use mismatch: if the island is the main prep and homework surface, marble's etching and softness show fast — the same caution that governs the broader kitchen. The lesson is that an island rewards getting the overhang, the span, and the seam right, after which the slab choice opens up.
How a Kitchen Island Countertop Is Fabricated & Installed — the Structure-Specific Sequence
An island is the most demanding countertop install in a kitchen because it combines a large span, a cantilever, unavoidable seams, and a four-sided finish. The six steps below are the full arc, each aimed at the structure that makes an island an island.
Template After the Island Cabinets Are Set and Strong
A template is taken only after the island cabinets are set, level, and confirmed strong enough for the load. Because an island bears hundreds of pounds of slab plus seating loads, the base and floor are verified to carry it without deflecting before anything is cut.
Engineer the Overhang Support First
For a seating overhang past the limit, the fabricator specs the support before the slab — steel rods set into the cabinet top, corbels, or a hidden bracket — all installed first so the cantilever is carried, not floating. The support method matches the overhang depth, the load, and the look you want.
Plan and Place the Seams
Seams on a large island are placed where they're least visible and most supported — never over an unsupported overhang — pattern-aligned across the joint on veined stone, and bonded with color-matched epoxy that reads as a thin, tight line on a surface seen from all sides. A seam laid out in the shop disappears; one improvised on site shows.
Fabricate the Waterfall Miter
A waterfall edge is its own operation: the top and the vertical panel meet at a 45-degree mitered seam, glued so the corner looks like a single folded piece, with the veining laid out to flow continuously down the side. It's precise work — the difference between a stunning waterfall and an obvious miter.
Cut Any Prep-Sink or Cooktop Openings
Cutouts for a prep sink or cooktop are radiused at the inside corners against stress cracks, and the edge profile is ground on every visible side, since an island is finished in the round. On porous stone, cut edges and any sink reveal are sealed at this stage.
Set Level, Tie to the Room, and Walk It
The slab is set dead level over the supported base, matched in material and height to the surrounding cabinets and perimeter so it reads as one design, and any porous stone gets its first seal. The fabricator walks the island with you to review the overhang's use limits, the sealing cadence, and seam care.
Skip or rush any one of these six and the failure it was meant to prevent shows up later — a cracked overhang, a visible seam, a sagging base — which is why a vetted fabricator treats the sequence as fixed, not optional.

Common Kitchen Island Countertop Mistakes, Consequences, and Prevention
Most island failures are the same handful of structural shortcuts, each with a predictable consequence and a known prevention. Naming them is how you spot a corner being cut before the slab is set on the room's centerpiece.
| Mistake | What it causes | The prevention |
|---|---|---|
| Unsupported overhang past the limit | The cantilever cracks along the cabinet edge under leaning load | Add steel rods, corbels, or a panel for any overhang past 10" |
| 2 cm slab over a big span, no extra support | The thin slab flexes and deflects, stressing the surface and seams | Use 3 cm, or add continuous support and a built-up edge to 2 cm |
| Undersized island cabinets or floor | The base sags under the slab weight, opening seams from below | Confirm the cabinets and floor carry the load without deflecting |
| Seam in a high-sightline spot | An obvious line across the room's focal surface | Place seams low-sightline and supported, pattern-matched |
| Seam set over an unsupported overhang | The joint separates where there's nothing beneath it | Never locate a seam over an unsupported cantilever |
| Waterfall miter left visible or mismatched | The veining jumps at the corner, undercutting the feature | Miter at 45° and lay out the vein to flow over the edge |
| Soft marble on a hard-working prep island | Etching and scratches show fast on the daily surface | Choose tough quartz or quartzite; reserve marble for a showpiece |
Every row is a documented way an island cracks, sags, or shows its joints — which is why "we engineer the overhang, carry the load, and place the seams before we set the slab, in writing" is the most valuable sentence in an island quote.
Which Countertop Is Right for Your Island?
The right island surface is the output of a short chain of honest answers about the overhang you want, the island's size, the look, and how it'll be used. Walk it in order — and settle the structure before the slab.
- How far will the seating overhang extend? Set the dimension for knee room first. If it's past roughly 10 inches for 3 cm stone, plan steel rods, corbels, or a support panel up front — the overhang drives the engineering, not the other way around. A modest or no overhang keeps the structure simple.
- How big is the island against a slab's max size? Check your island's dimensions against available slab sizes. If it exceeds one slab, a seam is unavoidable, so plan its placement (low-sightline, supported) now rather than discovering it on install day. A smaller island may fit one slab, seamless.
- Do you want a waterfall edge? If yes, choose a material with continuous, matchable veining — quartz, quartzite, or marble — and raise it early so the fabricator lays out the slab to flow the vein over the mitered corner. Without a waterfall, the material field is wider.
- How is the island used — daily prep or showpiece? A hard-working family prep-and-homework island wants tough, non-porous quartz or Mohs 7 quartzite; a warm gather-and-prep island suits butcher block away from the sink; a pure statement island can carry dramatic veined stone even if it's softer.
- What does the budget read, honestly? The material sets the baseline, but the overhang support, the seams, and any waterfall add real fabrication — a waterfall roughly doubles the material on that edge. Compare lifetime value in our cost guides and the material comparison tool, and price the structure, not just the slab.
Run honestly, this tree settles the structure first and then opens the slab choice — and a fabricator who quotes a generous overhang with no mention of support, or a big island with no seam plan, is the red flag.
Not sure your island's overhang and span are engineered right?
Tell us your island's size and the overhang you want and we'll match a vetted fabricator who engineers the support, plans the seams, and puts it in writing.
The Waterfall Edge: Where an Island Shows Its Craft
The waterfall edge is the most demanding — and most rewarding — thing an island can do, and getting it right is pure fabrication skill. Two details decide whether a waterfall reads as one folded piece or two pieces joined.
The Mitered Corner and the Flowing Vein
A waterfall edge turns the top 90 degrees and runs it to the floor, and the corner is a 45-degree mitered seam glued so the two panels meet as a single crisp edge. The craft is in the veining: on quartz, quartzite, or marble, the slab is laid out so the pattern appears to continue unbroken down the side, flowing over the miter rather than jumping at it. A mismatched or visible miter undercuts the whole feature, which is why a waterfall is a test of the fabricator as much as the slab — and why continuous, matchable veining is a real spec for it.
Support and Load at a Waterfall
Beyond the look, a waterfall panel is structural: it runs to the floor and can help carry the top, but it also adds weight and must be set precisely plumb so the miter stays tight. The panel's base has to sit solid on the floor, and the whole assembly — top, miter, and leg — is engineered as one. A waterfall is not just a longer slab; it's a folded structure that has to be both flush at the corner and sound underfoot.
What Actually Drives the Cost of a Kitchen Island Countertop
An island quote is not a flat rate; the items below drive the total, ranked by how much they move it on a freestanding, seen-from-all-sides surface.
- Material grade and slab size. The stone or engineered product sets the baseline, and a large island in a rare, high-movement natural slab — or one big enough to need an oversized or bookmatched slab — carries a real premium over a common material on a modest island.
- Waterfall edge. A waterfall roughly doubles the material on that edge (the vertical panel is more slab) and adds precise mitering and veining layout — one of the biggest single swings on an island quote.
- Overhang support engineering. Steel rods, corbels, or a support panel for a seating overhang past the limit is real material and labor installed before the slab — a line item a wall run never has.
- Seams and slab layout. An island past the max slab size adds seam bonding and the skilled layout to match veining across the joint and hide it on a surface seen from every angle.
- Edge profile on all sides. Because an island is finished in the round, the edge is ground and polished on every visible side, and a decorative profile multiplies that work over a plain eased edge.
- Cabinet reinforcement. If the island cabinets or floor need strengthening to carry the slab and seating load without deflecting, that structural work adds to the total.
- Prep-sink or cooktop cutouts. An island with its own prep sink or cooktop adds radiused cutouts, plumbing or electrical coordination, and fabrication a plain island skips.
Because these swing so widely — a waterfall and a supported overhang alone can move the number substantially — the only honest figure comes from an on-site look. Compare what moves the price across the category in our cost guides — the quartz countertop cost guide applies to the most popular island material — and size your own island first with the countertop cost calculator.

Keeping a Kitchen Island Countertop Looking New
An island's day-to-day care follows its material exactly as a perimeter counter would, but its longevity also depends on protecting the structural features — the overhang and the seams — that make an island an island.
For the surface, the routine is the material's own: non-porous quartz and soapstone need only soap and water and never sealing; porous granite, quartzite, and marble need a maintained seal and prompt wiping of spills; butcher block needs oiling and dry care — none of that is island-specific. What is island-specific is respecting the overhang: a properly supported overhang carries normal leaning and seating indefinitely, but no overhang is built to be stood, sat, or climbed on as a step, and treating it as a bench is how even a well-engineered cantilever eventually stresses. Keep an eye on the seams — a quality color-matched seam stays tight, but if one ever opens or a hairline appears at the overhang edge, address it early before leaning loads widen it. Because an island gathers daily life — homework, prep, eating — clean it on the material's schedule and use cutting boards and trivets per the surface. If an island does chip at an edge, crack at an overhang, or open a seam, countertop repair can often stabilize and fill it, and restoration and polishing can renew a worn stone surface.
Talk through your project — free.
A free consultation and a written, itemized quote from a vetted installer. No pressure, no obligation.
Kitchen Island Countertop Glossary
The terms below recur in every island quote, spec sheet, and warranty — each defined as its working meaning on an actual island job, so you can read a scope and judge whether it is complete.
- Overhang
- The part of the island top that extends past the cabinet, usually on a seating side for knee room. Past roughly 10 inches unsupported for 3 cm stone, it needs added structure or it cracks under leaning load.
- Cantilever
- An overhang that projects beyond its support, carrying its load in bending. Because stone is weak in tension, an unsupported cantilever cracks along the cabinet edge under weight.
- Steel rods
- Flat bar or rod epoxied into channels cut in the cabinet top to carry a seating overhang, hidden inside the assembly for a clean floating look — one of three ways to support an overhang.
- Corbels
- Visible brackets set under an overhang to carry it, doubling as a design feature. Chosen when the look calls for a supported, traditional profile rather than a hidden floating edge.
- Waterfall edge
- An edge where the top turns 90 degrees and runs to the floor, meeting at a 45-degree mitered corner with the veining laid out to flow continuously down the side.
- Miter
- A 45-degree cut where two slab pieces meet to form a corner — as at a waterfall edge — glued so the joint reads as a single folded piece rather than two pieces joined.
- Seam
- The bonded joint where two slabs meet on a run too large for one slab. On an island it's placed low-sightline and supported, pattern-matched, and bonded with color-matched epoxy — never over an unsupported overhang.
- Slab thickness (2 cm vs. 3 cm)
- Standard stone thicknesses. 3 cm is the island default — rigid over a span, a single-thickness edge, a bigger overhang; 2 cm is lighter and cheaper but needs a built-up edge and more support.
- Bookmatch
- Laying two adjacent slabs as mirror images so the veining forms a symmetrical pattern across a seam — a dramatic option for a large island or a waterfall in high-movement stone.
- Deflection
- The sag of a span or base under load. An undersized island cabinet or a thin slab over a long span deflects, opening seams and stressing the slab from below.
- Built-up edge
- A doubled or laminated edge that makes a 2 cm slab look like a thicker single-piece edge, adding apparent mass and stiffness where 2 cm is used to save weight or cost.
- Waterfall panel
- The vertical piece of a waterfall edge that runs to the floor. It's structural as well as decorative — set plumb on a solid base so the miter stays tight and the leg carries load.
Standards, Warranty Conditions, and What an Island Must Meet
A manufacturer's warranty is a contract with conditions, and on an island most issues aren't about the product — they're about how the overhang and load were engineered.
Warranty Conditions That Hinge on the Island's Structure
Stone and engineered-surface warranties assume the slab was installed to the maker's specifications — including that overhangs were supported per guideline and the base carried the load without deflecting. An overhang that cracks because it was left unsupported past the limit is an installation failure, not a product defect, and typically falls outside coverage; the same goes for a seam that opens over an unsupported gap. Ask in writing that fabrication follow the manufacturer's published instructions and that the overhang support and cabinet load be documented — that scope is what a claim is judged against.
What Sets the Bar for Island Fabrication
Recognized fabrication practice governs the rest: overhang-support guidelines by thickness, seam-placement and bonding standards, and the mitering precision a waterfall demands. An island built to these stands solid and reads clean. Because an island is chosen alongside the surrounding cabinets and perimeter kitchen counters, it's templated with them so material and height match — and when a stone surface wears rather than fails, polishing or restoration renews it without replacement.
A Real Kitchen Island Decision
One representative island shows why it's an engineering decision: the overhang and the seam, not the slab, drove every call.
How to Vet a Fabricator for a Kitchen Island Countertop
Most island failures are engineering failures, so the fabricator matters more than the brand on the slab. These questions separate a pro who builds a sound, seamless island from one who cuts a big slab and hopes.
- They engineer the overhang before quoting the dimension
- Ask how they'll support your seating overhang. A real answer names steel rods, corbels, or a panel for anything past the limit — and asks your overhang dimension first, because the dimension drives the support, not the reverse.
- They confirm the cabinet and floor carry the load
- Ask whether the island base and floor can bear the slab. A credible fabricator checks it, because hundreds of pounds of stone on an undersized base sags, opens seams, and stresses the slab from below.
- They plan the seams against the slab size
- Ask where the seams will fall. The answer should tie your island's dimensions to available slab sizes, place the seam low-sightline and supported, and never over an unsupported overhang — planned, not discovered on install day.
- They can execute a waterfall miter
- If you want a waterfall, ask how they lay out the veining and cut the miter. A real answer describes a 45-degree mitered corner and laying the slab so the vein flows over the edge — the test of a fabricator's craft.
- They finish the edge on all four sides
- Ask how the back and ends are finished. Because an island is furniture in the round, every visible edge should be ground and polished to profile, not just the front run.
- They put the structure, seam plan, and warranty in writing
- Ask for the overhang support, the seam placement, the cabinet-load confirmation, and a labor warranty in writing before work starts. A crew willing to name a workmanship guarantee — and return if a seam opens or an edge cracks — is accountable for the build.
Why Route Your Kitchen Island Countertop Through Pro Work Home Surface
Pro Work Home Surface is not a fabricator and does not cut or set your slab — we are a national authority on home surfaces that matches homeowners with vetted local countertop pros and holds them to a published bar.
- Overhang engineered before the slab is set
- Any seating overhang past roughly 10 inches for 3 cm stone is carried by steel rods, corbels, or a support panel installed first, and the island cabinets and floor are confirmed to bear the slab's full weight without deflecting.
- Seams placed, supported, and matched
- Seams are located in low-sightline, well-supported spots — never over an unsupported overhang — pattern-aligned across the joint, and bonded with color-matched epoxy that reads as a thin, tight line on a surface seen from every side.
- Waterfalls mitered and veining laid to flow
- A waterfall edge is cut as a precise 45-degree mitered corner and the slab is laid out so the veining continues down the side, so the corner looks like one folded piece rather than two pieces joined.
- National coverage, local crews
- We match you with fabricators in your area nationwide, so the standard is consistent even though the crew is local — whether it's a modest prep island or a statement waterfall island with seating for four.
Countertops are one of eight categories we cover across home surfaces. An island is usually chosen alongside your kitchen counters and surrounding cabinets, so template them together — and if your project also touches a bathroom vanity or an outdoor kitchen with its own material logic, the same standards apply. Compare what moves the price in our cost guides, weigh the options in our learning center, size the job with our material comparison tool, and start from the countertops category hub or the full range of home surfaces.
Brands & Material Authority
Quality and construction drive long-term performance more than the label. These are widely respected names in this category:
- Cambria
- Caesarstone
- Silestone
- MSI
- Cosentino
- Corian
- Wilsonart